SEAT REAR NO. 2 SEAT ASSEMBLY DISASSEMBLY
CAUTION / NOTICE / HINT
- CAUTION:
-
Wear protective gloves. Sharp areas on the parts may injure your hands.
- HINT:
- ·
Use the same procedure for the RH and LH sides.
·The procedure listed below is for the RH side.
PROCEDURE

 1.REMOVE REAR NO. 2 SEAT HEADREST ASSEMBLY RH
Remove the rear No. 2 seat headrest assembly RH.
2.REMOVE REAR SEAT LOWER CUSHION HINGE COVER RH
Return the seatback to the upright position.
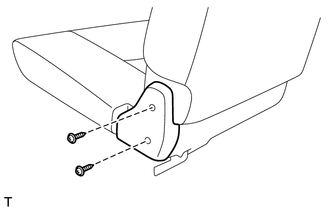
Remove the 2 screws and rear seat lower cushion hinge cover RH.
3.REMOVE NO. 1 RECLINING ADJUSTER RELEASE HANDLE RH
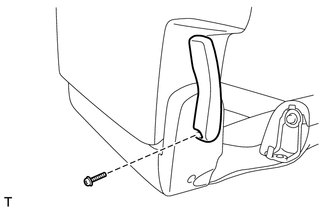
Remove the screw and No. 1 reclining adjuster release handle RH.
4.REMOVE REAR NO. 2 SEAT RECLINING COVER RH
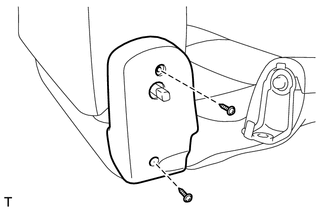
Remove the 2 screws and rear No. 2 seat reclining cover RH.
5.REMOVE NO. 2 SEATBACK COVER SUB-ASSEMBLY RH
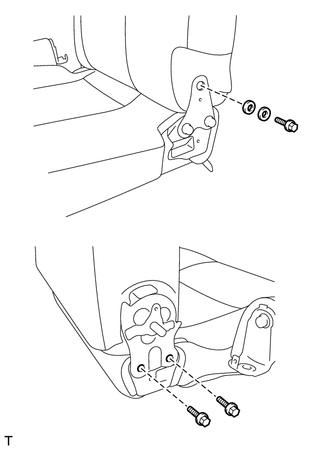
| *1 | Spacer |
| *2 | Plate |
Remove the 3 bolts, plate, spacer and rear No. 2 seatback assembly.
Detach the fastening tape labeled A and hook labeled A.
Detach the 2 pieces of fastening tape labeled B.
Using a screwdriver, detach the hook labeled B, and then open the lower part of the No. 2 seatback cover sub-assembly RH.
- HINT:
-
Tape the screwdriver tip before use.
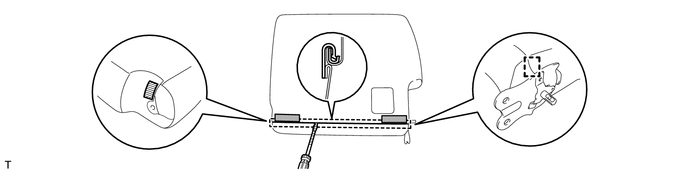
| *1 | Hook A | *2 | Fastening Tape A |
| *3 | Hook B | *4 | Fastening Tape B |
| *5 | Protective Tape | - | - |
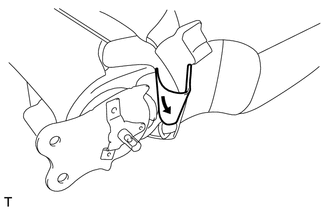
Detach the hook and roll up the No. 2 seatback cover sub-assembly RH.
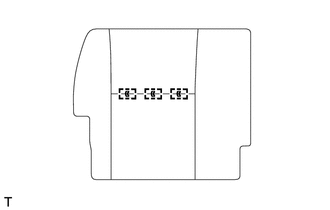
Remove the hog rings.
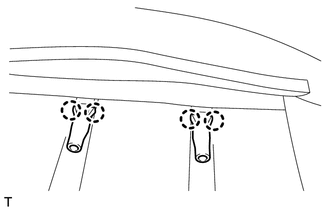
Detach the 4 claws and remove the 2 rear No. 2 seat headrest supports, and then remove the No. 2 seatback cover sub-assembly RH.
6.REMOVE NO. 2 SEATBACK PAD RH
Remove the No. 2 seatback pad RH from the No. 2 seatback frame sub-assembly RH.
7.REMOVE NO. 2 SEAT CUSHION PLATE
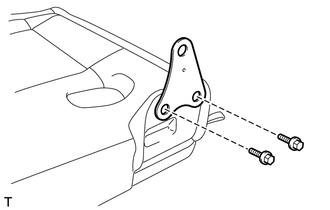
Remove the 2 bolts and No. 2 seat cushion plate.
8.REMOVE FRONT OUTER NO. 3 SEAT LEG SUB-ASSEMBLY RH
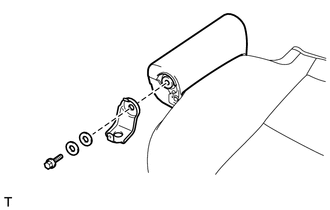
Remove the bolt, 2 plates and front outer No. 3 seat leg sub-assembly RH.
9.REMOVE REAR OUTER NO. 3 SEAT LEG SUB-ASSEMBLY RH
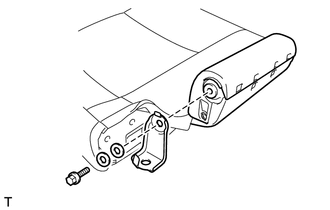
Remove the bolt, 2 plates and rear outer No. 3 seat leg sub-assembly RH.
10.REMOVE REAR SEAT HINGE COVER
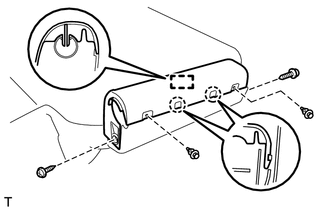
Using a clip remover, remove the 2 clips.
Remove the 2 screws.
Using a screwdriver, detach the 2 claws.
- HINT:
-
Tape the screwdriver tip before use.
Detach the guide and remove the rear seat hinge cover.
11.REMOVE REAR SEATBACK STOP RELEASE BUTTON
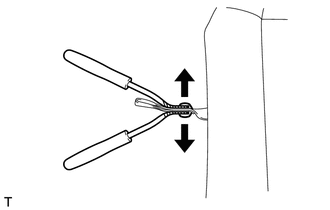
| *1 | Protective Tape |
Using 2 clip removers, remove the 2 rear seatback stop release buttons as shown in the illustration.
- HINT:
- ·
Tape the clip remover tips before use.
·If a rear seatback stop release button is damaged, replace it with a new one.
12.REMOVE REAR SEAT LEG COVER RH
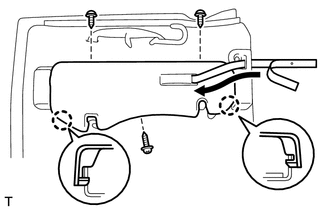
Pass the No. 2 seat reclining release handle sub-assembly through the hole of the No. 3 seat cushion hinge cover RH.
Remove the 3 screws.
Detach the 2 claws and remove the rear seat leg cover RH.
Pass the No. 2 seat reclining release handle sub-assembly through the hole of the rear seat leg cover RH.
13.REMOVE REAR NO. 1 SEAT CUSHION HINGE COVER
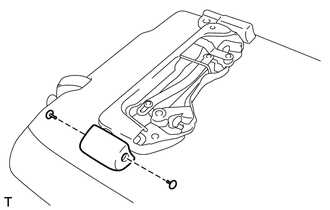
Using a clip remover, remove the 2 clips and rear No. 1 seat cushion hinge cover.
14.REMOVE NO. 3 SEAT CUSHION HINGE COVER RH
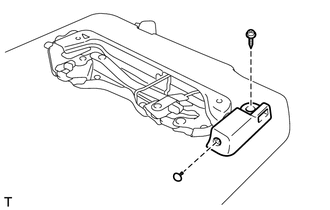
Using a clip remover, remove the clip.
Remove the screw and No. 3 seat cushion hinge cover RH.
15.REMOVE NO. 2 SEAT RECLINING RELEASE HANDLE SUB-ASSEMBLY
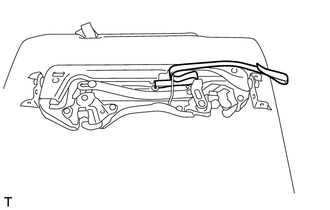
Remove the No. 2 seat reclining release handle sub-assembly.
16.REMOVE REAR NO. 2 SEAT INNER BELT SUB-ASSEMBLY RH (for RH Side)
17.REMOVE REAR NO. 2 SEAT CENTER LAP TYPE BELT ASSEMBLY (for RH Side)
18.REMOVE REAR NO. 2 SEAT INNER BELT SUB-ASSEMBLY LH (for LH Side)
19.REMOVE REAR NO. 2 SEAT LAP TYPE BELT ASSEMBLY LH (for LH Side)
20.REMOVE REAR SEAT CUSHION SPRING
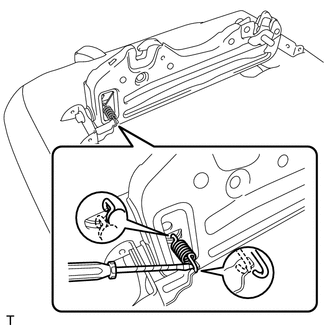
| *1 | Protective Tape |
Using a screwdriver, remove the rear seat cushion spring as shown in the illustration.
- HINT:
-
Tape the screwdriver tip before use.
21.REMOVE NO. 2 SEAT LEG SUB-ASSEMBLY RH
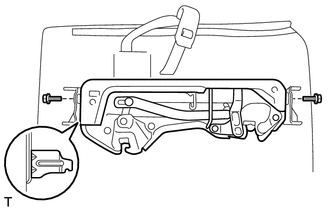
| *1 | Bracket of No. 2 Seat Cushion Frame Sub-assembly RH |
Remove the 2 bolts and No. 2 seat leg sub-assembly RH.
- NOTICE:
-
The No. 2 seat leg sub-assembly RH will turn together with the bolts when the bolts are loosened, so be sure not to deform the bracket of the No. 2 seat cushion frame sub-assembly RH.
22.REMOVE NO. 2 SEAT CUSHION COVER SUB-ASSEMBLY RH
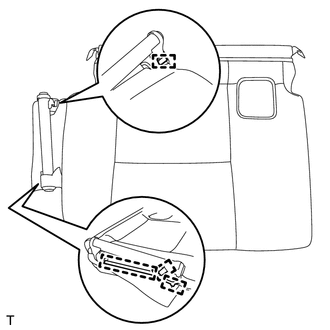
Detach the 4 hooks.
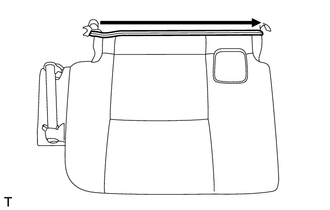
Open the fastener.
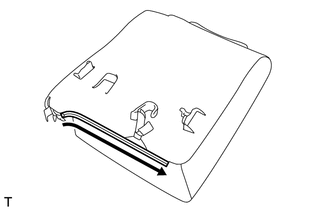
Open the fastener.
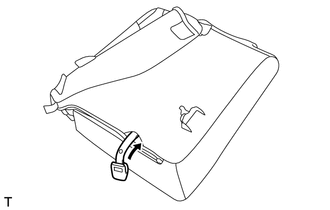
Pass the No. 2 fold seat stopper band assembly through the hole in the No. 2 seat cushion cover sub-assembly RH.
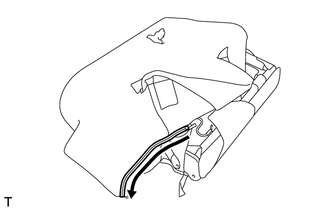
Open the fastener.
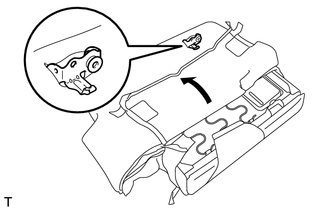
Pass the bracket of the No. 2 seat cushion frame sub-assembly RH through the slit of the No. 2 seat cushion cover sub-assembly RH and open the No. 2 seat cushion cover sub-assembly RH.
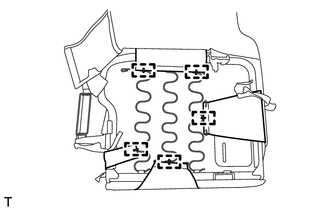
Remove the hog rings.
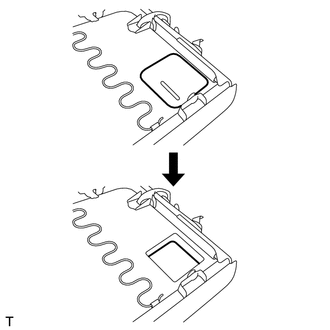
Detach the No. 2 seat cushion cover sub-assembly RH.
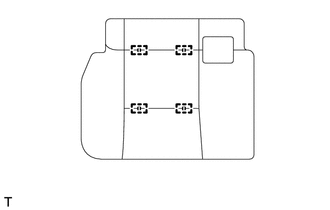
Remove the hog rings and No. 2 seat cushion cover sub-assembly RH from the No. 2 seat cushion pad RH.
23.REMOVE NO. 2 FOLD SEAT STOPPER BAND ASSEMBLY
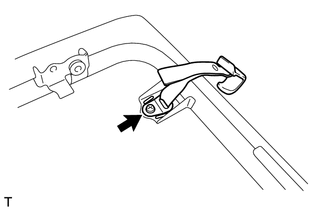
Remove the screw and No. 2 fold seat stopper band assembly.
24.REMOVE NO. 2 SEAT CUSHION PAD RH
- NOTICE:
- ·
As the No. 2 seat cushion pad RH is affixed to the No. 2 seat cushion frame sub-assembly RH, do not remove the No. 2 seat cushion pad RH from the No. 2 seat cushion frame sub-assembly RH unless it is necessary to replace the No. 2 seat cushion pad RH. If the No. 2 seat cushion pad RH is removed from the No. 2 seat cushion frame sub-assembly RH, make sure to replace the No. 2 seat cushion pad RH.
·Perform the following only when replacing the No. 2 seat cushion pad RH or No. 2 seat cushion frame sub-assembly RH.
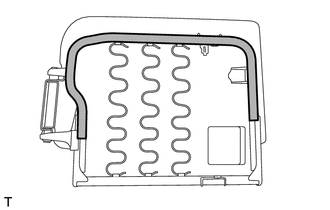
| *1 | Adhesive Area |
Detach the parts of the No. 2 seat cushion pad RH attached with adhesive shown in the illustration, and remove the No. 2 seat cushion pad RH.