| Last Modified: 6-7-2017 | 6.8:8.0.40 | Doc ID: RM000001A8Y000X |
| Model Year Start: 2006 | Model: Land Cruiser | Prod Date Range: [05/2005 - 01/2006] |
| Title: SEAT: FRONT SEAT ASSEMBLY: REASSEMBLY; 2006 MY Land Cruiser [05/2005 - 01/2006] | ||
REASSEMBLY
CAUTION:
Wear protective gloves. Sharp areas on the seatback frame and seat adjuster may injure your hands.
HINT:
- Use the same procedures for the RH side and LH side.
- The procedures listed below are for the LH side.
|
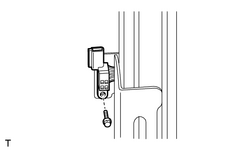
1. INSTALL SEAT POSITION AIRBAG SENSOR (for Driver Side) (a) Install the airbag sensor with a new bolt. Torque: 8.0 N·m {82 kgf·cm, 71in·lbf} (b) Connect the connector. |
|
2. INSTALL SEAT POSITION CONTROL RELAY
(a) Install the seat position control relay with the 2 bolts.
Torque:
5.5 N·m {56 kgf·cm, 49in·lbf}
(b) Connect the connectors.
|
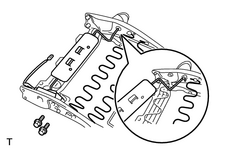
3. INSTALL LUMBAR SUPPORT ADJUSTER ASSEMBLY (a) Install the spacer to the seatback frame. (b) Install the lumbar support with the 2 bolts. |
|
4. INSTALL FRONT SEATBACK HEATER
(a) Turn the seatback cover inside out.
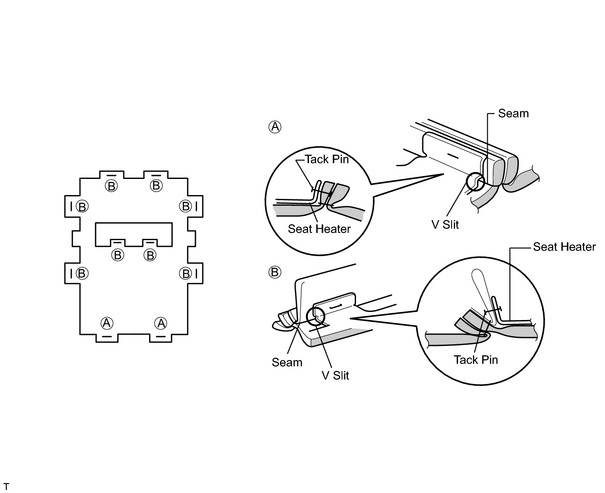
(b) Using a tacker, install the seatback heater to the seatback cover with the tack pins.
NOTICE:
Do not substitute other metal parts for the tack pins. Insufficient distance between the heater and the cover may result in damage to the heater.
HINT:
-
Illustration "A" and "B":
Fasten the cover and the heater with the tack pins, matching the seam with the V slit of the heater.
-
Sewing thread can be substituted for the tack pins. However, allow a distance of 6 to 7 mm (0.24 to 0.28 in.) between both sewed parts of the heater and the cover.
|
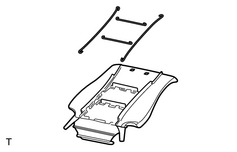
(c) Thread the wires through the listing pocket. |
|
(d) Turn the seatback cover inside out to put it back to its original position.
5. INSTALL FRONT SEATBACK COVER
|
(a) Using hog ring pliers, install the seatback cover to the seatback pad with new hog rings. |
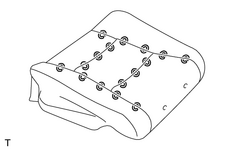
|
|
(b) Install the seatback cover with pad to the seatback frame. |
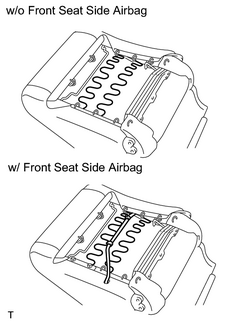
|
(c) w/o Front seat side airbag:
Using hog ring pliers, install new hog rings.
(d) w/ Front seat side airbag:
Using hog ring pliers, install new hog rings, Then. install the clamps and the 2 bolts.
Torque:
4.7 N·m {48 kgf·cm, 42in·lbf}
(e) Install the 2 headrest supports.
6. INSTALL FRONT ARMREST ASSEMBLY
(a) Install the bush to the seatback.
(b) Install the armrest with the bolt.
Torque:
37 N·m {380 kgf·cm, 27ft·lbf}
(c) Install the No. 1 seat armrest cap.
7. INSTALL FRONT SEATBACK ASSEMBLY
|
(a) w/o Front seat side airbag: Install the reclining adjuster inside shield RH with the screw. |
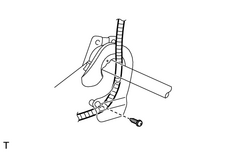
|
(b) w/ Front seat side airbag:
Place the airbag connector along the inner seat adjuster, and then install the reclining adjuster inside shield with the screw so that the connector is placed in between them.
NOTICE:
When handling the airbag connector, take care not to damage the airbag wire harness.
(c) Install the reclining adjuster inside shield LH with the screw.
|
(d) Install the seatback with the 4 bolts. Torque: 43 N·m {440 kgf·cm, 32ft·lbf} |
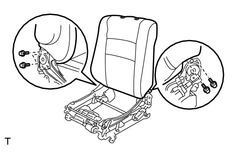
|
(e) Using hog ring pliers, install new hog rings.
|
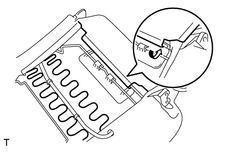
(f) Attach the hook. |
|
(g) Connect the connectors.
8. INSTALL FRONT SEAT CUSHION HEATER
(a) Turn the seat cushion cover inside out.
(b) Using a tacker, install the seat cushion heater to the seat cushion cover with the tack pins.
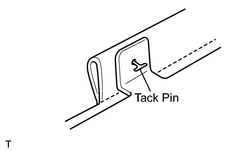
NOTICE:
Do not substitute other metal parts for the tack pins. Insufficient distance between the heater and the cover may result in damage to the heater.
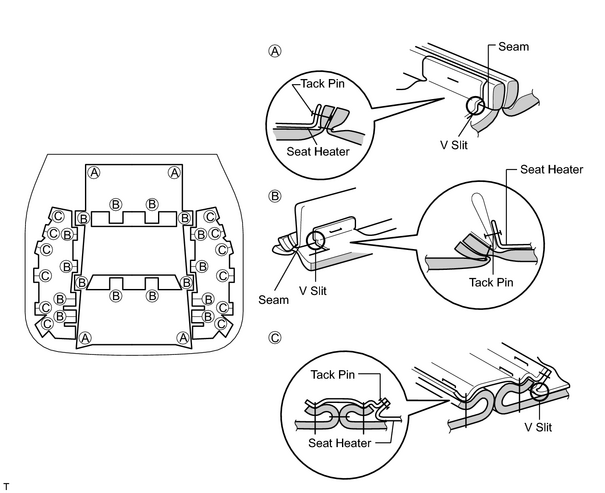
HINT:
-
Illustration "A" and "B":
Fasten the cover and the heater with the tack pins, matching the seam with the V slit of the heater.
-
Illustration "C":
Fasten the outstretched cloth pad and the heater with the tack pins, matching the edge of the cloth pad with the V slit of the heater.
-
Sewing thread can be substituted for the tack pins. However, allow a distance of 6 to 7 mm (0.24 to 0.28 in.) between both sewed parts of the heater and the cover.
|
(c) Thread the wires through the listing pocket. |
|
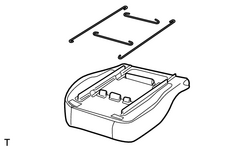
(d) Turn the seat cushion cover inside out to put it back to its original position.
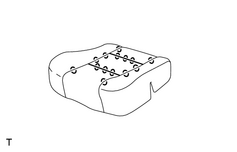
9. INSTALL FRONT SEAT CUSHION COVER
|
(a) Using hog ring pliers, install the seat cushion cover to the seat cushion pad with new hog rings. |
|
(b) Using hog ring pliers, install the seat cushion cover with pad to the seat cushion frame with new hog rings.
(c) Attach the hook.
|
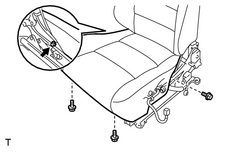
10. INSTALL FRONT SEAT CUSHION ASSEMBLY (a) Install the seat cushion to the seat adjuster with the 4 bolts. Torque: 21 N·m {210 kgf·cm, 15ft·lbf} (b) Attach the wire harness clamp. |
|
|
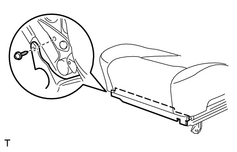
11. INSTALL FRONT NO. 1 SEAT CUSHION SHIELD INNER LH (a) Install the cushion shield with the screw. |
|
|
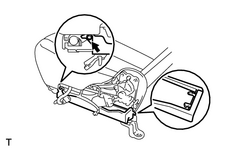
12. INSTALL SEAT TRACK LOWER RAIL PROTECTOR NO.1 (a) Attach the claws to install the rail protector. (b) Install the screw. |
|
|
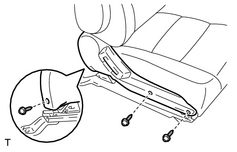
13. INSTALL FRONT SEAT CUSHION SHIELD INNER LH (a) Install the cushion shield with the 3 screws. |
|
|
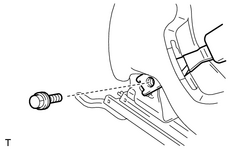
14. INSTALL FRONT SEAT INNER BELT ASSEMBLY LH (a) Install the inner belt with the bolt. Torque: 42 N·m {430 kgf·cm, 31ft·lbf} (b) Connect the connector and attach the clamp. |
|
15. INSTALL FRONT SEAT CUSHION SHIELD LH
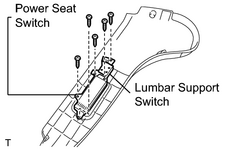
(a) Install the lumbar support switch with the 2 screws.
(b) Install the power seat switch with the 3 screws.
|
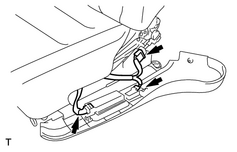
(c) Connect the connectors shown in the illustration. |
|
|
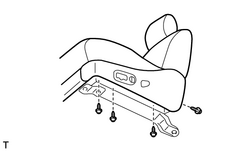
(d) Install the cushion shield with the 4 screws. |
|
(e) Install the 2 power seat switch knobs.
16. INSTALL FRONT SEATBACK BOARD SUB-ASSEMBLY LH
|
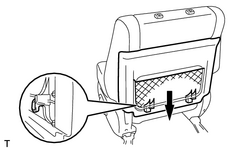
(a) Push the seatback board in the direction indicated by the arrow in the illustration to attach the 2 hooks. |
|
|
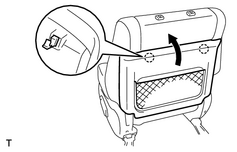
(b) Attach the 2 claws to install the seatback board. |
|
17. INSTALL FRONT SEAT HEADREST ASSEMBLY

|

|