INSTALLATION
Removal / installation · Vehicles built Aug 2013 – Jul 2014
Versions by build date: Aug 2013 – Jul 2014 from Aug 2014
- HINT:
- Use the same procedure for RHD and LHD vehicles.
- The procedure listed below is for LHD vehicles.
| 1.
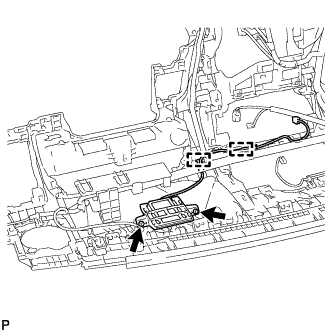
INSTALL NAVIGATION ANTENNA ASSEMBLY |
 |
- Install the navigation antenna assembly with the 2 screws.
Attach the 2 clamps.
| 2.
INSTALL DEFROSTER NOZZLE ASSEMBLY
|
|
Install the defroster nozzle with the 4 screws <A>.
| 3.
INSTALL NO. 2 SIDE DEFROSTER NOZZLE DUCT
|
|
- HINT:
- Use the same procedure described for the No. 1 side defroster nozzle duct.
| 4.
INSTALL NO. 1 SIDE DEFROSTER NOZZLE DUCT
|
|
Attach the 2 claws to install the No. 1 side defroster nozzle duct.
Install the screw <A>.
| 5.
INSTALL NO. 2 HEATER TO REGISTER DUCT
|
|
- HINT:
- Use the same procedure described for the No. 1 heater to register duct.
| 6.
INSTALL NO. 1 HEATER TO REGISTER DUCT
|
|
Install the No. 1 heater to register duct with the 4 screws <A>.
| 7.
INSTALL INSTRUMENT PANEL SAFETY PAD SUB-ASSEMBLY |
|
(Click here)
| 8.
CONNECT CABLE TO NEGATIVE BATTERY TERMINAL |
|
- NOTICE:
- When disconnecting the cable, some systems need to be initialized after the cable is reconnected (Click here).
| 9.
CHECK SRS WARNING LIGHT |
|
(Click here)