REMOVAL
Removal / installation · Vehicles built from Aug 2013
| 1. SUPPORT TRANSMISSION AND TRANSFER ASSEMBLY (w/ DPF) |

Support the transmission and transfer with a transmission jack.
- NOTICE:
- For safety reasons, install the No. 3 frame crossmember after removing the front exhaust pipe.
| 2. REMOVE FRONT SUSPENSION MEMBER BRACKET LH AND RH (w/ DPF) |
Remove the 8 bolts, front bracket suspension member LH and front bracket suspension member RH.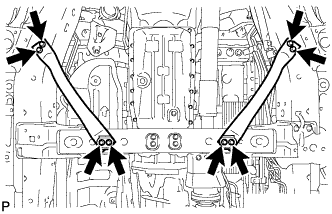

| 3. REMOVE NO. 3 FRAME CROSSMEMBER SUB-ASSEMBLY (w/ DPF) |
Remove the 4 bolts of the rear engine mounting insulator.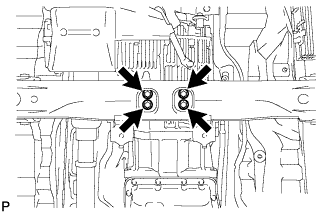
Remove the 4 nuts, 4 bolts and frame crossmember.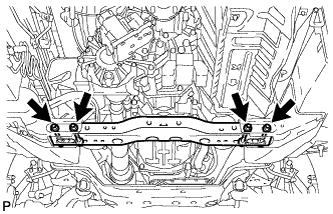
| 4. DISCONNECT AIR FUEL RATIO SENSOR (w/ DPF) |
Disconnect the air fuel ratio sensor connector and detach the clamp.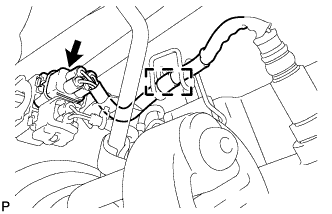
| 5. DISCONNECT CENTER EXHAUST PIPE ASSEMBLY (w/ DPF) |
Remove the 2 bolts and 2 compression springs, and then disconnect the center exhaust pipe.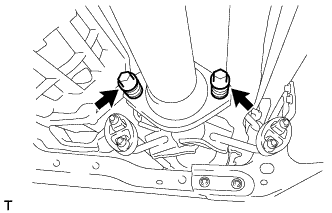
| 6. REMOVE FRONT EXHAUST PIPE ASSEMBLY (w/ DPF) |
Disconnect the exhaust gas temperature sensor connector.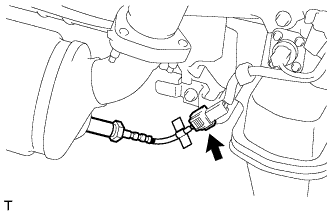
Disconnect the No. 2 exhaust gas temperature sensor connector.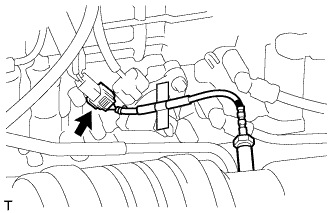
Disconnect the No. 3 exhaust gas temperature sensor connector.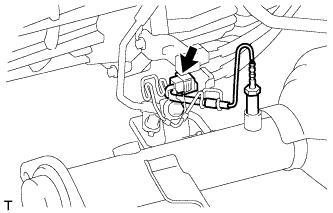
Disconnect the No. 6 exhaust pipe air hose from the front exhaust pipe.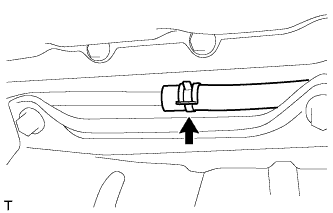
Disconnect the No. 7 exhaust pipe air hose from the front exhaust pipe.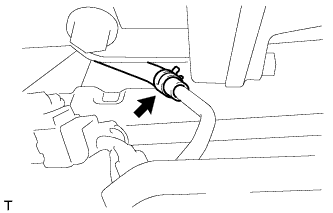
Remove the 2 exhaust pipe supports.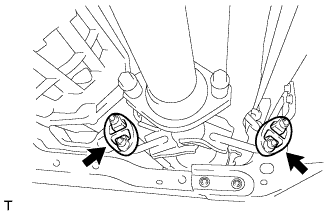
- HINT:
- Remove the exhaust pipe supports before removing the No. 3 frame crossmember.
Remove the 3 nuts and front exhaust pipe.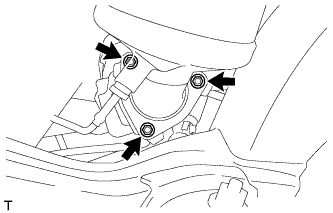
Remove the gasket.
| 7. REMOVE PARK/NEUTRAL POSITION SWITCH ASSEMBLY |
Disconnect the switch connector.
Using a screwdriver, bend the tabs of the lock washer.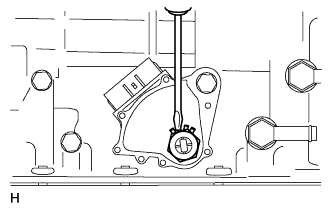
Remove the lock nut and lock washer.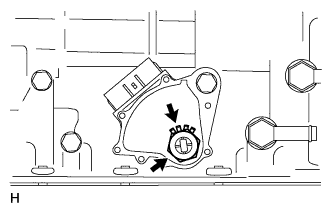
Remove the bolt and switch.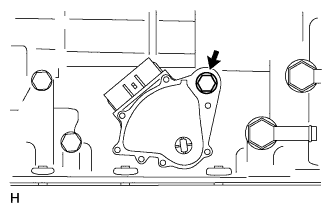
- HINT:
- Make sure that the manual valve lever shaft has not been rotated prior to installing the park/neutral position switch as the detent spring may become detached from the manual valve lever shaft.