REPLACEMENT
Removal / installation · Vehicles built from Aug 2013
| 1. REPLACE CONNECTING ROD SMALL END BUSH |

Using SST and a press, press out the bush.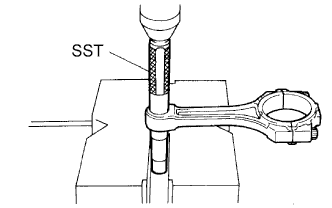

- SST
- 09222-30010
Align the oil holes of a new bush and the connecting rod.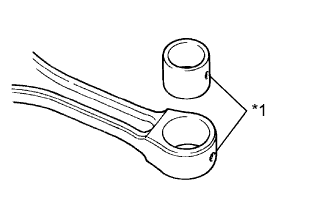
Text in Illustration *1
Oil Hole
Using SST and a press, press in the bush.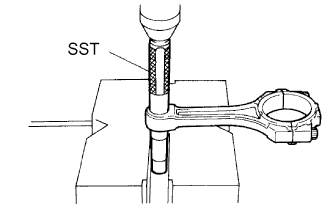
- SST
- 09222-30010
Using a pin hole grinder, hone the bush to obtain the standard specified clearance between the bush and piston pin.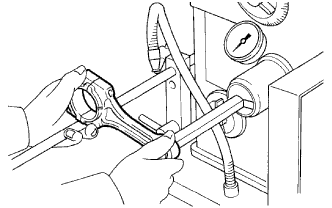
Check that the piston pin fits at normal room temperature.
Coat the piston pin with engine oil and push it into the connecting rod with your thumb.
| 2. REPLACE TIGHT PLUG |
- NOTICE:
- If coolant leaks from the tight plug or the plug is corroded, replace it.
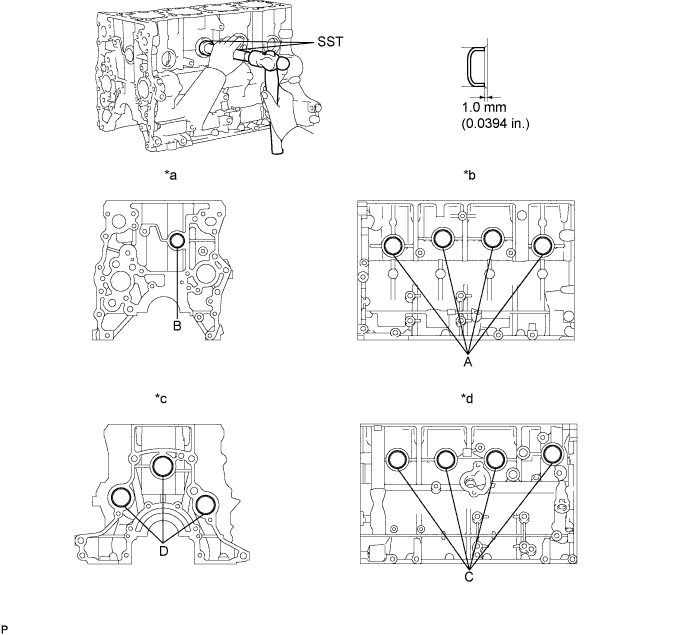
| *a |
Front Side |
*b |
Intake Side |
| *c |
Rear Side |
*d |
Exhaust Side |
Apply adhesive to new tight plugs.
- Adhesive:
- Toyota Genuine Adhesive 1324, Three Bond 1324 or equivalent.
Using SST, tap in the 8 tight plugs labeled A and C.
- SST
- 09950-60010
(09951-00350)
09950-70010 (09951-07100)
Using SST, tap in the tight plug labeled B.
- SST
- 09950-60010
(09951-00300)
09950-70010 (09951-07100)
Using SST, tap in the 3 tight plugs labeled D.
- SST
- 09950-60010
(09951-00400)
09950-70010 (09951-07100)
| 3. REPLACE STRAIGHT PIN |
- NOTICE:
- It is not necessary to remove a straight pin unless it is being replaced.
Using a plastic-faced hammer, tap in new straight pins to the cylinder block.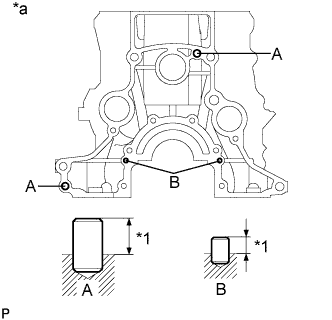
- Standard Straight Pin:
Item
Wide
Protrusion
Pin A
10 mm (0.394 in.)
13 mm (0.512 in.)
Pin B
6.0 mm (0.236 in.)
5.5 mm (0.217 in.)
Text in Illustration *1
Protrusion
*a
Rear Side
| 4. REPLACE RING PIN |
- NOTICE:
- It is not necessary to remove a ring pin unless it is being replaced.
-
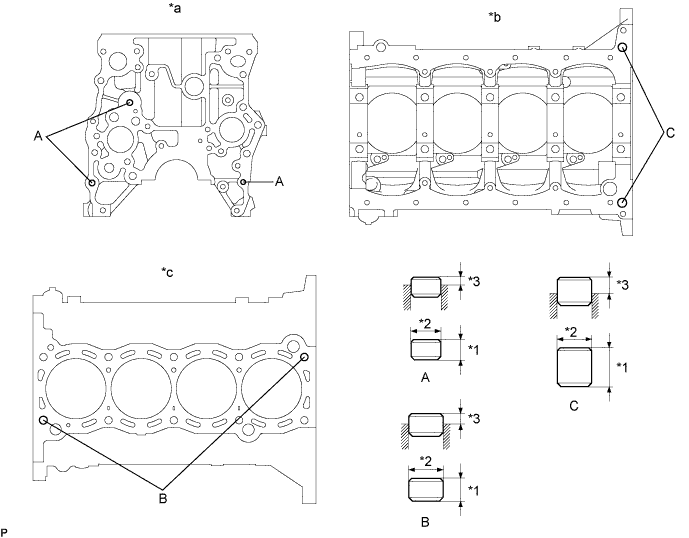
| *1 |
Height |
*2 |
Width |
| *3 |
Protrusion |
- |
- |
| *a |
Front Side |
*b |
Lower Side |
| *c |
Upper Side |
- |
- |
Using a plastic-faced hammer, tap in new ring pins to the cylinder block.
- Standard Ring Pin:
Item
Height
Width
Protrusion
Pin A
9.0 mm (0.354 in.)
11 mm (0.433 in.)
3.5 to 4.5 mm (0.138 to 0.177 in.)
Pin B
14 mm (0.511 in.)
15 mm (0.591 in.)
7.5 to 9.5 mm (0.295 to 0.374 in.)
Pin C
20 mm (0.787 in.)
14 mm (0.511 in.)
7.0 to 9.0 mm (0.276 to 0.354 in.)