DISASSEMBLY
Removal / installation · Vehicles built from Aug 2013
| 1. REMOVE VANE PUMP OIL RESERVOIR CAP SUB-ASSEMBLY |

Remove the vane pump oil reservoir cap
| 2. REMOVE VANE PUMP OIL RESERVOIR SUB-ASSEMBLY |
the 3 bolts and oil reservoir from the front vane pump housing.
Using a screwdriver, remove the O-ring from the oil reservoir.
| 3. SECURE VANE PUMP ASSEMBLY |
Using SST, secure the vane pump between aluminum plates in a vise as shown in the illustration.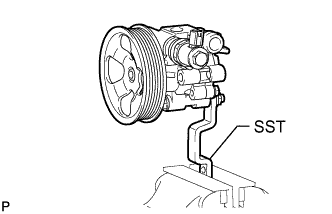

- SST
- 09630-00014
(09631-00132)
| 4. REMOVE PRESSURE PORT UNION O-RING (w/o VSC) |
Using a 27 mm socket wrench, remove the pressure port union from the front housing.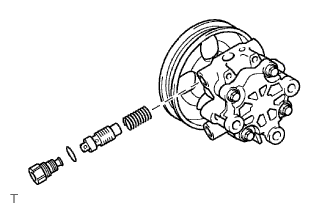
Using a screwdriver, remove the O-ring from the pressure port union.
Remove the flow control valve from the front housing.
- NOTICE:
- Be careful not to damage the pressure port union.
Remove the compression spring from the front housing.
| 5. REMOVE POWER STEERING OIL PRESSURE SWITCH (w/o VSC) |
Using a 19 mm deep socket wrench, remove the oil pressure switch from the front housing.
Remove the O-ring from the oil pressure switch.
| 6. REMOVE VANE PUMP REAR HOUSING |
Remove the 4 bolts and rear housing from the vane pump front housing.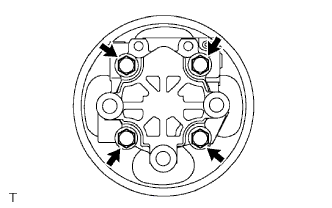
Remove the O-ring from the vane pump rear housing.
| 7. REMOVE SHAFT WITH PULLEY |
Using 2 screwdrivers, remove the shaft snap ring from the shaft with pulley.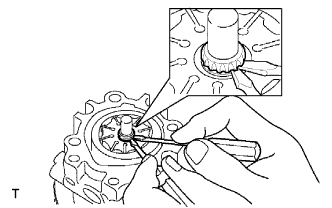
Remove the shaft with pulley from the vane pump rear housing.
| 8. REMOVE VANE PUMP ROTOR |
Remove the vane pump rotor and 10 vane pump plates from the vane pump front housing.
- NOTICE:
- Be careful not to drop the vane pump plates.
| 9. REMOVE VANE PUMP CAM RING |
| 10. REMOVE FRONT VANE PUMP SIDE PLATE |
Remove the front side plate from the vane pump front housing.
Remove the No. 1 O-ring from the side plate.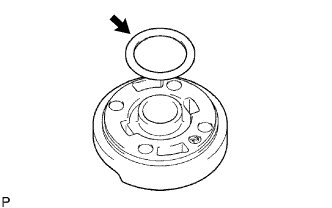
Remove the No. 2 O-ring from the vane pump front housing.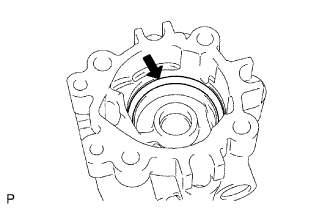
| 11. REMOVE VANE PUMP HOUSING OIL SEAL |
Using a screwdriver and piece of cloth, pry out the oil seal.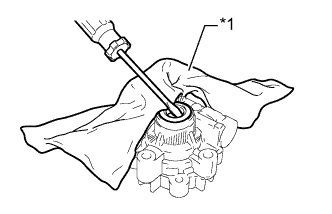
Text in Illustration *1
Cloth
- NOTICE:
- Be careful not to damage the vane pump front housing.