ADJUSTMENT
Removal / installation · Vehicles built from Aug 2013
| 1. STEERING OFF CENTER ADJUSTMENT PROCEDURE |

- HINT:
- This is the adjustment procedure for when the steering is off center.
Check if the steering wheel is off center.
Apply masking tape to the top center of the steering wheel and steering column upper cover.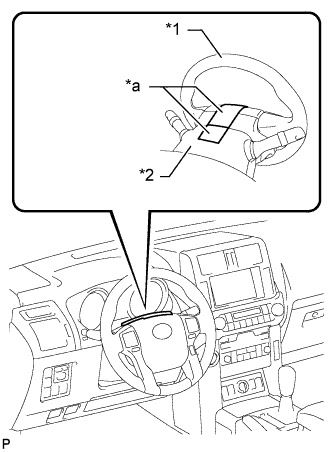

Text in Illustration *1
Steering Wheel
*2
Steering Column Upper Cover
*a
Masking Tape
Drive the vehicle in a straight line for 100 m (328 ft.) at a constant speed of 56 km/h (35 mph) and hold the steering wheel to maintain course.
Draw a line on the masking tape as shown in the illustration.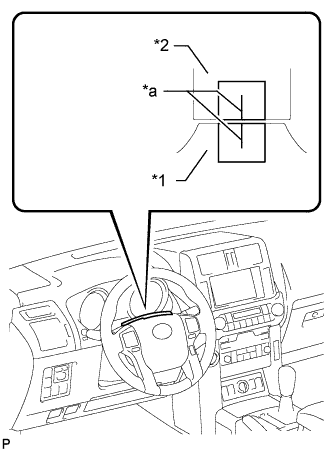
Text in Illustration *1
Steering Wheel
*2
Steering Column Upper Cover
*a
Marked Line
Turn the steering wheel to the center position.
- HINT:
- Look at the upper surface of the steering wheel, steering spoke and SRS airbag line to find the center position.
Draw a new line on the masking tape on the steering wheel as shown in the illustration.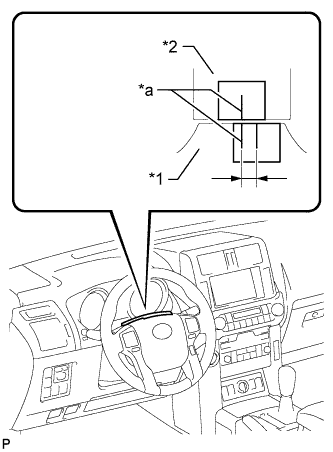
Text in Illustration *1
Steering Wheel
*2
Steering Column Upper Cover
*a
Marked Line
Measure the distance between the 2 lines on the masking tape on the steering wheel.
Convert the measured distance to a steering angle value.
- HINT:
- Measured distance 1 mm (0.0394 in.) = Steering angle of approximately 1°.
- Make a note of the steering angle.
- Measured distance 1 mm (0.0394 in.) = Steering angle of approximately 1°.
Adjust the steering angle.
Place matchmarks RH and LH tie rod ends and rack ends respectively where it can be easily seen.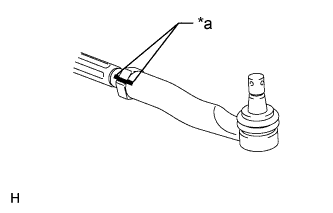
Text in Illustration *a
Matchmark
Using a paper gauge, measure the distance from the RH and LH tie rod ends to the rack end screws.
- HINT:
- Measure both the RH and LH sides.
- Make a note of the measured values.
- Measure both the RH and LH sides.
Remove the RH and LH boot clips from the rack boots.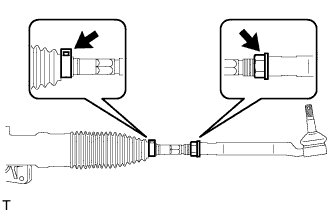
Loosen the RH and LH lock nuts.
Turn the RH and LH rack ends by the same amount (but in different directions) according to the steering angle value
- HINT:
- One 360° turn of a rack end (1.5 mm (0.0591 in.) horizontal movement) is equal to a 12° change in steering angle.
Tighten the RH and LH lock nuts to the specified torque.
- Torque:
- 88 N*m{ 897 kgf*cm , 65 ft.*lbf }
- NOTICE:
- Make sure that the difference in length between the RH and LH tie rod ends and rack end screws is within 1.5 mm (0.0591 in.).
Install the RH and LH boot clips.