INSTALLATION
Removal / installation · Vehicles built from Aug 2013
| 1. INSTALL AIR CONDITIONING PRESSURE SWITCH |

Sufficiently apply compressor oil to a new O-ring and the fitting surface of the pressure switch.
- Compressor oil:
- ND-OIL 8 or equivalent
Install the O-ring to the pressure switch.
Install the pressure switch.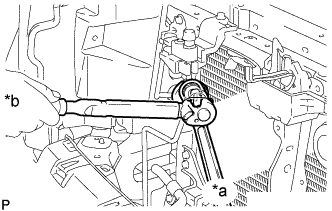

Text in Illustration *a
Hold
*b
Turn
- Torque:
- 11 N*m{ 112 kgf*cm , 8 ft.*lbf }
Connect the connector.
| 2. CHARGE REFRIGERANT |
- SST
- 09985-20010
(09985-02130, 09985-02150, 09985-02090, 09985-02110, 09985-02010, 09985-02050, 09985-02060, 09985-02070)
Perform vacuum purging using a vacuum pump.
Charge refrigerant HFC-134a (R134a).
*1: For vehicles with the 2TR-FE engine which have neither the rear cooler nor cool box, the refrigerant charging amount changes based on region.Standard Model Code
Air Conditioning Type
Cool Box
Refrigerant Charging Amount
Except the model codes below
w/o Rear Cooler
w/ Cool Box
600 +/-30 g (21.2 +/-1.1 oz.)
w/o Cool Box
550 +/-30 g (19.3 +/-1.1 oz.)
w/ Rear Cooler
w/ Cool Box
800 +/-30 g (28.2 +/-1.1 oz.)
w/o Cool Box
770 +/-30 g (27.2 +/-1.1 oz.)
w/ Rear Cooler
for Cold Area Specification Vehicles
w/o Cool Box
720 +/-30 g (25.3 +/-1.1 oz.)
TRJ150L-GKMEKV
TRJ150L-GKPEKV
TRJ155L-GJPEKV
GRJ150L-GKFEKV
GRJ150L-GKAEKV
KDJ150L-GKFEYV
KDJ150L-GKAEYV
w/o Rear Cooler
w/ Cool Box
600 +/-30 g (21.2 +/-1.1 oz.)
w/o Cool Box
550 +/-30 g (19.3 +/-1.1 oz.) or 600 +/-30 g (21.2 +/-1.1 oz.) *1
w/ Rear Cooler
w/ Cool Box
800 +/-30 g (28.2 +/-1.1 oz.)
w/o Cool Box
770 +/-30 g (27.2 +/-1.1 oz.)
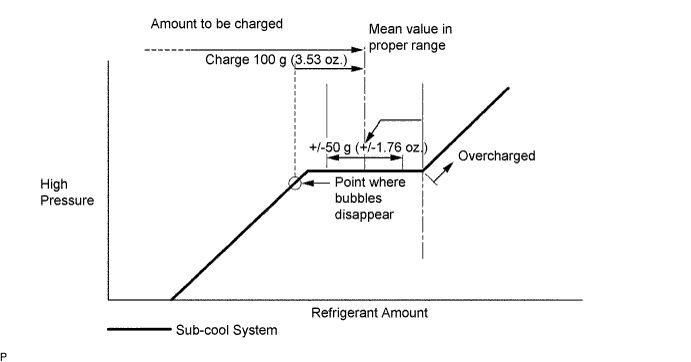
- NOTICE:
- Do not operate the cooler compressor before charging refrigerant as the cooler compressor will not work properly without any refrigerant, and will overheat.
- Approximately 100 g (3.53 oz.) of refrigerant may need to be charged after bubbles disappear. The refrigerant amount should be checked by measuring its quantity, and not with the sight glass.
- Do not operate the cooler compressor before charging refrigerant as the cooler compressor will not work properly without any refrigerant, and will overheat.
| 3. WARM UP ENGINE |
Warm up the engine at less than 1850 rpm for 2 minutes or more after charging the refrigerant.
- NOTICE:
- Be sure to warm up the compressor when turning the A/C switch is on after removing and installing the cooler refrigerant lines (including the compressor), to prevent damage to the compressor.
| 4. CHECK FOR REFRIGERANT GAS LEAK |
Warm up the engine at less than 1850 rpm for 2 minutes or more after charging the refrigerant.
- NOTICE:
- Be sure to warm up the compressor when turning the A/C switch is on after removing and installing the cooler refrigerant lines (including the compressor), to prevent damage to the compressor.
| 5. INSTALL RADIATOR GRILLE |
Install the radiator grille (Click here).
| 6. INSTALL UPPER RADIATOR SUPPORT SEAL |
Install the upper radiator support seal with the 13 clips.