Removal / installation · Vehicles built Aug 2013 – Jul 2014
Versions by build date: Aug 2013 – Jul 2014from Aug 2014
HINT:
Use the same procedure for LHD and RHD vehicles.
The procedure listed below is for LHD vehicles.
Use the same procedure for the RH side and LH side.
The procedure listed below is for the LH side.
1.
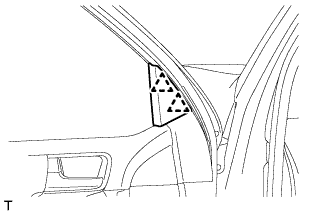
REMOVE FRONT DOOR LOWER FRAME BRACKET GARNISH LH
Detach the 2 clips and remove the front door lower frame bracket garnish LH.
2.
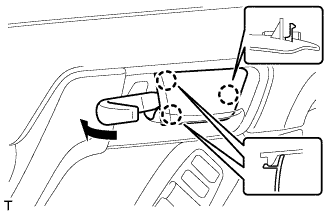
REMOVE NO. 2 DOOR INSIDE HANDLE BEZEL LH
Using a moulding remover, detach the 3 claws and remove the inside handle bezel as shown in the illustration.
3.
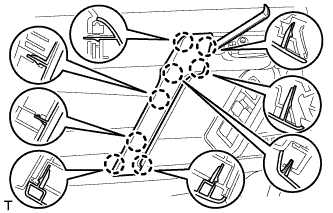
REMOVE FRONT DOOR ARMREST COVER LH
Using moulding remover A, detach the 8 claws and remove the assist grip cover.
4.
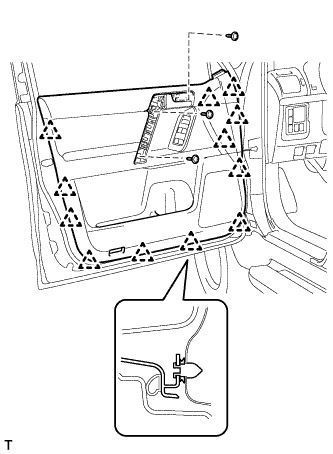
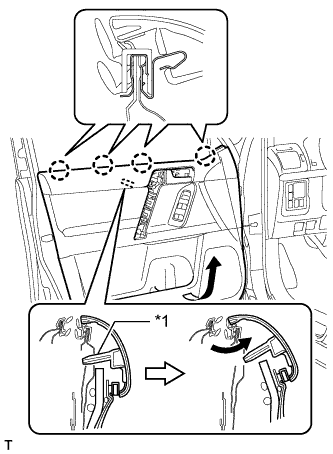
REMOVE FRONT DOOR TRIM BOARD SUB-ASSEMBLY LH
Remove the 3 screws.
Remove the 12 clips.
Pull out the front door trim board sub-assembly in the direction indicated by the arrow in the illustration.
Text in Illustration
*1
Reference Boss
Raise the front door trim board sub-assembly to detach the 4 claws and remove the front door trim board sub-assembly together with the front door inner glass weatherstrip LH.
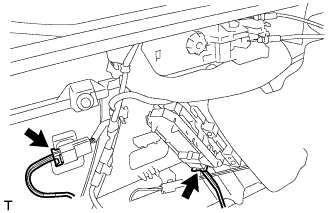
Disconnect the 2 connectors.
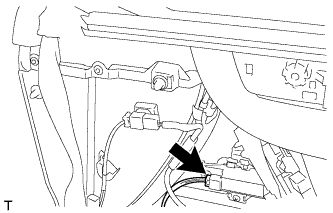
w/ Seat Position Memory System:
Disconnect the connectors.
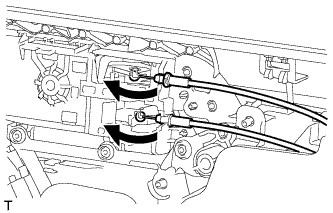
Disconnect the front door lock remote control cable assembly and front door inside locking cable assembly.
5.
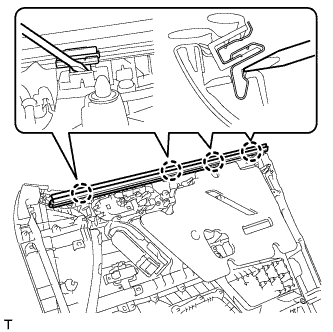
REMOVE FRONT DOOR INNER GLASS WEATHERSTRIP LH
Using a screwdriver, detach the 4 claws and remove the front door inner glass weatherstrip from the front door trim board sub-assembly as shown in the illustration.
6.
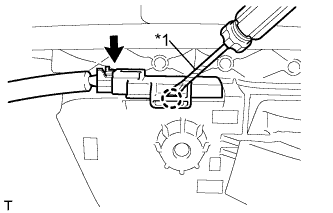
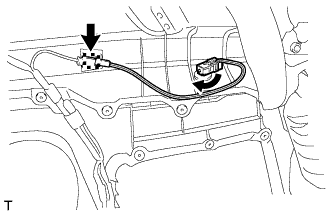
REMOVE FRONT DOOR INSIDE HANDLE ILLUMINATION LIGHT ASSEMBLY LH
Disconnect the connector.
Text in Illustration
*1
Protective Tape
Using a screwdriver, detach the claw and remove the light.