REMOVAL
Removal / installation · Vehicles built Aug 2013 – Jul 2014
Versions by build date: Aug 2013 – Jul 2014 from Aug 2014
- HINT:
- Use the same procedure for RHD and LHD vehicles.
- The procedure listed below is for LHD vehicles.
- Use the same procedure for RHD and LHD vehicles.
| 1. REMOVE INSTRUMENT SIDE PANEL LH |

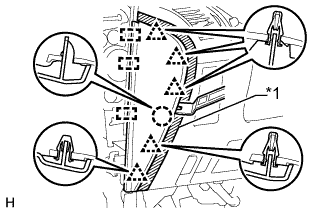  |
Put protective tape around the instrument side panel.
Text in Illustration *1
Protective Tape
Using a moulding remover, detach the 5 clips, claw and 3 guides and remove the instrument side panel.
| 2. REMOVE INSTRUMENT CLUSTER FINISH PANEL ORNAMENT (for LHD) |
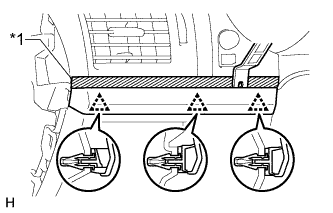 |
Put protective tape around the instrument cluster finish panel ornament.
Text in Illustration *1
Protective Tape
Using a moulding remover, detach the 3 clips and remove the instrument cluster finish panel ornament.
| 3. REMOVE INSTRUMENT PANEL FINISH PLATE GARNISH (for RHD) |
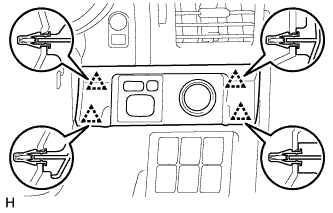 |
Detach the 4 clips.
Disconnect each connector and remove the instrument panel finish plate garnish.
| 4. REMOVE LOWER INSTRUMENT PANEL FINISH PANEL ASSEMBLY |
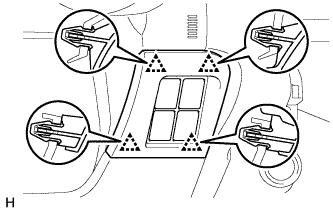 |
Detach the 4 clips.
Disconnect each connector and remove the instrument panel finish panel.
| 5. REMOVE INSTRUMENT CLUSTER FINISH PANEL SUB-ASSEMBLY |
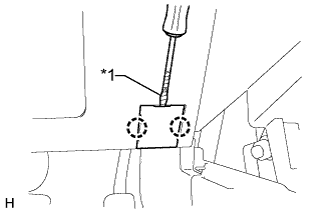 |
Using a screwdriver, detach the 2 claws and open the cover.
- HINT:
- Tape the screwdriver tip before use.
Text in Illustration *1
Protective Tape
w/o Knee Airbag: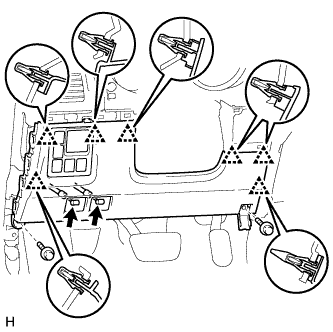
Remove the 2 bolts <C>.
Detach the 7 clips.
Disconnect each connector and each cable and remove the lower instrument panel finish panel.
w/ Knee Airbag: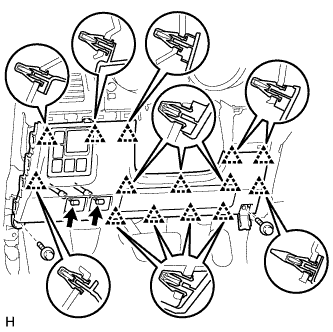
Remove the 2 bolts <C>.
Detach the 14 clips.
Disconnect each connector and each cable and remove the lower instrument panel finish panel.
| 6. REMOVE LOWER STEERING COLUMN COVER |
Remove the 2 screws.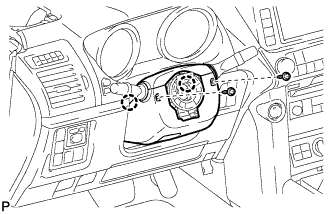
Detach the 2 claws and remove the steering column lower cover.
| 7. REMOVE UPPER STEERING COLUMN COVER |
Detach the 4 clips.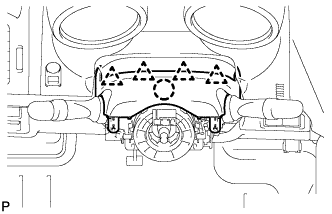
Detach the claw and remove the steering column upper cover.
| 8. REMOVE TRANSPONDER KEY AMPLIFIER |
Remove the screw and cover.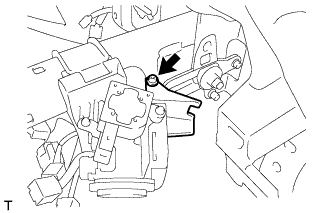
Turn the key amplifier as shown in the illustration to detach the 2 claws and remove the key amplifier.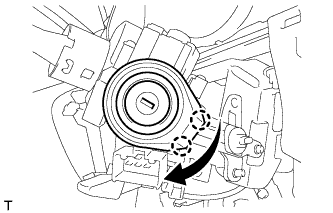
Disconnect the connector.