Home › Engine / Hybrid System › 1KD-FTV ENGINE MECHANICAL › ENGINE UNIT (w/ DPF)REMOVAL
Removal / installation · Vehicles built Aug 2013 – Jul 2014
Versions by build date: Aug 2013 – Jul 2014 from Aug 2014
NOTICE:
When replacing the injectors (including shuffling the injectors between the cylinders), common rail or cylinder head, it is necessary to replace the injection pipes with new ones.
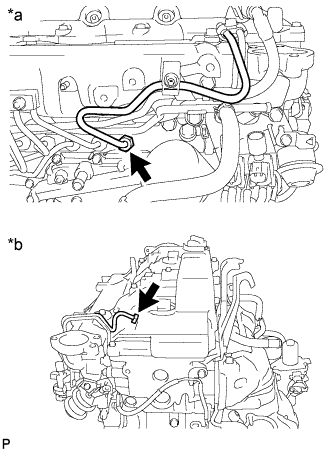
When replacing the fuel supply pump, common rail, cylinder block, cylinder head, cylinder head gasket or timing gear case, it is necessary to replace the fuel inlet pipe with a new one.
1.
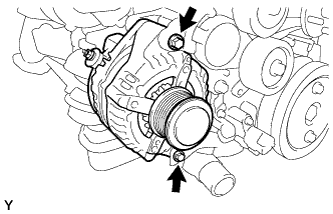
REMOVE GENERATOR ASSEMBLY
Remove the 2 bolts and generator.
2.
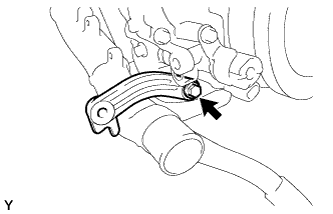
REMOVE GENERATOR BRACKET
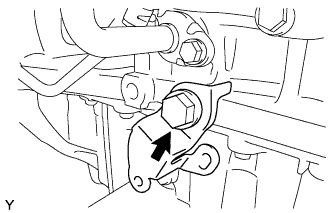
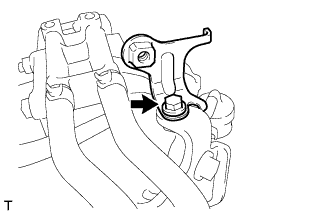
Remove the bolt and generator bracket.
3.
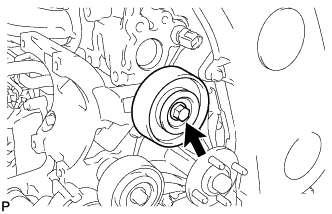
REMOVE IDLE PULLEY ASSEMBLY (w/ Air Conditioning System)
Remove the bolt, pulley plate, idle pulley and spacer.
4.
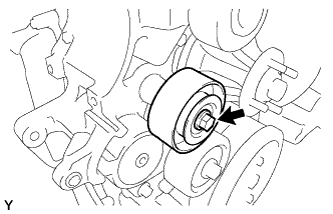
REMOVE NO. 2 IDLE PULLEY ASSEMBLY (w/ Air Conditioning System)
Remove the bolt, pulley plate, No. 2 idle pulley and spacer.
5.
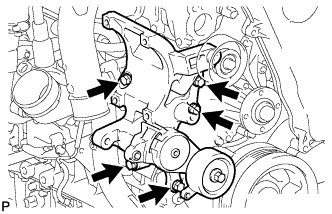
REMOVE NO. 1 COMPRESSOR MOUNTING BRACKET
Remove the 5 bolts and No. 1 compressor mounting bracket.
6.
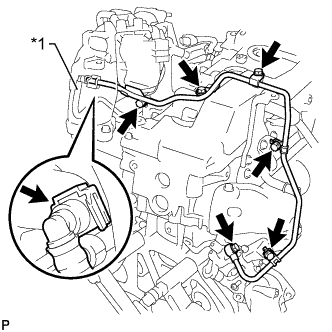
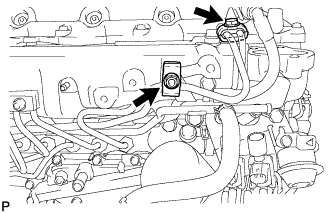
REMOVE NO. 1 FUEL PIPE
Disconnect the No. 2 fuel pipe (Click here ).
Text in Illustration
*1
No. 2 Fuel Pipe
Remove the 4 bolts, union bolt, gasket and No. 1 fuel pipe.
7.
REMOVE NO. 2 EXHAUST MANIFOLD HEAT INSULATOR
Remove the 2 bolts and No. 2 exhaust manifold heat insulator from the turbine outlet elbow.
8.
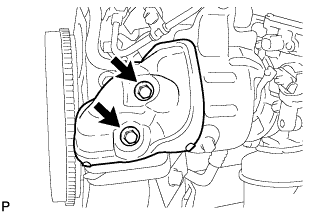
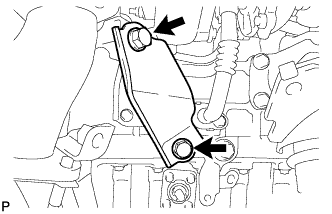
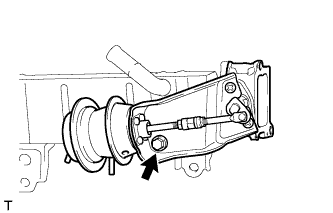
REMOVE TURBINE OUTLET ELBOW STAY
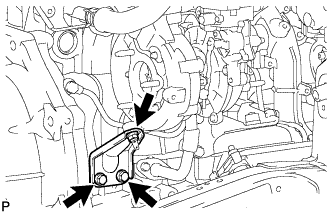
Remove the 2 bolts and turbine outlet elbow stay from the No. 2 turbine outlet elbow and cylinder block sub-assembly.
9.
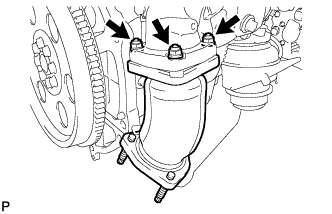
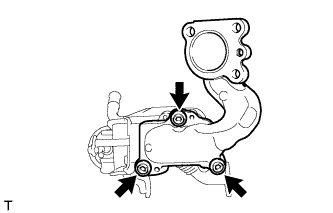
REMOVE NO. 2 TURBINE OUTLET ELBOW
Remove the 3 nuts, No. 2 turbine outlet elbow and gasket from the turbine outlet elbow.
10.
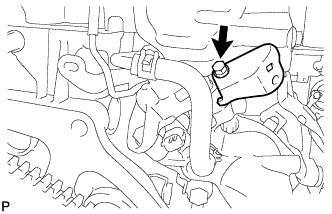
REMOVE FUEL PIPE CLAMP
Remove the bolt and fuel pipe clamp from the turbine outlet elbow.
11.
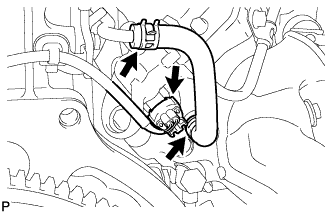
REMOVE NO. 11 WATER BY-PASS HOSE
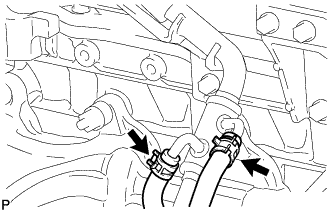
Disconnect the exhaust fuel addition injector connector. Slide the 2 clamps and remove the No. 11 water by-pass hose from the turbine outlet elbow.
12.
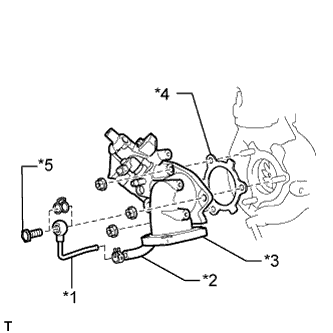
REMOVE TURBINE OUTLET ELBOW
Remove the union bolt and gasket from the turbine outlet elbow.
Text in Illustration
*1
No. 4 Water By-pass Pipe
*2
No. 12 Water By-pass Hose
*3
Turbine Outlet Elbow
*4
Gasket
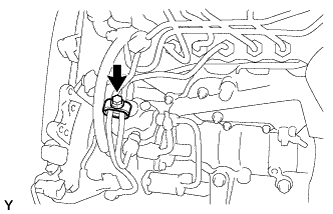
*5
Union Bolt
Slide the clamp and remove the No. 4 water by-pass pipe from the No. 12 water by-pass hose.
Remove the 3 nuts, turbine outlet elbow and gasket from the turbocharger sub-assembly.
13.
REMOVE VENTILATION PIPE
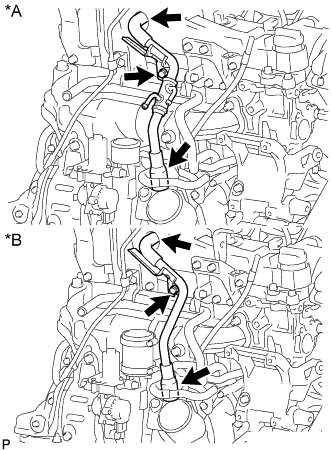
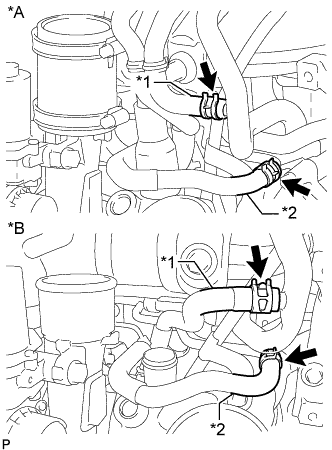
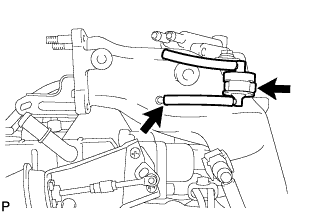
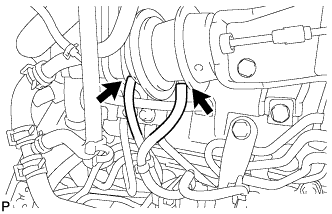
Type A Slide the 2 clamps and disconnect the No. 3 turbo water hose and No. 4 turbo water hose from the ventilation pipe.
Remove the bolt and disconnect the 2 ventilation hoses and ventilation pipe from the cylinder head sub-assembly.
Text in Illustration
*A
Type A
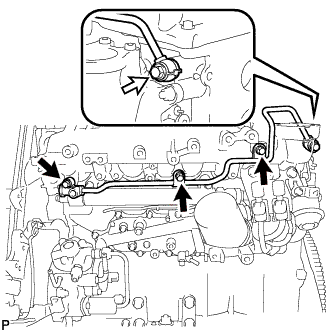
*B
Type B
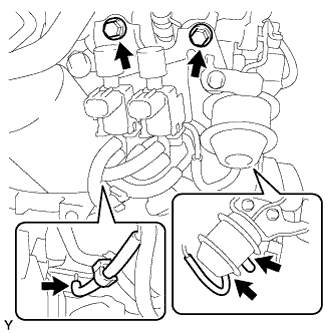
14.
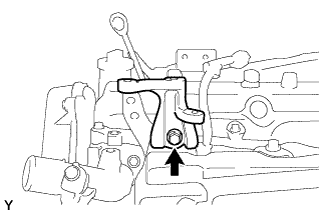
REMOVE NO. 1 TURBO INSULATOR
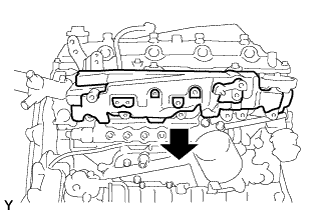
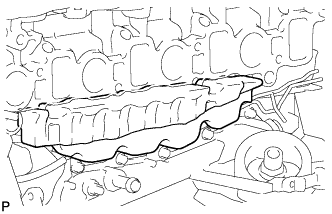
Remove the 2 bolts and No. 1 turbo insulator from the turbocharger sub-assembly.
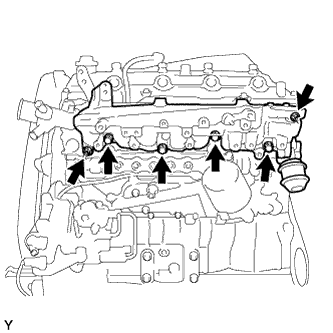
15.
REMOVE NO. 1 EXHAUST MANIFOLD HEAT INSULATOR
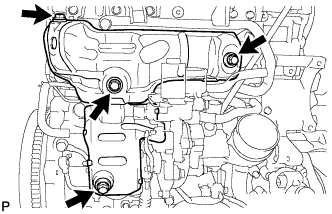
Remove the 2 bolts and No. 1 exhaust manifold heat insulator from the exhaust manifold.
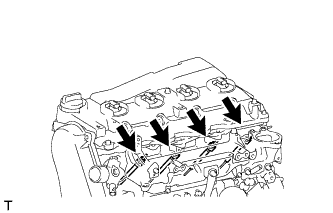
16.
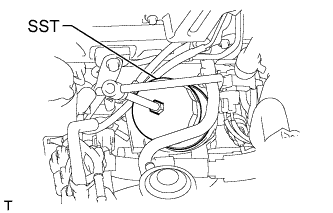
DISCONNECT ENGINE OIL LEVEL DIPSTICK GUIDE SUB-ASSEMBLY
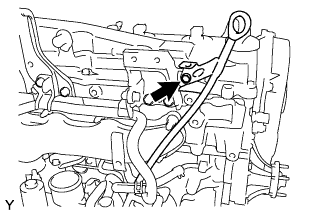
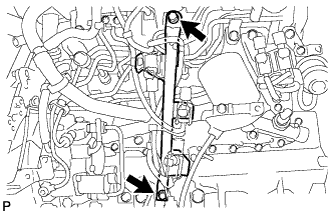
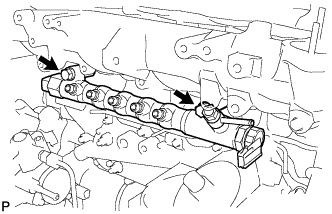
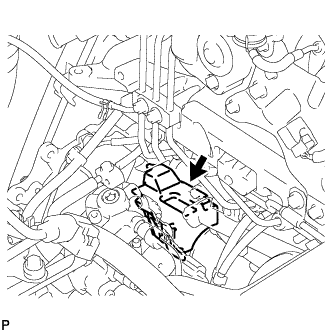
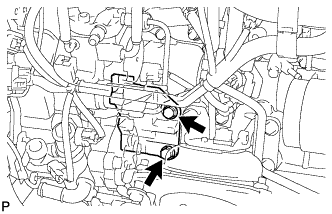
Remove the bolt. Disconnect the engine oil level dipstick guide from the cylinder block sub-assembly.
17.
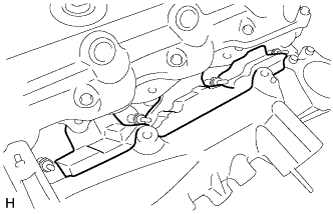
DISCONNECT NO. 1 TURBO WATER HOSE
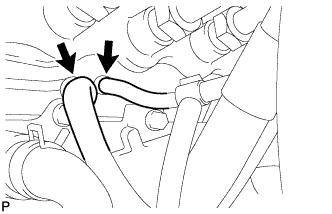
Slide the 2 clamps and disconnect the No. 1 turbo water hose from the No. 2 water by-pass pipe.
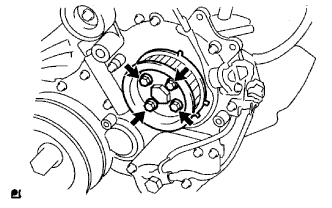
Text in Illustration
*A
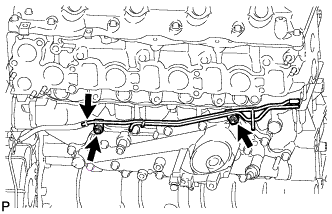
Type A
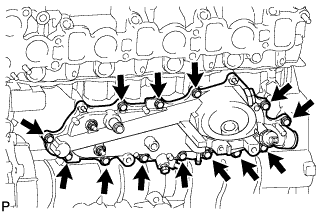
*B
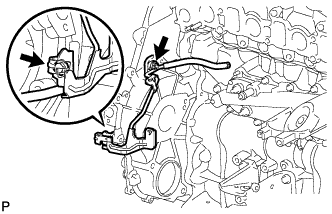
Type B
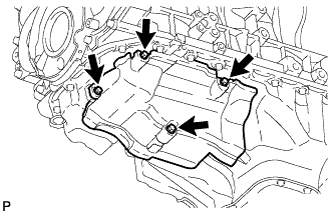
*1
No. 1 Turbo Water Hose
*2
No. 3 Turbo Water Hose
Type B Slide the clamp and disconnect the No. 3 turbo water hose from the compressor inlet elbow.
18.
DISCONNECT NO. 3 TURBO WATER HOSE
Slide the clamp and remove the No. 3 turbo water hose from the No. 2 water by-pass pipe.
19.
REMOVE TURBOCHARGER STAY
Remove the 2 bolts, nut and turbocharger stay from the turbocharger sub-assembly and cylinder block.
20.
REMOVE WIRE HARNESS CLAMP BRACKET
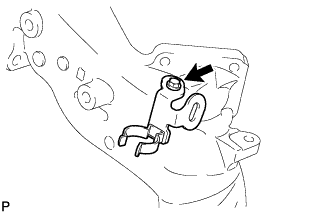
Remove the bolt and wire harness clamp bracket from the cylinder block.
21.
REMOVE TURBO OIL INLET PIPE SUB-ASSEMBLY
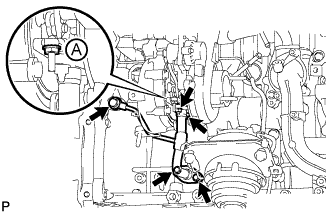
Remove the 2 bolts, 2 nuts, union bolt, turbo oil inlet pipe sub-assembly and 3 gaskets.
NOTICE:
Do not loosen the nut labeled A in the illustration.
22.
REMOVE EXHAUST MANIFOLD WITH TURBOCHARGER
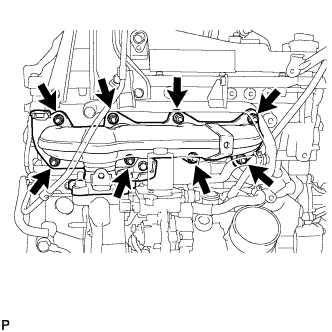
Remove the 8 nuts and 8 plate washers from the exhaust manifold with turbocharger sub-assembly. Remove the exhaust manifold with turbocharger sub-assembly and gasket.
23.
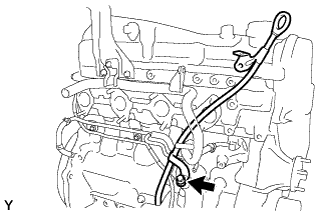
REMOVE ENGINE OIL LEVEL DIPSTICK GUIDE SUB-ASSEMBLY
Remove the bolt and engine oil level dipstick guide.
24.
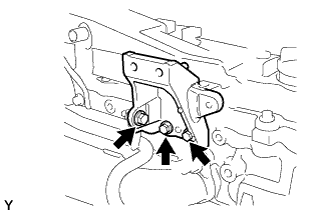
REMOVE COMPRESSOR ELBOW STAY
Remove the 3 bolts and compressor elbow stay.
25.
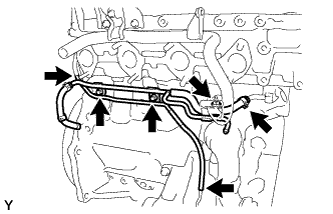
REMOVE NO. 5 WATER BY-PASS PIPE SUB-ASSEMBLY
Disconnect the 3 hoses. Remove the 2 bolts, nut and No. 5 water by-pass pipe.
26.
REMOVE NO. 2 WATER BY-PASS PIPE SUB-ASSEMBLY
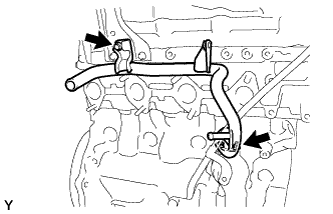
Remove the bolt, nut and No. 2 water by-pass pipe.
27.
REMOVE NO. 2 ENGINE COVER BRACKET
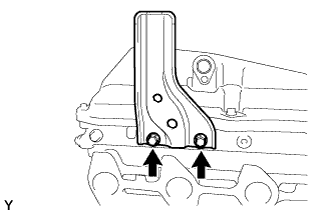
Remove the 2 bolts and No. 2 engine cover bracket.
28.
REMOVE NO. 3 VACUUM TRANSMITTING PIPE SUB-ASSEMBLY
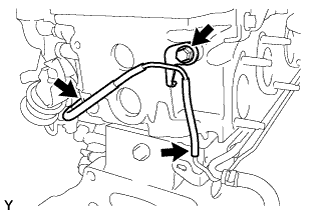
Disconnect the 2 vacuum hoses. Remove the bolt and No. 3 vacuum transmitting pipe.
29.
REMOVE NO. 1 VACUUM PIPE
Remove the bolt and No. 1 vacuum pipe.
30.
REMOVE NO. 2 CYLINDER BLOCK INSULATOR
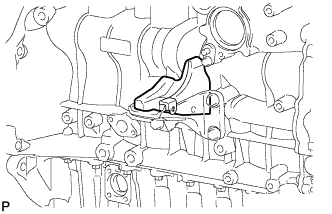
Remove the No. 2 cylinder block insulator from the front No. 1 engine mounting bracket RH.
31.
REMOVE WATER INLET
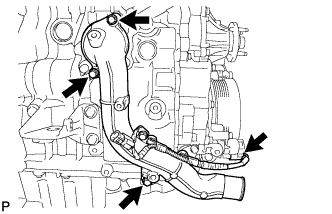
Disconnect the connector and remove the 3 bolts and water inlet.
32.
REMOVE THERMOSTAT
Remove the thermostat.
Remove the gasket from the thermostat.
33.
REMOVE NO. 3 CYLINDER BLOCK INSULATOR
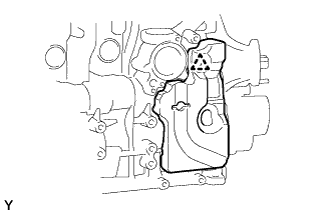
Detach the clip and remove the No. 3 cylinder block insulator.
34.
REMOVE ENGINE OIL LEVEL SENSOR
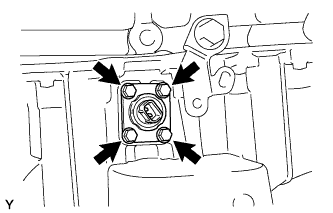
Remove the 4 bolts and engine oil level sensor. Cut away part of the gasket and remove the gasket from the engine oil level sensor.
HINT:
Remove only the outer part of the gasket.
35.
REMOVE ENGINE COOLANT TEMPERATURE SENSOR
Disconnect the engine coolant temperature sensor connector. Remove the engine coolant temperature sensor.
Remove the gasket from the engine coolant temperature sensor.
36.
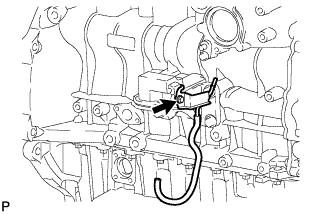
REMOVE OIL PRESSURE SWITCHING VALVE ASSEMBLY
Remove the bolt and oil pressure switching valve.
37.
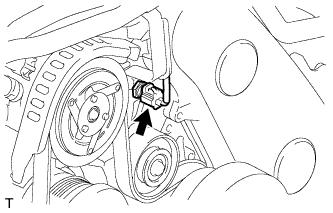
REMOVE CAMSHAFT POSITION SENSOR
Remove the bolt and camshaft position sensor.
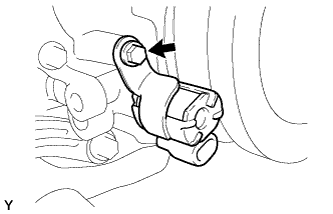
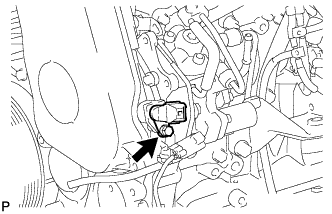
38.
REMOVE CRANKSHAFT POSITION SENSOR
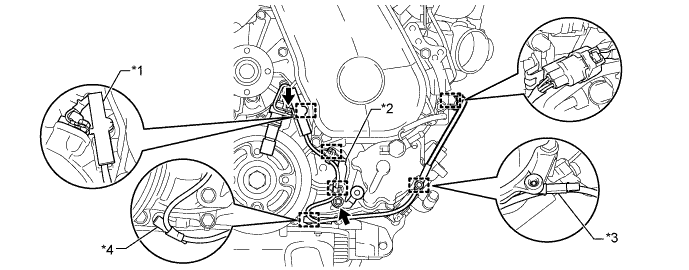
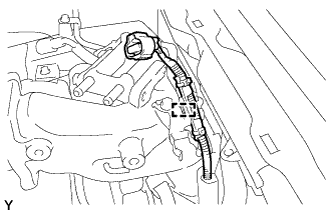
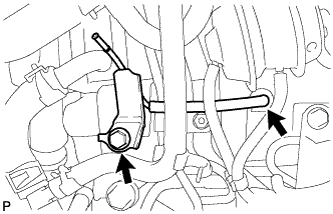
Detach the 2 wire harness clamps (A, B).
Disconnect the crankshaft position sensor connector.
Detach the crankshaft position sensor connector from the No. 1 vacuum transmitting pipe.
Remove the clamp.
NOTICE:
Make sure that no portion of the clamp remains in the clamp installation hole. If there is any portion of the clamp remaining, remove it.
Do not reuse the clamp.
Remove the bolt and bracket (clamp).
Remove the bolt and crankshaft position sensor.
Detach the 2 wire harness clamps from the bracket (clamp).
Text in Illustration
*1
Clamp
*2
Bracket (Clamp)
*3
Wire Harness Clamps (A)
*4
Wire Harness Clamps (B)
39.
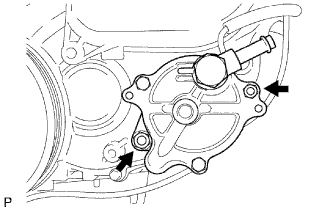
REMOVE VACUUM PUMP ASSEMBLY
Remove the bolt and bracket.
Remove the 2 nuts, vacuum pump and 2 O-rings.
40.
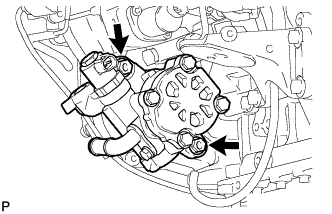
REMOVE VANE PUMP ASSEMBLY
Remove the 2 nuts, vane pump and O-ring.
41.
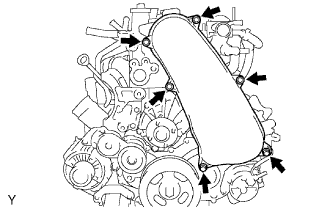
REMOVE NO. 1 TIMING BELT COVER
Remove the 6 bolts, 6 washers and timing belt cover.
42.
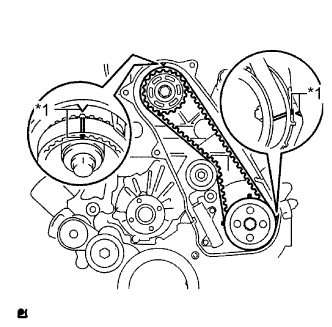
REMOVE TIMING BELT
Turn the crankshaft clockwise and align the timing marks as shown in the illustration.
Text in Illustration
*1
Timing Mark
HINT:
If reusing the timing belt, place matchmarks on the timing belt so that it can be installed exactly as before.
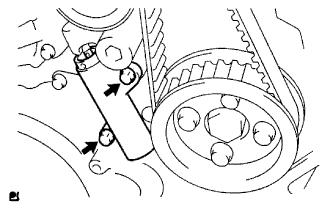
Uniformly loosen and remove the 2 bolts and No. 1 timing belt tensioner.
Remove the timing belt.
HINT:
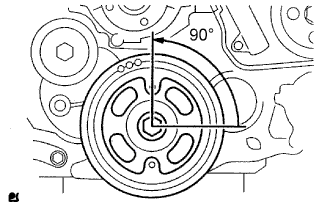
If turning the camshaft while the timing belt is removed, turn the crankshaft 90° counterclockwise as shown in the illustration.
When installing the timing belt, turn the camshaft to align the timing marks and then turn the crankshaft clockwise to align the timing marks.
43.
REMOVE NO. 1 TIMING BELT IDLER SUB-ASSEMBLY
NOTICE:
When inspecting the No. 1 timing belt idler, do not remove it unless absolutely necessary.
Using a 10 mm hexagon wrench, remove the bolt, No. 1 timing belt idler and washer.
44.
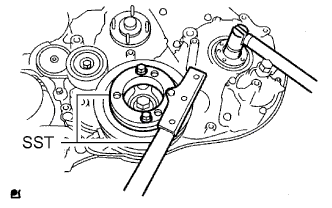
REMOVE CRANKSHAFT PULLEY
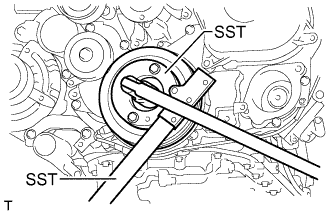
Using SST, hold the crankshaft pulley and loosen the pulley bolt.
SST
09213-58014
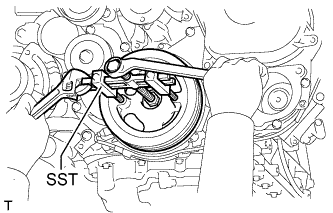
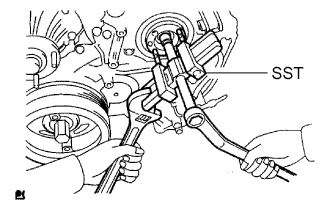
Using SST, remove the pulley bolt and crankshaft pulley.
SST
09950-50013
(09951-05010, 09952-05010, 09953-05020, 09954-05021)
45.
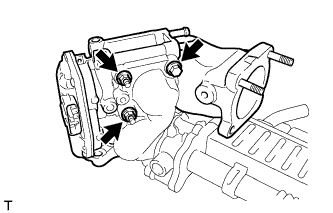
REMOVE DIESEL THROTTLE BODY ASSEMBLY
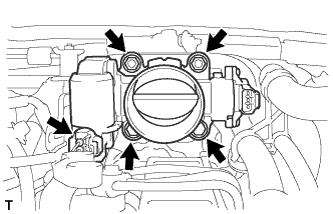
Disconnect the throttle control motor connector. Remove the 2 bolts, 2 nuts, diesel throttle body and gasket.
46.
REMOVE MANIFOLD ABSOLUTE PRESSURE SENSOR
Disconnect the manifold absolute pressure sensor connector and vacuum hose. Remove the bolt and manifold absolute pressure sensor.
47.
REMOVE EMISSION CONTROL VALVE BRACKET
Remove the bolt and emission control valve bracket.
48.
REMOVE THROTTLE BODY BRACKET
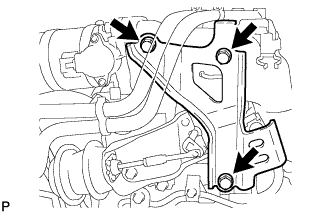
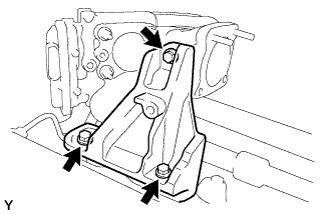
Remove the 3 bolts and throttle body bracket.
49.
REMOVE NO. 1 GAS FILTER
Disconnect the vacuum hose and remove the No. 1 gas filter from the gas filter bracket.
50.
REMOVE GAS FILTER BRACKET
Detach the clamp and disconnect the wire harness.
Remove the bolt and gas filter bracket.
51.
REMOVE NO. 2 CYLINDER HEAD COVER SUB-ASSEMBLY
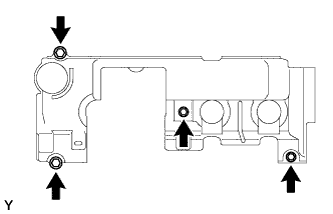
Remove the 4 bolts and No. 2 cylinder head cover.
52.
REMOVE NO. 1 VACUUM TRANSMITTING PIPE
Disconnect the vacuum hose from the intake manifold. Remove the bolt and No. 1 vacuum transmitting pipe.
53.
REMOVE MANIFOLD STAY WITH VACUUM SWITCHING VALVE
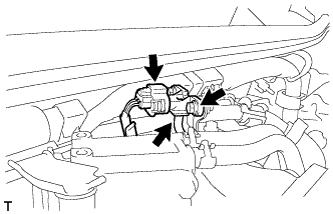
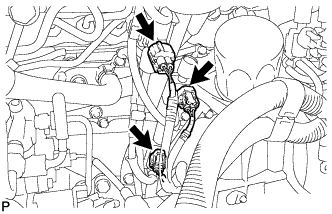
Disconnect the 3 vacuum switching valve connectors.
Disconnect the No. 1 vacuum transmitting hose.
Disconnect the 2 No. 2 vacuum transmitting hoses from the No. 2 EGR valve.
Disconnect the No. 1 vacuum transmitting hose and No. 4 vacuum transmitting hose.
Remove the 2 bolts and manifold stay with vacuum switching valve.
54.
REMOVE WATER BY-PASS HOSE
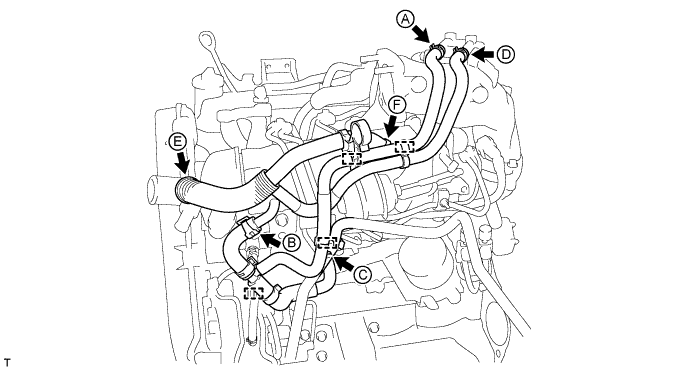
Detach the 4 water by-pass hose clamps.
Disconnect the No. 7 water by-pass hose labeled A in the illustration.
Disconnect the No. 4 water by-pass hose labeled B in the illustration.
Disconnect the No. 3 water by-pass hose labeled C in the illustration.
Disconnect the No. 8 water by-pass hose labeled D in the illustration.
Disconnect the No. 6 water by-pass hose labeled E in the illustration.
Disconnect the No. 5 water by-pass hose labeled F in the illustration.
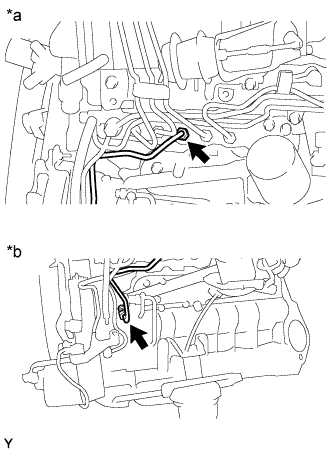
55.
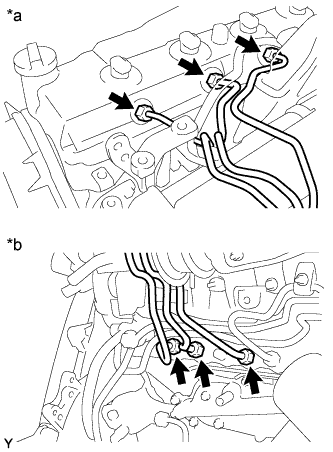
REMOVE FUEL INLET PIPE SUB-ASSEMBLY
Remove the bolt and No. 2 injection pipe clamp.
Using a 17 mm union nut wrench, loosen the union nuts and remove the fuel inlet pipe.
Text in Illustration
*a
Common Rail Side
*b
Fuel Supply Pump Side
56.
REMOVE WIRING HARNESS CLAMP BRACKET
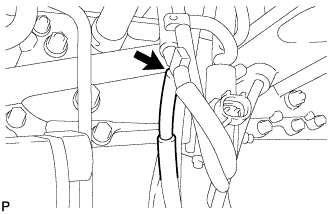
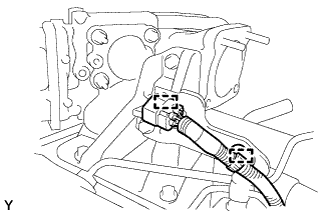
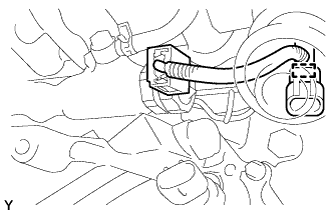
Disconnect the glow plug connector.
Detach the 2 wire harness clamps and disconnect the glow plug connector from the wiring harness clamp bracket.
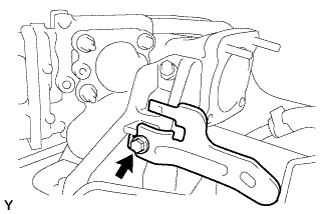
Remove the bolt and wiring harness clamp bracket.
57.
REMOVE NO. 1, NO. 2 AND NO. 3 INJECTION PIPE SUB-ASSEMBLY
NOTICE:
After removing the injection pipe, cover the outlets on the common rail with tape to keep out foreign matter.
After removing the injection pipe, put it in a plastic bag to prevent foreign matter from contaminating its injector inlet.
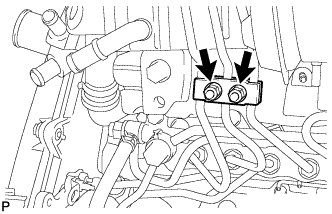
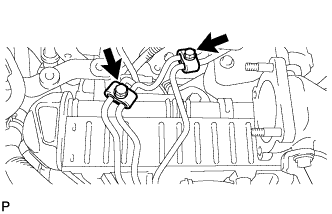
Remove the 2 nuts and No. 3 injection pipe clamp.
Remove the 2 bolts and 2 No. 2 injection pipe clamps.
Using a 17 mm union nut wrench, loosen the union nuts and remove the No. 1, No. 2 and No. 3 injection pipes.
Text in Illustration
*a
Injector Side
*b
Common Rail Side
58.
REMOVE AIR CONNECTOR STAY
Remove the 3 bolts and air connector stay.
59.
REMOVE ELECTRIC EGR CONTROL VALVE ASSEMBLY WITH NO. 2 EGR VALVE AND EGR COOLER
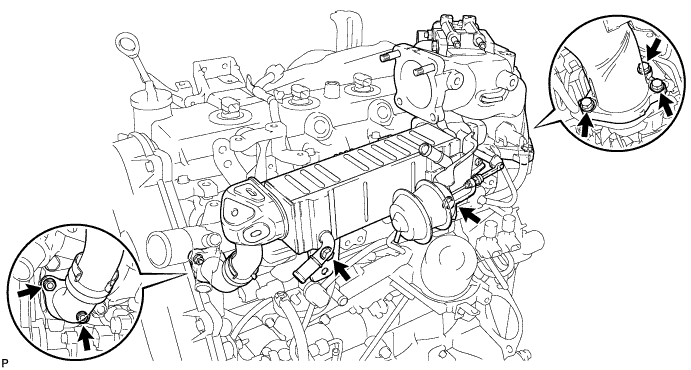
Remove the 2 nuts, the 5 bolts and the electric EGR control valve with No. 2 EGR valve and EGR cooler.
Remove the 2 gaskets from the cylinder head and intake manifold.
60.
REMOVE ELECTRIC EGR CONTROL VALVE ASSEMBLY
Remove the 2 nuts, bolt and intake air connector together with the electric EGR control valve. Remove the electric EGR control valve and 2 gaskets from the intake air connector.
61.
REMOVE EGR VALVE ADAPTER
Using a 6 mm hexagon wrench, remove the 3 hexagon bolts, 3 plate washers, EGR valve adapter and gasket.
62.
REMOVE NO. 2 EGR VALVE ASSEMBLY
Remove the bolt, No. 2 EGR valve and gasket.
63.
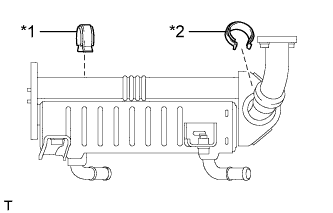
REMOVE EGR COOLER INSULATOR
Remove the 2 EGR cooler insulators from the EGR cooler.
Text in Illustration
*1
No. 2 EGR Cooler Insulator
*2
No. 1 EGR Cooler Insulator
64.
REMOVE NO. 4 INJECTION PIPE SUB-ASSEMBLY
Remove the bolt, nut and 2 No. 2 injection pipe clamps.
Using a 17 mm union nut wrench, loosen the union nuts and remove the No. 4 injection pipe.
Text in Illustration
*a
Common Rail Side
*b
Injector Side
65.
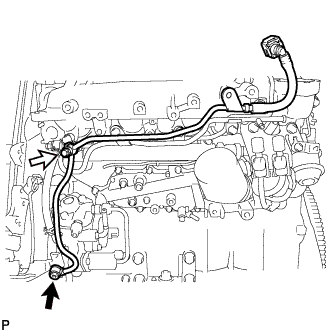
REMOVE NO. 2 FUEL PIPE
Using a 6 mm hexagon wrench, remove the union bolt and gasket.
Text in Illustration
Union Bolt
Fuel Check Valve
Remove the fuel check valve, gasket and No. 2 fuel pipe.
66.
REMOVE NO. 3 NOZZLE LEAKAGE PIPE
Disconnect the 2 fuel hoses.
Text in Illustration
Fuel Check Valve
Remove the 2 bolts.
Remove the fuel check valve, gasket and No. 3 nozzle leakage pipe.
67.
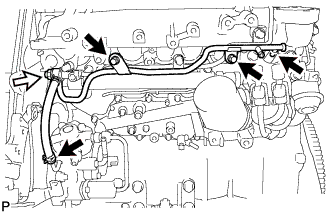
REMOVE NO. 2 NOZZLE LEAKAGE PIPE ASSEMBLY
Remove the 3 bolts.
Text in Illustration
Union Bolt
Remove the union bolt, gasket and No. 2 nozzle leakage pipe.
68.
REMOVE VACUUM CONTROL VALVE SET
Disconnect the 2 vacuum switching valve connectors.
Disconnect the 3 vacuum hoses, and then remove the 2 bolts and vacuum control valve set.
69.
REMOVE INTAKE PIPE STAY
Remove the bolt and intake pipe stay.
70.
REMOVE INTAKE MANIFOLD INSULATOR
Remove the intake manifold insulator.
71.
REMOVE INTAKE MANIFOLD
Detach the sensor wire connector clamp from the intake manifold.
Remove the 2 nuts, 4 bolts, intake manifold and gasket.
72.
REMOVE NO. 1 GLOW PLUG CONNECTOR
Disconnect the No. 1 glow plug connector from the wire harness.
Remove the 4 screw grommets.
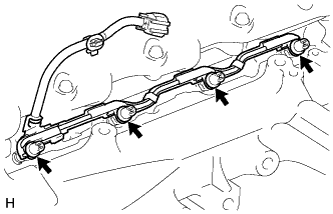
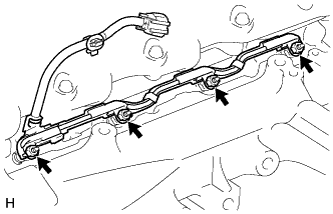
Remove the 4 nuts and No. 1 glow plug connector.
73.
REMOVE NO. 1 INTAKE MANIFOLD INSULATOR
74.
REMOVE GLOW PLUG ASSEMBLY
Using a 12 mm deep socket wrench, remove the 4 glow plugs.
75.
REMOVE OIL FILTER SUB-ASSEMBLY
Using SST, remove the oil filter.
SST
09228-07501
76.
REMOVE COMMON RAIL ASSEMBLY
Disconnect the pressure discharge valve connector.
Remove the 2 bolts and common rail.
NOTICE:
Do not remove the pressure discharge valve or fuel pressure sensor.
77.
REMOVE NO. 2 INTAKE MANIFOLD INSULATOR
Remove the No. 2 intake manifold insulator.
78.
REMOVE INJECTION PUMP INSULATOR
79.
REMOVE NO. 1 INJECTION PUMP PROTECTOR
Remove the 2 bolts and No. 1 injection pump protector.
80.
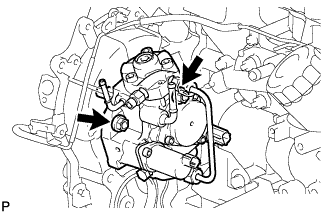
REMOVE FUEL SUPPLY PUMP ASSEMBLY
Remove the 4 bolts indicated by the arrows in the illustration. Remove the No. 2 camshaft timing pulley flange and pump drive shaft pulley.
Remove the set nut and O-ring while holding the crankshaft pulley using SST.
SST
09213-58014
Loosen the 2 nuts.
Using SST, disconnect the fuel supply pump from the injection gear.
SST
09950-50013
(09951-05010, 09952-05010, 09953-05020, 09954-05021)
NOTICE:
Apply lubricant to the threads and tip of SST (center bolt) before using it.
Remove the 2 nuts and fuel supply pump.
NOTICE:
Do not hold or carry the fuel supply pump by the pipe.
The fuel supply pump must be kept horizontal.
Remove the O-ring.
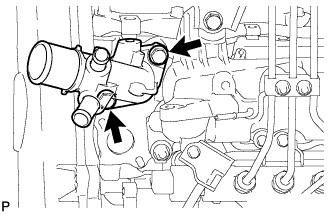
81.
REMOVE WATER OUTLET
Remove the 2 bolts, gasket and water outlet.
82.
REMOVE NO. 2 VACUUM TRANSMITTING PIPE SUB-ASSEMBLY
Disconnect the vacuum hose. Remove the 2 nuts and No. 2 vacuum transmitting pipe.
83.
REMOVE OIL COOLER COVER SUB-ASSEMBLY
Remove the 13 bolts and oil cooler cover.
84.
REMOVE NO. 1 VACUUM TRANSMITTING PIPE SUB-ASSEMBLY
Remove the bolt, nut and No. 1 vacuum transmitting pipe.
85.
REMOVE NO. 1 OIL PAN COVER SUB-ASSEMBLY
Remove the 4 bolts and No. 1 oil pan cover.
86.
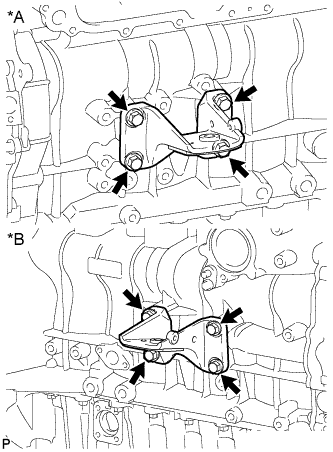
REMOVE FRONT NO. 1 ENGINE MOUNTING BRACKET
Remove the 8 bolts and 2 front No. 1 engine mounting brackets.
Text in Illustration
*A
for LH Side
*B
for RH Side