DISASSEMBLY
Removal / installation · Vehicles built from Aug 2013
- NOTICE:
- Do not disconnect the hoses indicated in the illustration.
-
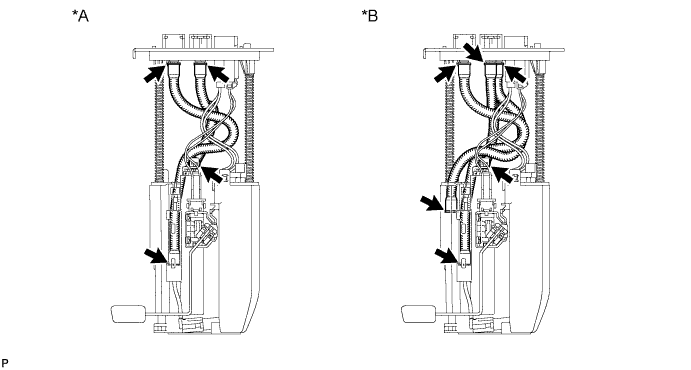

Text in Illustration *A
for Single Tank Type
*B
for Double Tank Type
| 1. REMOVE FUEL SENDER GAUGE ASSEMBLY (for Single Tank Type) |

Disconnect the fuel sender gauge connector.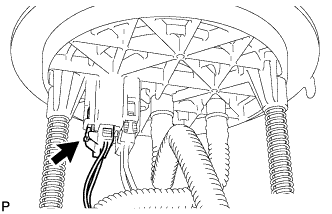
Press down on the fuel sender gauge claw labeled A. Then slide the fuel sender gauge upward to remove it.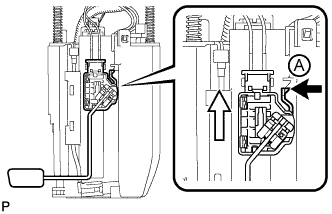
Text in Illustration 
Press down

Slide
| 2. REMOVE FUEL SENDER GAUGE ASSEMBLY (for Double Tank Type) |
Disconnect the fuel sender gauge connector.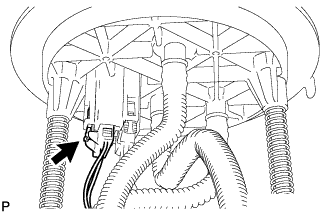
Press down on the fuel sender gauge claw labeled A. Then slide the fuel sender gauge upward to remove it.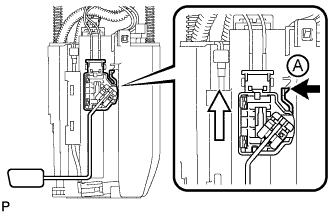
Text in Illustration
Press down
Slide
| 3. REMOVE NO. 1 FUEL SUB-TANK (for Single Tank Type) |
Disconnect the fuel pump connector.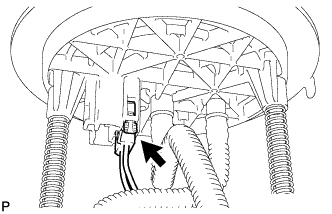
Disconnect the jet pump from the No. 1 fuel sub-tank.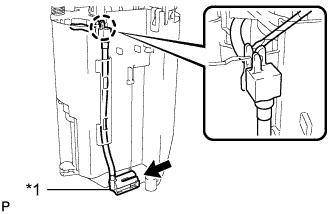
Text in Illustration *1
Jet Pump
Using a small screwdriver, detach the claw from the No. 1 fuel sub-tank.
- HINT:
- Tape the screwdriver tip before use.
- NOTICE:
- Do not damage the No. 1 fuel sub-tank.
Using a screwdriver, detach the 3 claws from the claw holes.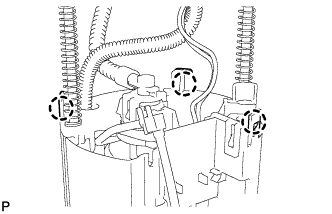
- HINT:
- Tape the screwdriver tip before use.
- NOTICE:
- Do not damage the No. 1 fuel sub-tank.
Using a screwdriver, detach the 3 claws from the claw holes.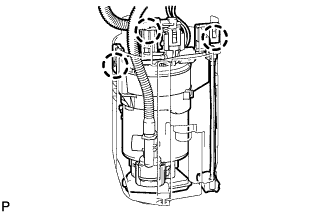
- HINT:
- Tape the screwdriver tip before use.
- NOTICE:
- Do not damage the No. 1 fuel sub-tank.
| 4. REMOVE NO. 1 FUEL SUB-TANK (for Double Tank Type) |
Disconnect the fuel pump connector.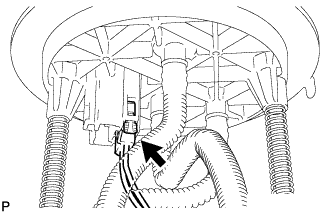
Disconnect the jet pump labeled A from the No. 1 fuel sub-tank.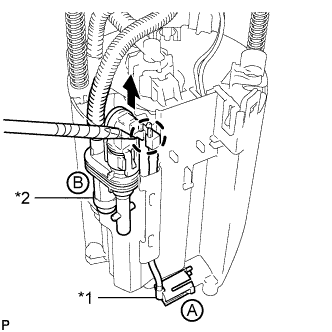
Text in Illustration *1
Jet Pump A
*2
Jet Pump B
Disconnect the jet pump labeled B from the No. 1 fuel sub-tank.
- HINT:
- Tape the screwdriver tip before use.
- NOTICE:
- Do not damage the No. 1 fuel sub-tank.
Using a screwdriver, detach the 3 claws from the claw holes.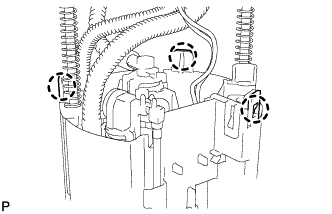
- HINT:
- Tape the screwdriver tip before use.
- NOTICE:
- Do not damage the No. 1 fuel sub-tank.
Using a screwdriver, detach the 3 claws from the claw holes.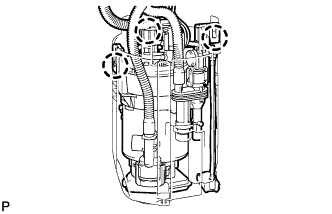
- HINT:
- Tape the screwdriver tip before use.
- NOTICE:
- Do not damage the No. 1 fuel sub-tank.
| 5. REMOVE FUEL PUMP |
Detach the fuel pump wire harness clamp.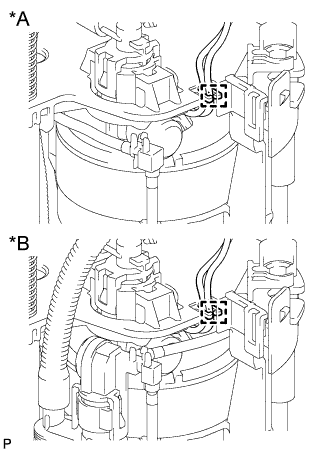
Text in Illustration *A
for Single Tank Type
*B
for Double Tank Type
Using a screwdriver, detach the 5 claws from the claw holes and disconnect the fuel pump from the fuel filter case.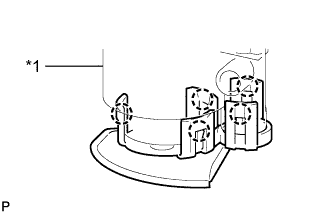
Text in Illustration *1
Fuel Filter Case
- HINT:
- Tape the screwdriver tip before use.
Disconnect the fuel pump wire harness connector from the fuel pump to remove it.
Remove the O-ring and fuel pump spacer from the fuel pump.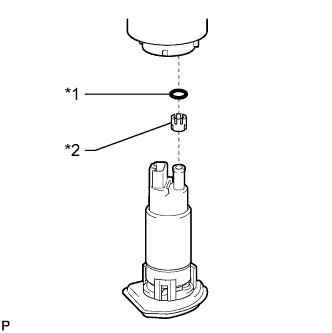
Text in Illustration *1
O-Ring
*2
Fuel Pump Spacer
| 6. REMOVE FUEL SUCTION CAP |
Remove the fuel suction cap from the fuel filter case.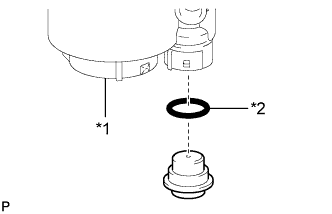
Text in Illustration *1
Fuel Filter Case
*2
O-Ring
Remove the O-ring from the fuel suction cap.