REMOVAL
Removal / installation · Vehicles built from Aug 2013
- NOTICE:
- Wear protective gloves. Sharp areas on the parts may injure your hands.
| 1. REMOVE REAR NO. 1 SEAT ASSEMBLY RH |

| 2. REMOVE REAR SEAT UPPER RECLINING COVER RH |
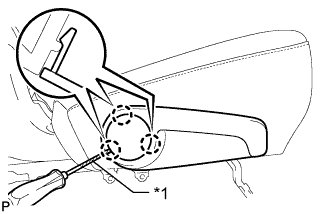  |
Using a screwdriver, detach the 3 claws and remove the rear seat upper reclining cover RH.
- HINT:
- Tape the screwdriver tip before use.
Text in Illustration *1
Protective Tape
| 3. REMOVE RECLINING ADJUSTER RELEASE HANDLE RH |
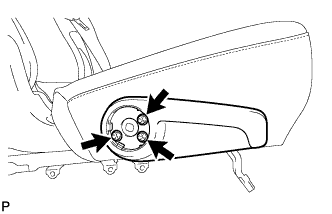 |
Remove the 3 screws and reclining adjuster release handle RH.
| 4. REMOVE REAR SEAT CUSHION MOULDING RH |
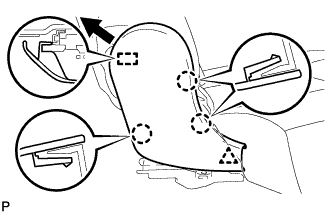 |
Using a clip remover, detach the clip.
Using a moulding remover, detach the 3 claws.
Move the rear seat cushion moulding RH in the direction of the arrow to detach the guide and remove the rear seat cushion moulding RH.
| 5. REMOVE REAR SEAT REAR CUSHION MOULDING LH |
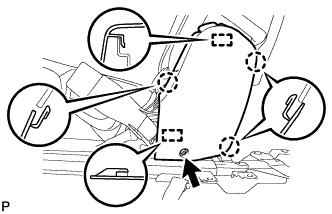 |
Remove the screw.
Using a moulding remover, detach the 3 claws.
Detach the 2 guides and remove the rear seat rear cushion moulding LH.
| 6. REMOVE SEAT CUSHION COVER WITH PAD |
w/ Seat Heater System: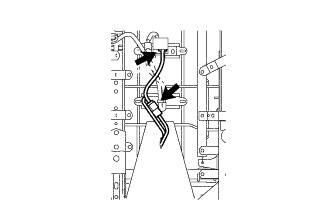
Disconnect the 2 rear seat heater connectors.
Pull out the wire harness as shown in the illustration.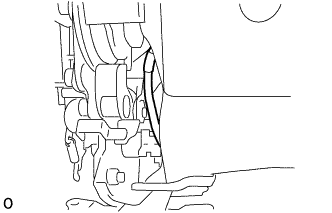
Detach the hooks and remove the seat cushion cover with pad.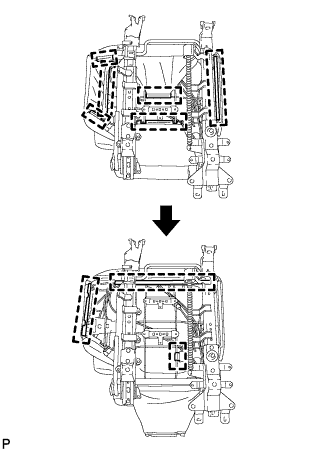
| 7. REMOVE RECLINING ADJUSTER KNOB CAP RH |
Using a screwdriver, detach the claw and guide, and then remove the reclining adjuster knob cap RH.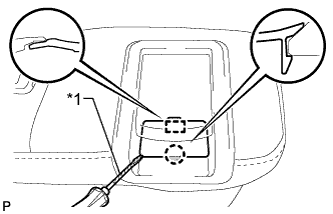
- HINT:
- Tape the screwdriver tip before use.
Text in Illustration *1
Protective Tape
| 8. REMOVE REAR SEAT LOCK CONTROL LEVER SUB-ASSEMBLY RH |
Remove the 2 screws.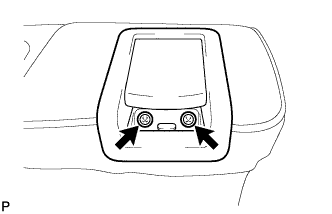
Disconnect the cable in the order shown in the illustration and remove the rear seat lock control lever sub-assembly RH.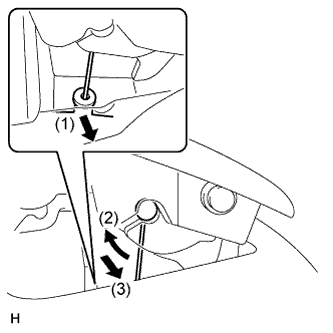
| 9. REMOVE REAR SEAT COVER CAP |
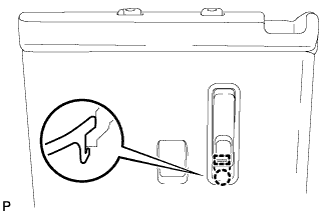 |
Using a screwdriver, detach the claw and guide, and then remove the rear seat cover cap.
- HINT:
- Tape the screwdriver tip before use.
| 10. REMOVE REAR CENTER BACK LOCK CONTROL LEVER |
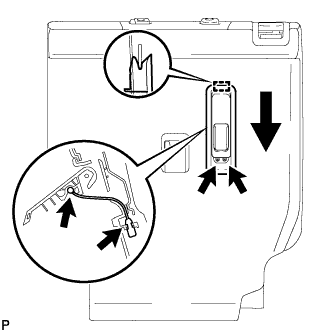 |
Remove the 2 screws.
Move the rear center back lock control lever in the direction of the arrow to detach the guide and remove the rear center back lock control lever.
Detach the cable clamp and disconnect the cable from the rear center back lock control lever.
| 11. REMOVE REAR SEATBACK COVER |
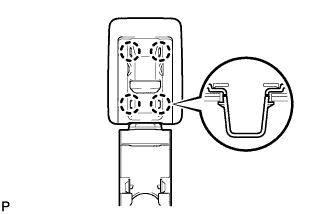 |
Using a screwdriver, detach the 4 claws and remove the rear seatback cover.
- HINT:
- Tape the screwdriver tip before use.
| 12. REMOVE REAR SEATBACK BOARD CARPET ASSEMBLY RH |
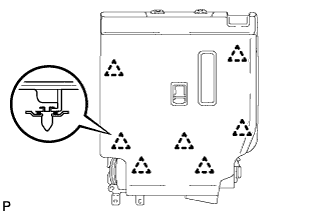 |
Using a clip remover, detach the 7 clips and remove the rear seatback board carpet assembly RH.
| 13. REMOVE REAR NO. 1 SEAT HEADREST SUPPORT ASSEMBLY |
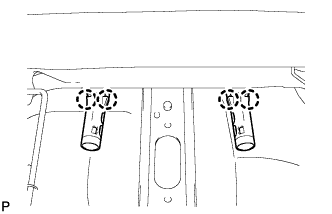 |
Detach the 4 claws and remove the 2 rear No. 1 seat headrest support assemblies.
| 14. REMOVE SEATBACK COVER WITH PAD |
Remove the 14 hog rings and detach the hooks, and then remove the seatback cover with pad.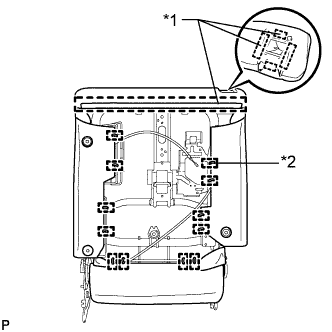
Text in Illustration *1
Hook
*2
Hog Ring
w/ Seat Heater System:
Remove the wire harness.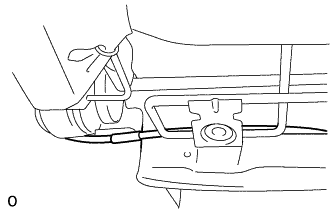
| 15. REMOVE SEPARATE TYPE REAR SEATBACK COVER |
w/ Seat Heater System: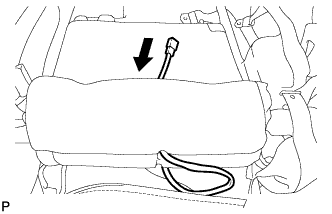
Disconnect the rear seatback heater assembly wire harness from the separate type rear seatback pad.
Remove the 8 hog rings and separate type rear seatback cover from the separate type rear seatback pad.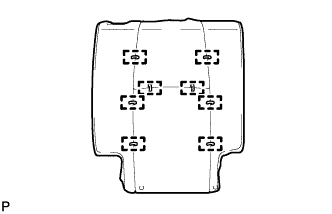
| 16. REMOVE REAR SEATBACK HEATER ASSEMBLY |
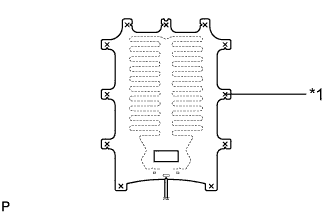 |
Cut off the 11 tack pins which fasten the rear seatback heater assembly to the separate type rear seatback cover, and then remove the rear seatback heater assembly from the separate type rear seatback cover.
Text in Illustration *1
Tack Pin