REMOVAL
Removal / installation · Vehicles built from Aug 2013
- CAUTION:
- Wear protective gloves. Sharp areas on the parts may injure your hands.
| 1.
REMOVE REAR NO. 1 SEAT ASSEMBLY RH |
 |
(Click here)
| 2.
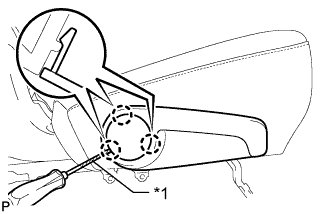
REMOVE REAR SEAT UPPER RECLINING COVER RH
|
|
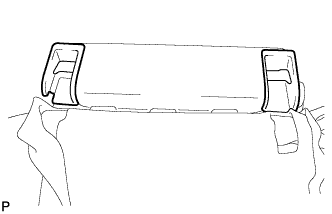
Using a screwdriver, detach the 3 claws and remove the rear seat upper reclining cover RH.
- HINT:
- Tape the screwdriver tip before use.
Text in Illustration
*1
|
Protective Tape
|
| 3.
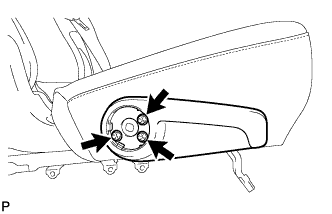
REMOVE RECLINING ADJUSTER RELEASE HANDLE RH
|
|
Remove the 3 screws and reclining adjuster release handle RH.
| 4.
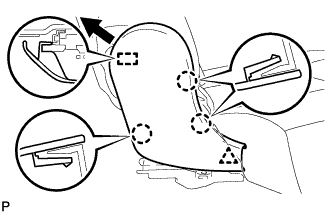
REMOVE REAR SEAT CUSHION MOULDING RH
|
|
Using a clip remover, detach the clip.
Using a moulding remover, detach the 3 claws.
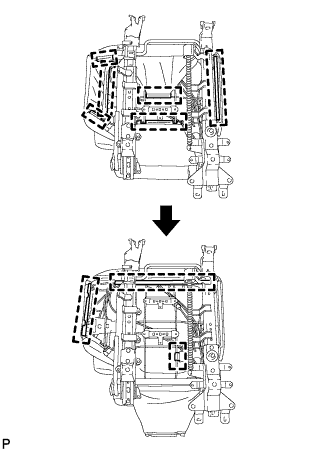
Move the rear seat cushion moulding RH in the direction of the arrow to detach the guide and remove the rear seat cushion moulding RH.
| 5.
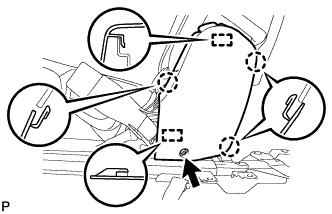
REMOVE REAR SEAT REAR CUSHION MOULDING LH
|
|
Remove the screw.
Using a moulding remover, detach the 3 claws.
Detach the 2 guides and remove the rear seat rear cushion moulding LH.
| 6.
REMOVE SEAT CUSHION COVER WITH PAD
|
|
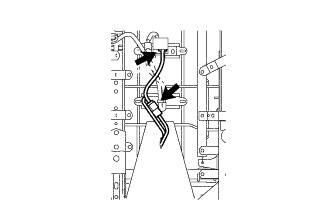
- w/ Seat Heater System:
Disconnect the 2 rear seat heater connectors.
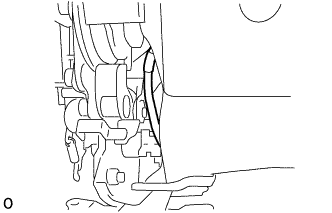
- Pull out the wire harness as shown in the illustration.
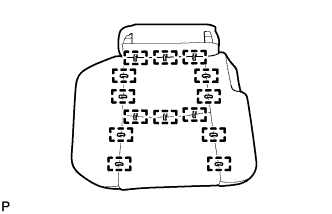
- Detach the hooks and remove the seat cushion cover with pad.
| 7.
REMOVE REAR NO. 2 SEAT PROTECTOR
|
|
Remove the 2 rear No. 2 seat protectors from the separate type rear seat cushion pad.
| 8.
REMOVE SEPARATE TYPE REAR SEAT CUSHION COVER
|
|
Remove the 14 hog rings and separate type rear seat cushion cover from the separate type rear seat cushion pad.
| 9.
REMOVE REAR SEAT CUSHION HEATER ASSEMBLY |
|
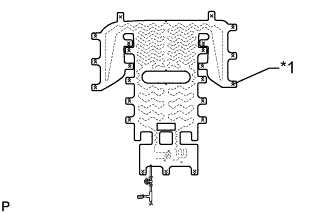
Cut off the 23 tack pins and remove the rear seat cushion heater assembly from the separate type rear seat cushion cover.
Text in Illustration
*1
|
Tack Pin
|