HEATING / AIR CONDITIONING COMPRESSOR(for 5L-E) REASSEMBLY
PROCEDURE

 88410
1.INSTALL MAGNET CLUTCH ASSEMBLY
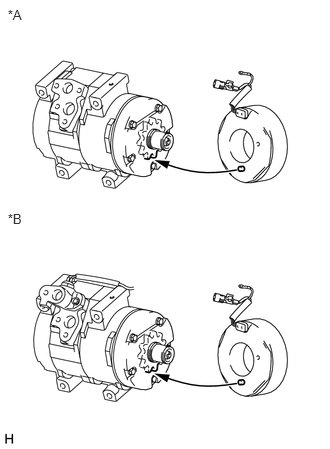
| *A | for Type A |
| *B | for Type B |
Install the magnet clutch stator with the parts shown in the illustration aligned.
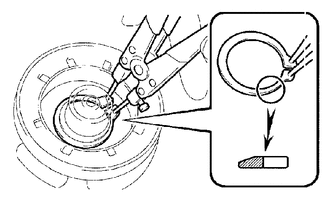
Using a snap ring expander, install a new snap ring with the chamfered side facing up.
- NOTICE:
-
When installing the snap ring, do not widen it excessively.
Connect the connector.
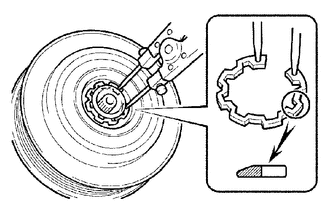
Using a snap ring expander, install the magnet clutch rotor and a new snap ring with the chamfered side facing up.
- NOTICE:
- ·
Do not damage the seal cover of the bearing when installing the snap ring.
·When installing the snap ring, do not widen it excessively.
Install the compressor washer and magnet clutch hub.
- NOTICE:
-
Do not change the combination of the compressor washer used before disassembly.
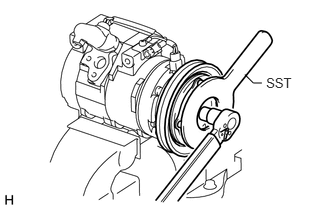
Using SST, hold the magnet clutch hub and install the bolt.
- SST
- 09985-00270
- Torque:
- 18 N*m (184 kgf*cm, 13 ft.*lbf)
- NOTICE:
-
Make sure that there is no foreign matter or oil on the compressor shaft, bolt and clutch hub.
2.INSTALL COOLER BRACKET
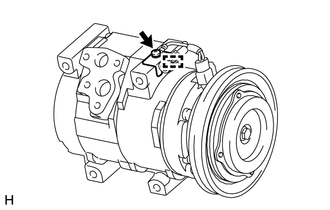
Install the cooler bracket with the screw.
Attach the clamp.
3.INSPECT MAGNET CLUTCH CLEARANCE
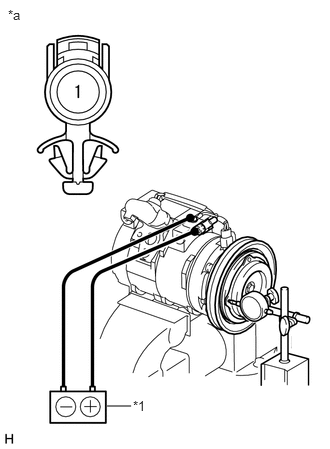
| *1 | Battery |
| *a | Component without harness connected
(Magnet Clutch Assembly) |
Clamp the cooler compressor in a vise.
Set a dial indicator to the magnet clutch hub.
Connect the battery positive (+) lead to terminal 1 of the magnet clutch connector. Turn the magnet clutch on and off by connecting and disconnecting the battery negative (-) lead to and from the ground wire and measure the clearance.
- Standard clearance:
0.35 to 0.60 mm (0.014 to 0.024 in.)
If the measured value is not within the standard clearance, remove the magnet clutch hub and adjust the clearance using compressor washers to obtain the standard clearance.
- NOTICE:
-
Adjustment should be performed with 3 magnet clutch washers or less.
Remove the cooler compressor from the vise.