INTERIOR PANELS / TRIM FRONT CONSOLE BOX(for Bench Seat Type) REMOVAL
CAUTION / NOTICE / HINT
- HINT:
- ·
Use the same procedure for RHD and LHD vehicles.
·The procedure listed below is for LHD vehicles.
PROCEDURE

 84010A
1.REMOVE INTEGRATION CONTROL AND PANEL ASSEMBLY
55436A
2.REMOVE INSTRUMENT PANEL FINISH PANEL END LH
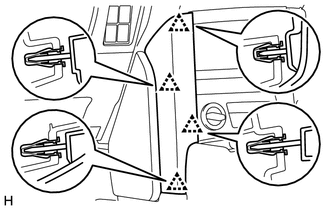
Detach the 4 clips and remove the instrument panel finish panel end LH.
55449C
3.REMOVE NO. 2 INSTRUMENT PANEL FINISH PANEL CUSHION
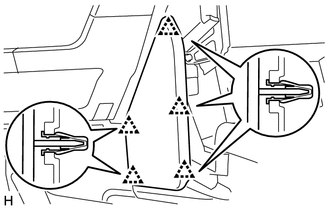
Detach the 5 clips and remove the No. 2 instrument panel finish panel cushion.
55435A
4.REMOVE INSTRUMENT PANEL FINISH PANEL END RH
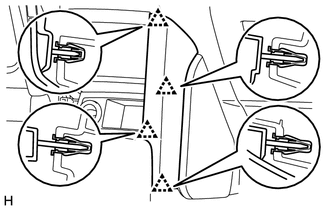
Detach the 4 clips and remove the instrument panel finish panel end RH.
Disconnect the connector.
55448A
5.REMOVE NO. 1 INSTRUMENT PANEL FINISH PANEL CUSHION
- HINT:
-
Use the same procedure described for the No. 2 instrument panel finish panel cushion.
58831A
6.REMOVE FRONT CONSOLE UPPER PANEL GARNISH
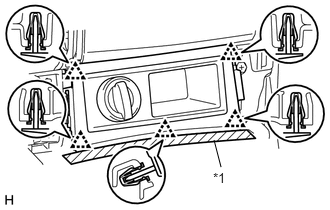
Put protective tape around the front console upper panel garnish.
| *1 | Protective Tape |
Detach the 5 clips.
Disconnect the connectors and remove the front console upper panel garnish.
55606
7.REMOVE NO. 1 INSTRUMENT PANEL UNDER COVER SUB-ASSEMBLY
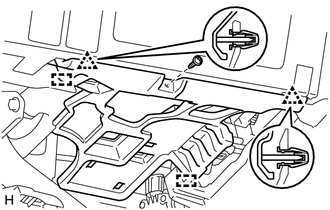
for LHD:
Remove the screw.
Detach the 2 clips and 2 guides and remove the No. 1 instrument panel under cover.
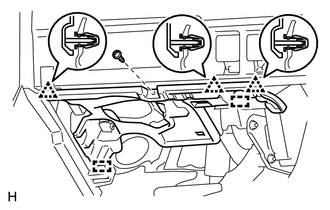
for RHD:
Remove the screw.
Detach the 3 clips and 2 guides and remove the No. 1 instrument panel under cover.
58816B
8.REMOVE FRONT NO. 1 CONSOLE BOX INSERT
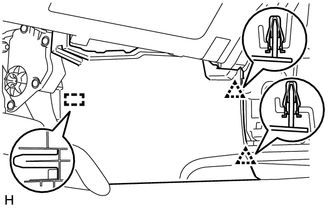
Detach the 2 clips and guide and remove the front No. 1 console box insert.
55607
9.REMOVE NO. 2 INSTRUMENT PANEL UNDER COVER SUB-ASSEMBLY
Remove the screw.
Detach the 3 clips and 2 guides and remove the No. 2 instrument panel under cover.
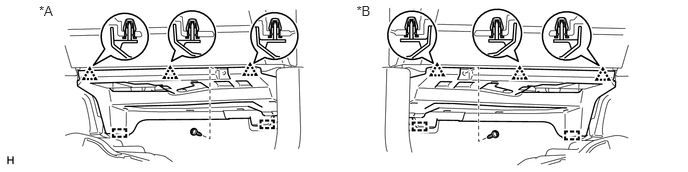
| *A | for LHD | *B | for RHD |
58817A
10.REMOVE FRONT NO. 2 CONSOLE BOX INSERT
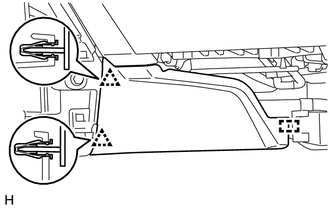
Detach the 2 clips and guide and remove the front No. 2 console box insert.
58821C
11.REMOVE UPPER CONSOLE PANEL
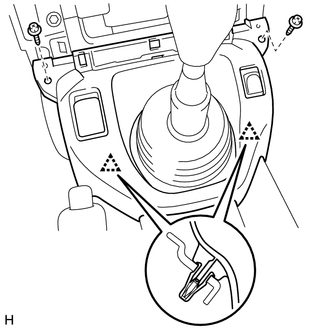
Remove the 2 screws.
Detach the 2 clips and remove the upper console panel.
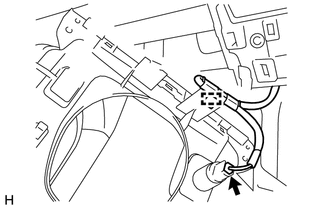
Disconnect the connector and detach the clamp.
58910C
12.REMOVE REAR CONSOLE BOX ASSEMBLY
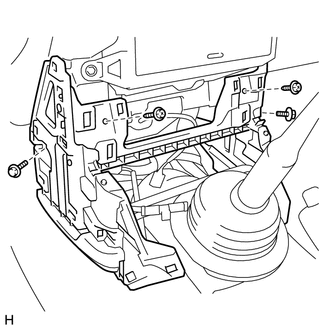
Remove the 2 screws, 2 bolts and rear console box.