1GD-FTV EMISSION CONTROL UREA PUMP INSTALLATION
PROCEDURE

 77871A
1.INSTALL UREA PUMP
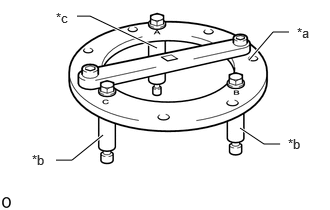
| *a | 09809-36010 |
| *b | 09809-60010 (09809-60020) |
| *c | 09809-60010 (09809-60030) |
Install SST (09809-60010) to SST (09809-36010) as shown in the illustration.
- SST
- 09809-36010 (09809-03010, 09809-03030, 09809-03040, 09809-03050)
09809-60010 (09809-60020, 09809-60030)
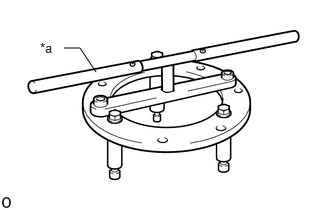
| *a | 09808-14031 |
Install SST (09808-14031) to SST (09809-36010).
- SST
- 09808-14031 (09808-01010)
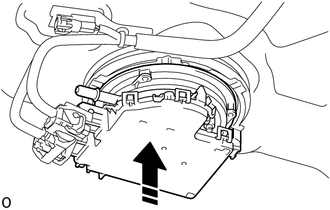
Install a new gasket to the urea pump.
Set the urea pump to the urea tank sub-assembly.
Turn the lock plate and temporarily install the urea pump.
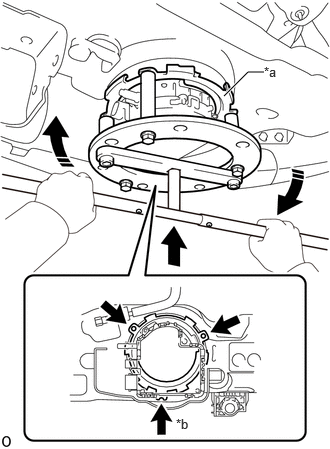
| *a | Lock Plate |
| *b | Cutout |
Align the SST (09809-60030) with the cutout of the lock plate.
Secure the lock plate.
- NOTICE:
- ·
Do not use any tools other than SST, such as screwdriver, etc.
·Make sure to rotate SST (handle) horizontally. If it is rotated at an angle, SST may come off.
·Do not use an impact wrench or turn SST handle with excessive force, as parts may be damaged.
77840
2.CONNECT UREA TUBE WITH HEATER ASSEMBLY
- NOTICE:
-
Check for dirt or mud on the urea pump and around the urea tube with heater connector before connection. Clean if necessary.
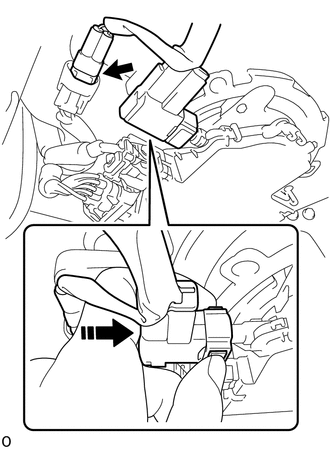
Connect the urea tube with heater assembly to the urea pump.
- NOTICE:
-
If there is any solidified urea solution (white solids) on the connection areas of the urea tube with heater assembly and urea pump, clean the solids off with water. Otherwise, they may prevent the O-ring from sealing properly.
Wash the connection area of the urea tube with heater connector with water to remove all solidified urea solution (white solids).
Wipe off the connection area of the urea pump with water to remove all solidified urea solution (white solids).
Align the axis of the connector with the axis of the urea pump. Push the urea tube connector into the urea pump until the urea tube connector makes a "click" sound.
After connecting the urea pump and the urea tube connector, check that the urea pump and urea tube connector are securely connected by trying to pull them apart.
Connect the connector to the No. 3 frame wire.
Attach the 2 clamps and connect the urea tube with heater assembly to the urea tank sub-assembly.
82169
3.CONNECT NO. 3 FRAME WIRE
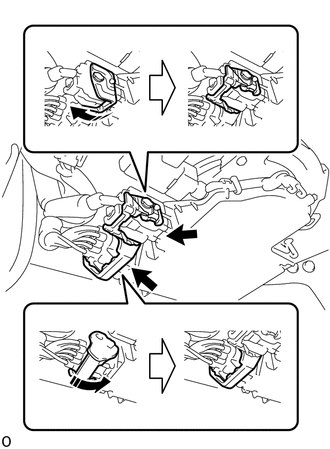
Connect the 2 connectors to the urea pump.
- NOTICE:
-
When connecting a connector, make sure that dirt, water and other foreign matter is not stuck between the connector and urea pump.
51226A
4.INSTALL FRONT SUSPENSION MEMBER BRACKET LH
5.ADD UREA SOLUTION (AdBlue)
77830A
6.INSTALL UREA TANK CAP ASSEMBLY