REMOVAL
Removal / installation · Vehicles built Sep 2011 – Dec 2011
Versions by build date: Sep 2011 – Dec 2011 from Jan 2012
- HINT:
- Use the same procedures for the LH side and RH side.
- The procedures listed below are for the LH side.
| 1.
DISCONNECT CABLE FROM NEGATIVE BATTERY TERMINAL |
|
| 2.
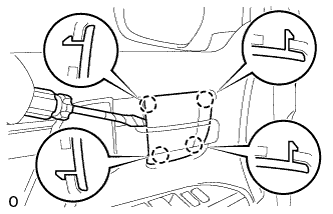
REMOVE FRONT DOOR INSIDE HANDLE BEZEL
|
 |
- Using a screwdriver, detach the 4 claws and remove the inside handle bezel.
- HINT:
- Tape the screwdriver tip before use.
| 3.
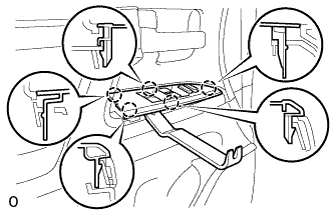
REMOVE FRONT DOOR ARMREST BASE PANEL ASSEMBLY
|
|
Using a moulding remover, detach the 5 claws.
Disconnect the connector and remove the armrest base panel.
| 4.
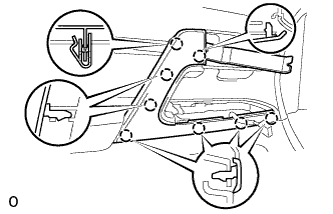
REMOVE DOOR ASSIST GRIP COVER
|
|
- Using a moulding remover, detach the 8 claws and remove the door assist grip cover.
| 5.
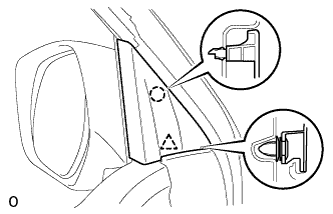
REMOVE FRONT DOOR LOWER FRAME BRACKET GARNISH
|
|
- Detach the clip and claw, remove the front lower door frame bracket garnish.
| 6.
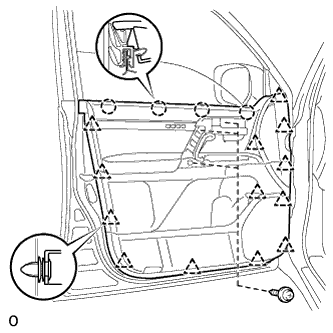
REMOVE FRONT DOOR TRIM BOARD SUB-ASSEMBLY
|
|
- Remove the 3 screws.
Remove the 13 clips, 4 claws and trim board.
Disconnect the connector.
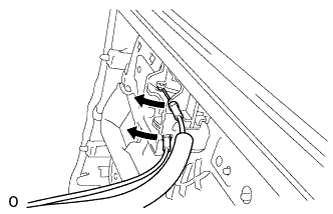
- Disconnect the 2 cables from the inside handle.
| 7.
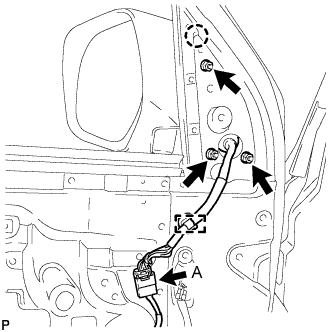
REMOVE OUTER REAR VIEW MIRROR ASSEMBLY |
|
w/ Power Mirror Control System:
Disconnect the connector labeled A.
Detach the clamp.
Remove the 3 nuts and claw.
Remove the outer rear view mirror.