INSTALLATION
Removal / installation · Vehicles built from Sep 2011
| 1. INSTALL REAR WIPER MOTOR GROMMET |

Apply MP grease to the entire inner surface of the rear wiper motor grommet.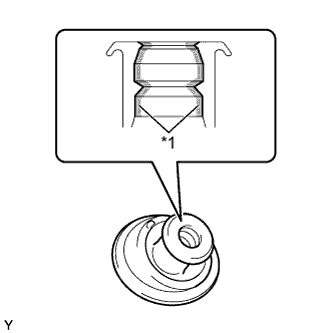

Text in Illustration *1
MP Grease
- HINT:
- Make sure that the hole does not get clogged with grease and the grooves in the grommet are filled with grease.
Install the rear wiper motor grommet.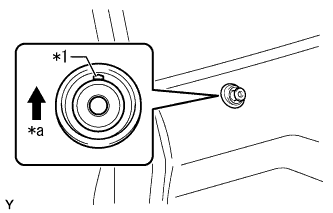
Text in Illustration *1
Position Mark
*a
Upward
- HINT:
- Install the grommet with its position mark facing up.
| 2. INSTALL REAR WIPER MOTOR ASSEMBLY |
Temporarily install the rear wiper motor assembly with the 3 bolts.
Tighten the 3 bolts.
- Torque:
- 5.5 N*m{ 56 kgf*cm , 49 in.*lbf }
Connect the connector.
| 3. INSTALL REAR WIPER ARM AND BLADE ASSEMBLY |
Clean the wiper arm serrations.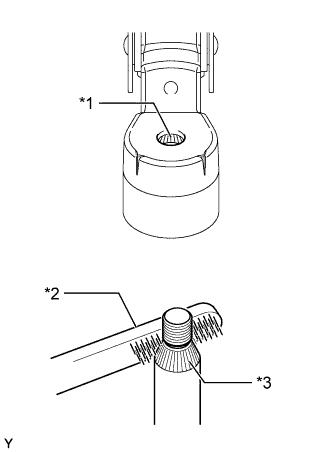
Text in Illustration *1
Wiper Arm Serrations
*2
Wire Brush
*3
Wiper Pivot Serrations
Clean the wiper pivot serrations with a wire brush.
Operate the rear wiper, and stop the rear wiper motor at the automatic stop position.
Align the tips of the blade with the marks as shown in the illustration.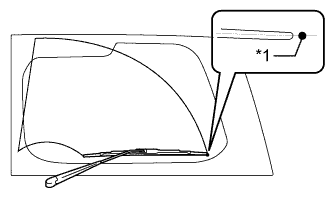
Text in Illustration *1
Mark for Blade Position
Install the rear wiper arm and blade assembly with the nut.
- Torque:
- 5.5 N*m{ 56 kgf*cm , 49 in.*lbf }
Close the wiper arm head cap.
| 4. INSTALL BACK DOOR TRIM PANEL ASSEMBLY RH |
Attach the 13 clips to install the back door trim panel.
| 5. INSTALL BACK DOOR TRIM COVER RH |
Attach the 2 claws and clamp.
Attach the 5 clips and 2 claws to install the back door trim cover.
| 6. INSTALL ASSIST GRIP RH |
Install the assist grip with the 2 bolts.
Attach the 2 claws to close the 2 covers.