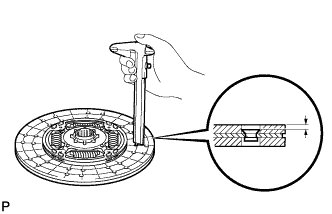
If the depth is less than the minimum, replace the clutch disc assembly.
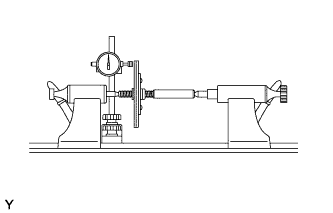
Using a dial indicator with a roller instrument, check the clutch disc runout.
Maximum Runout:
0.9 mm (0.0354 in.)
If the runout is more than the maximum, replace the clutch disc assembly.
INSPECT CLUTCH COVER ASSEMBLY
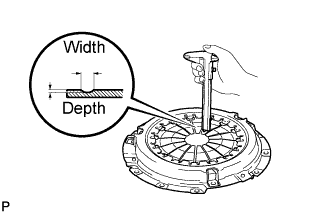
Using a vernier caliper, inspect the depth and width of wear of the diaphragm spring.
Maximum Wear:
Depth
Width
0.6 mm (0.0236 in.)
5.0 mm (0.197 in.)
If the wear is more than the maximum, replace the clutch cover assembly.
INSPECT FLYWHEEL SUB-ASSEMBLY
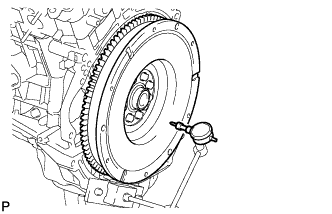
Using a dial indicator, inspect the flywheel runout.
Maximum Runout:
0.1 mm (0.00393 in.)
If the runout is more than the maximum, replace the flywheel sub-assembly.
INSPECT CLUTCH RELEASE BEARING ASSEMBLY
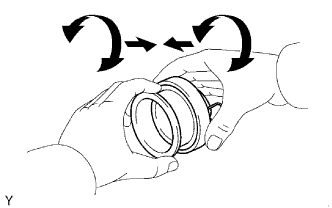
Check that the clutch release bearing moves smoothly without abnormal resistance by turning the sliding parts of the clutch release bearing (contact surfaces with the clutch cover) while applying force in the axial direction.
Inspect the clutch release bearing for damage or wear. Replace the release bearing assembly as necessary.
INSPECT INPUT SHAFT BEARING
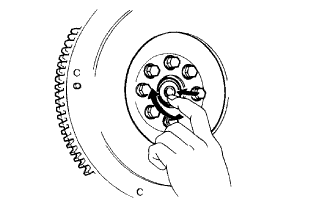
Turn the bearing by hand while applying force in the direction of the rotation. If the bearing is stuck or difficult to turn, replace the input shaft bearing.
HINT:
The bearing is permanently lubricated and requires no cleaning or lubrication.
REPLACE INPUT SHAFT BEARING
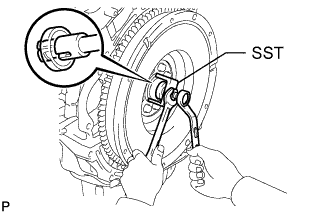
Using SST, remove the bearing.
SST
09303-35011
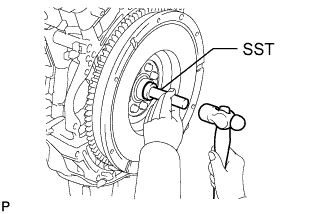
Using SST and a hammer, install a new bearing.
SST
09304-12012
HINT:
After installing the input shaft bearing to the engine side, make sure that it rotates smoothly.