REASSEMBLY
Removal / installation · Vehicles built from Jan 2012
- NOTICE:
- When installing parts, coat the parts indicated by arrows with power steering fluid (Click here).
| 1. INSTALL VANE PUMP HOUSING OIL SEAL |

Coat the lip of a new oil seal with power steering fluid.
Using SST and a press, press in the oil seal.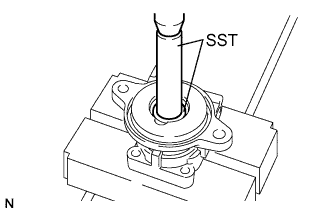

- SST
- 09950-60010
(09951-00320)
09950-70010 (09951-07150)
- NOTICE:
- Do not mistake the direction of the oil seal.
- Do not damage the oil seal.
- Do not mistake the direction of the oil seal.
| 2. INSTALL VANE PUMP SHAFT BEARING |
Using a brass bar and hammer, tap on a new snap ring.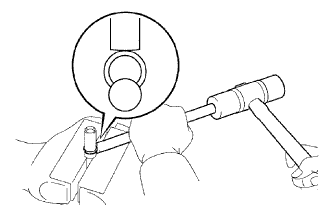
- NOTICE:
- Be careful not to damage the shaft.
Using a press, press in the shaft into a new bearing.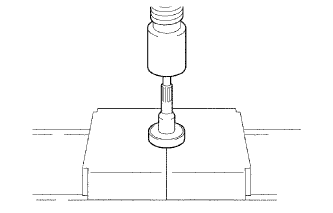
- NOTICE:
- Be careful not to damage the bearing.
| 3. INSTALL VANE PUMP SHAFT WITH VANE PUMP SHAFT BEARING |
Temporarily install the rear housing to the front housing.
Using SST and a press, press in the shaft with bearing into the front housing.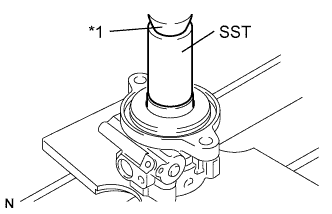
- SST
- 09632-36010
Text in Illustration *1
Press
Using a screwdriver, install a new snap ring into the front housing.
| 4. INSTALL VANE PUMP GEAR |
Using SST and a press, press in the gear to the shaft.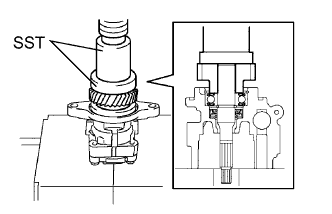
- SST
- 09950-60010
(09951-00420)
09950-70010 (09951-07150)
Remove the rear housing from the front housing.
| 5. INSTALL VANE PUMP FRONT SIDE PLATE |
Coat a new O-ring with power steering fluid and install it into the front housing.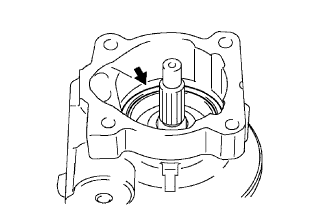
Coat the front side plate with power steering fluid.
Coat a new O-ring with power steering fluid and install it onto the front side plate.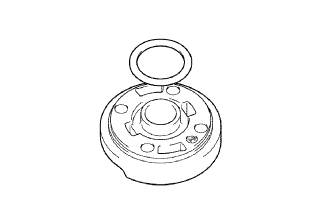
Align the notch of the front side plate with the notch of the front housing, and install the front side plate.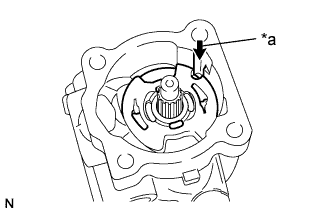
Text in Illustration *a
Align
- NOTICE:
- Make sure that the front side plate is installed facing in the correct direction.
| 6. INSTALL VANE PUMP CAM RING |
Coat the vane pump cam ring with power steering fluid
Align the notch of the cam ring with the notch of the front side plate, and install the cam ring with the inscribed mark facing upward.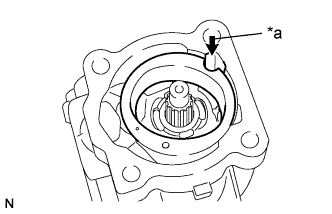
Text in Illustration *a
Align
- NOTICE:
- Make sure that the cam ring is installed facing in the correct direction.
| 7. INSTALL VANE PUMP ROTOR AND VANE PUMP PLATE |
Install the rotor with the inscribed mark facing upward.
Coat the 10 vane pump plates with power steering fluid.
Install the 10 vane pump plates with the round end facing upward.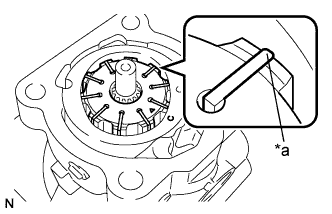
Text in Illustration *a
Round End
- NOTICE:
- Make sure that the 10 vane pump plates are installed facing in the correct direction.
| 8. INSTALL REAR VANE PUMP HOUSING |
Coat a new O-ring with power steering fluid and install it onto the rear housing.
Coat the straight pin of the rear vane pump housing with power steering fluid.
Align the straight pin of the rear vane pump housing with the notches of the cam ring, front side plate and front housing.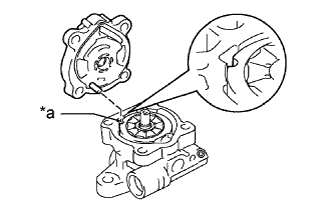
Text in Illustration *a
Align
- NOTICE:
- Make sure that the O-ring is not protruding anywhere when installing the vane pump rear housing.
Install the rear housing with the 4 bolts.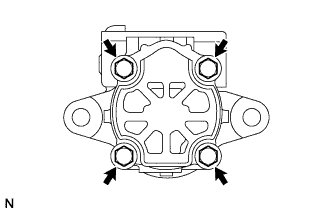
- Torque:
- 22 N*m{ 224 kgf*cm , 16 ft.*lbf }
| 9. INSTALL POWER STEERING SUCTION PORT UNION |
Coat a new O-ring with power steering fluid and install it to the suction port union.
Install the suction port union to the vane pump with the bolt.
- Torque:
- 12 N*m{ 122 kgf*cm , 9 ft.*lbf }
| 10. INSPECT TOTAL PRELOAD |
Check that the pump rotates smoothly without abnormal noise.
Temporarily install a service bolt.
- Recommended service bolt:
- Thread diameter:
- 10 mm (0.394 in.)
- Thread pitch:
- 1.25 mm (0.0492 in.)
- Bolt length:
- 50 mm (1.97 in.)
Using a torque wrench, measure the pump rotating torque.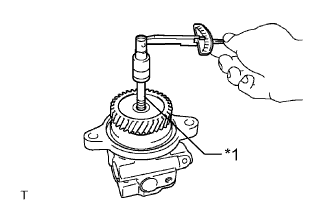
- Standard rotating torque:
- 0.27 N*m (2.8 kgf*cm, 2.4 in.*lbf) or less
If the rotating torque is not as specified, check the oil seal.Text in Illustration *1
Service Bolt