INSTALLATION
Removal / installation · Vehicles built from Jan 2012
Versions by build date: Sep 2011 – Dec 2011 from Jan 2012
| 1.
INSTALL TRANSFER ASSEMBLY |
 |
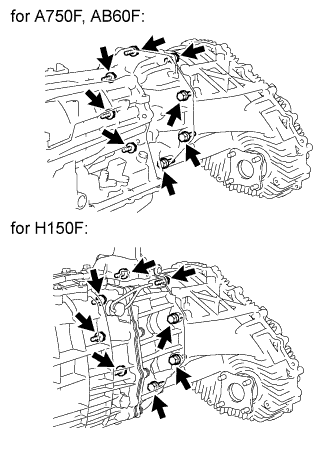
- Install the transfer with the 8 bolts.
-
Torque:
- 40 N*m{
408 kgf*cm
, 30 ft.*lbf
}
- NOTICE:
- Take care not to damage the adaptor oil seal with the transfer input shaft spline.
| 2.
INSTALL MANUAL TRANSMISSION WITH TRANSFER ASSEMBLY (for H150F) |
|
(Click here)
| 3.
INSTALL AUTOMATIC TRANSMISSION WITH TRANSFER ASSEMBLY (for AB60F) |
|
for 1VD-FTV:
(Click here)
for 1UR-FE:
(Click here)
for 3UR-FE:
(Click here)
| 4.
INSTALL AUTOMATIC TRANSMISSION WITH TRANSFER ASSEMBLY (for A750F) |
|
(Click here)
| 5.
ADD TRANSFER OIL
|
|
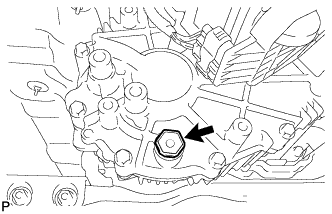
- Install a new gasket onto the drain plug and then install the plug.
-
Torque:
- 37 N*m{
377 kgf*cm
, 27 ft.*lbf
}
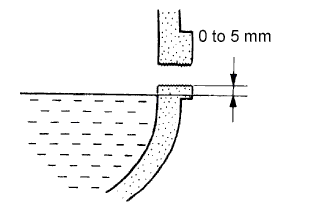
- Add oil so that the oil level is between 0 to 5.0 mm (0 to 0.197 in.) from the bottom lip of the filler plug hole.
- NOTICE:
- Add oil slowly.
- Add oil a little at a time, waiting several minutes between each addition of oil.
Wait approximately 5 minutes and check that the oil level has not changed.
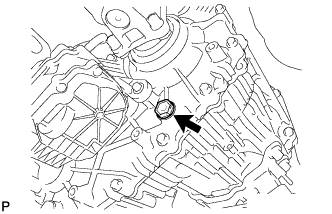
- Install a new gasket onto the filler plug and then install the plug.
-
Torque:
- 37 N*m{
377 kgf*cm
, 27 ft.*lbf
}
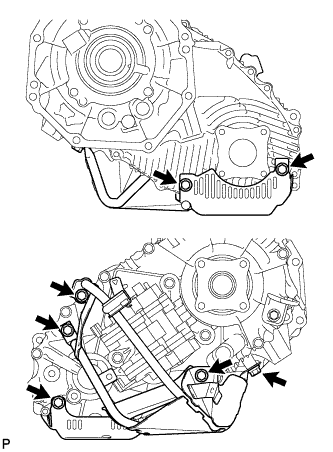
- Install the lower transfer case protector with the 7 bolts.
-
Torque:
- 14 N*m{
139 kgf*cm
, 10 ft.*lbf
}
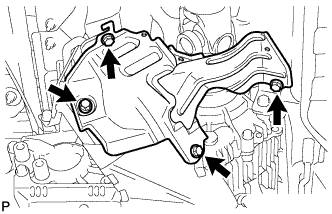
- Install the transfer heat insulator with the 4 bolts.
-
Torque:
- 30 N*m{
306 kgf*cm
, 22 ft.*lbf
}
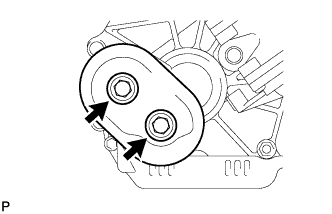
- except 1GR-FE:
Install the transfer dynamic damper with the 2 bolts.
-
Torque:
- 12 N*m{
122 kgf*cm
, 9 ft.*lbf
}
| 6.
CHECK FOR TRANSFER OIL LEAK |
|