REMOVAL
Removal / installation · Vehicles built Sep 2011 – Dec 2011
Versions by build date: Sep 2011 – Dec 2011 from Jan 2012
- HINT:
- Use the same procedures for the RH side and LH side.
- The procedures listed below are for the LH side.
- Use the same procedures for the RH side and LH side.
| 1. REMOVE STABILIZER CONTROL VALVE PROTECTOR (w/ KDSS) |

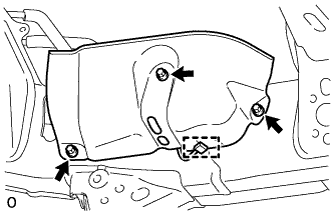  |
Detach the clamp, and disconnect the connector from the protector.
Remove the 3 bolts and protector.
| 2. OPEN STABILIZER CONTROL WITH ACCUMULATOR HOUSING SHUTTER VALVE (w/ KDSS) |
Using a 5 mm hexagon socket wrench, loosen the lower and upper chamber shutter valves of the stabilizer control with accumulator housing 2.0 to 3.5 turns.
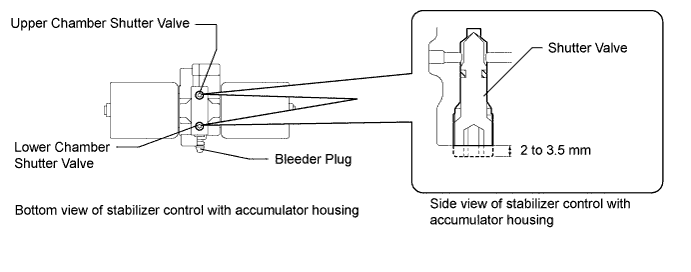
- NOTICE:
- When loosening a shutter valve, make sure that the end protrudes 2 to 3.5 mm (0.0787 to 0.137 in.) from the surface of the block, and do not turn the shutter valve any further.
- Do not remove the shutter valves.
- When loosening a shutter valve, make sure that the end protrudes 2 to 3.5 mm (0.0787 to 0.137 in.) from the surface of the block, and do not turn the shutter valve any further.
| 3. REMOVE FRONT WHEEL |
| 4. REMOVE FRONT FENDER SPLASH SHIELD SUB-ASSEMBLY LH |
 |
Remove the 3 bolts and screw.
Turn the clip indicated by the arrow in the illustration to remove the fender splash shield.
| 5. REMOVE FRONT FENDER SPLASH SHIELD SUB-ASSEMBLY RH |
- HINT:
- Use the same procedures described for the LH side.
| 6. REMOVE NO. 1 ENGINE UNDER COVER SUB-ASSEMBLY |
Remove the 10 bolts and No. 1 engine under cover.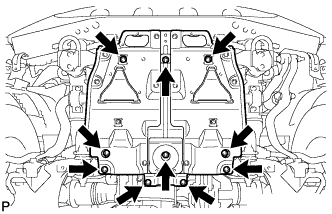
| 7. LOOSEN FRONT NO. 1 STABILIZER BRACKET LH |
Loosen the 2 bolts of the front stabilizer brackets.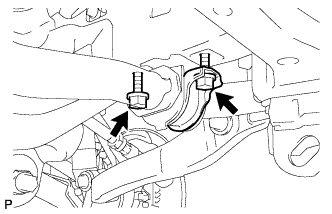
| 8. LOOSEN FRONT NO. 1 STABILIZER BRACKET RH |
Loosen the 2 bolts of the front stabilizer brackets.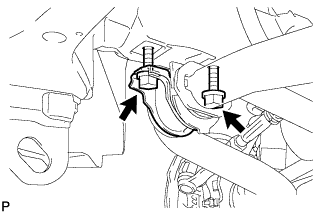
| 9. REMOVE FRONT STABILIZER LINK ASSEMBLY LH (w/ KDSS) |
Remove the 2 bolts, nut and stabilizer link.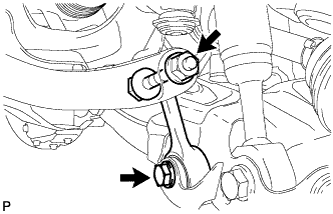
| 10. REMOVE FRONT STABILIZER LINK ASSEMBLY LH (w/o KDSS) |
Remove the bolt, nut and stabilizer link.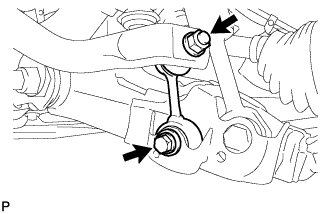
| 11. REMOVE FRONT STABILIZER LINK ASSEMBLY RH |
Remove the bolt, nut and stabilizer link.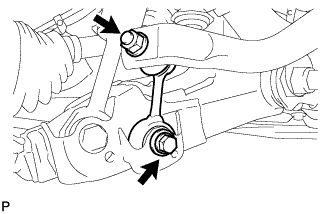
- HINT:
- If the ball joint turns together with the nut, use a 6 mm hexagon wrench to hold the stud.
| 12. DISCONNECT FRONT SHOCK ABSORBER WITH COIL SPRING LH |
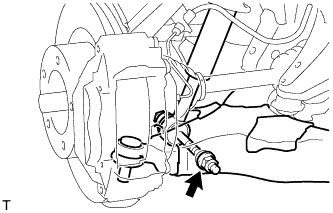 |
Remove the nut and bolt, and disconnect the shock absorber from the lower side.
| 13. DISCONNECT FRONT LOWER BALL JOINT ATTACHMENT LH |
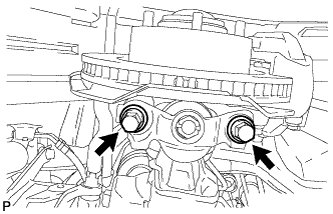 |
Remove the 2 bolts and disconnect the attachment from the steering knuckle.
| 14. REMOVE FRONT NO. 1 SUSPENSION ARM LOWER SUB-ASSEMBLY LH |
Support the front suspension LH with a jack.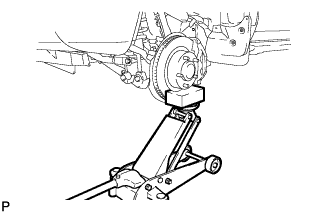
Place matchmarks on the No. 2 camber adjusting cam and No. 2 suspension toe adjusting plate.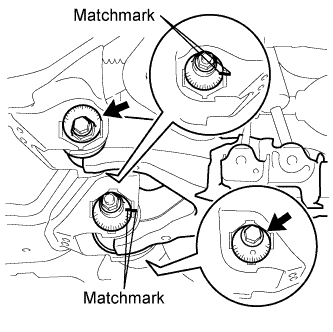
Remove the nut, washer, No. 2 camber adjusting cam, camber adjusting cam assembly, bolt, toe adjusting cam, No. 2 suspension toe adjusting plate and front No. 1 suspension arm lower LH.
| 15. REMOVE FRONT LOWER BALL JOINT ATTACHMENT LH |
Remove the cotter pin and nut.
Using SST, remove the lower ball joint attachment.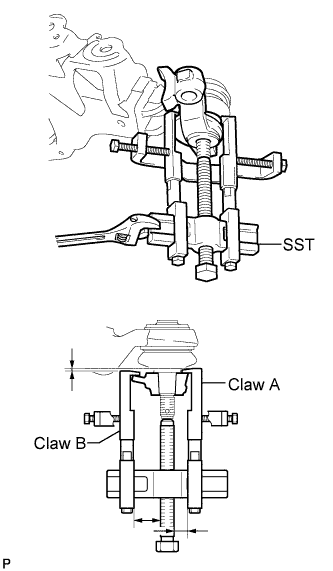
- SST
- 09950-40011
(09951-04010, 09953-04020, 09954-04010, 09955-04031, 09958-04011, 09952-04010)
09955-04090
- HINT:
- Claw A 09955-04090
- Claw B 09955-04031