REMOVAL
Removal / installation · Vehicles built Sep 2011 – Dec 2011
Versions by build date: Sep 2011 – Dec 2011 from Jan 2012
| 1.
DISCONNECT CABLE FROM NEGATIVE BATTERY TERMINAL |
 |
- NOTICE:
- When disconnecting the cable, some systems need to be initialized after the cable is reconnected (Click here)
| 2.
REMOVE FRONT FENDER SPLASH SHIELD SUB-ASSEMBLY RH
|
|
- HINT:
- Use the same procedures described for the LH side.
| 3.
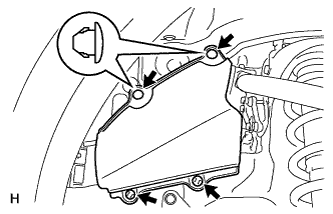
REMOVE FRONT FENDER SPLASH SHIELD SUB-ASSEMBLY LH
|
|
Remove the 3 bolts and screw.
Turn the clip indicated by the arrow in the illustration to remove the fender splash shield.
| 4.
REMOVE NO. 1 ENGINE UNDER COVER SUB-ASSEMBLY
|
|
- Remove the 10 bolts and under cover.
| 5.
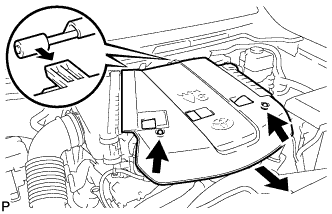
REMOVE V-BANK COVER
|
|
- Remove the 2 cap nuts and V-bank cover.
| 6.
REMOVE FRONT FENDER APRON SEAL LH
|
|
Remove the 4 clips and seal.
| 7.
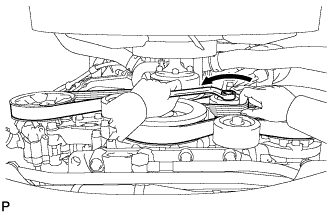
REMOVE FAN & GENERATOR V BELT
|
|
- While releasing the belt tension by turning the belt tensioner counterclockwise, remove the fan and generator V belt from the belt tensioner.
| 8.
REMOVE GENERATOR ASSEMBLY
|
|
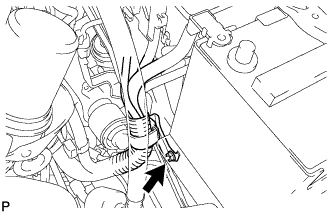
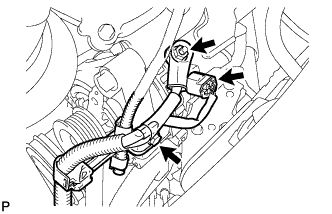
- Remove the nut and disconnect the wire harness clamp bracket.
- Disconnect the generator connector.
Remove the terminal cap.
Remove the nut and disconnect the generator wire.
Remove the wire harness clamp.
Remove the bolt and disconnect the wire harness clamp bracket.
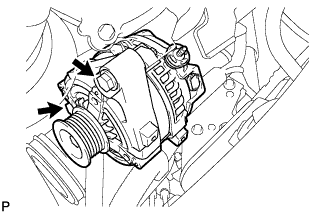
- Remove the 2 bolts and generator.
| 9.
DISCONNECT COOLER COMPRESSOR ASSEMBLY
|
|
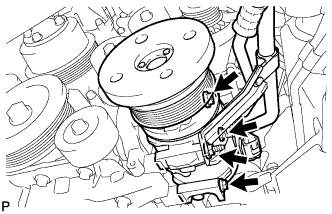
Disconnect the cooler compressor connector.
- Remove the nut, 3 bolts and stud bolt, and disconnect the cooler compressor.
| 10.
REMOVE CRANKSHAFT POSITION SENSOR |
|
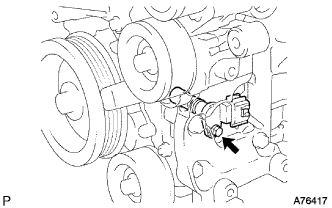
- Disconnect the sensor connector.
Remove the bolt and sensor.