INSTALLATION
Removal / installation · Vehicles built from Sep 2011
| 1. INSTALL HEATED OXYGEN SENSOR (for Bank 1 Sensor 2) |

Temporarily install the sensor to the exhaust pipe by hand.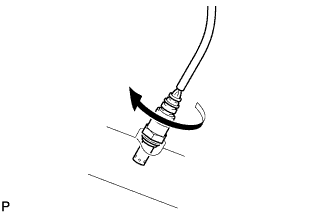

Using SST, tighten the sensor.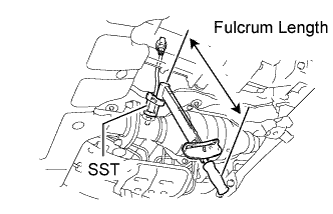
- SST
- 09224-00010
- Torque:
- without SST:
- 44 N*m{ 449 kgf*cm , 32 ft.*lbf }
- with SST:
- 40 N*m{ 408 kgf*cm , 30 ft.*lbf }
- HINT:
- Use a torque wrench with a fulcrum length of 30 cm (11.8 in.). If using a torque wrench with a length that is not 30 cm (11.8 in.), calculate the torque specification for the torque wrench and SST based on the "without SST" torque specification (Click here).
- Make sure SST and the wrench are connected in a straight line.
- Use a torque wrench with a fulcrum length of 30 cm (11.8 in.). If using a torque wrench with a length that is not 30 cm (11.8 in.), calculate the torque specification for the torque wrench and SST based on the "without SST" torque specification (Click here).
Connect the sensor connector.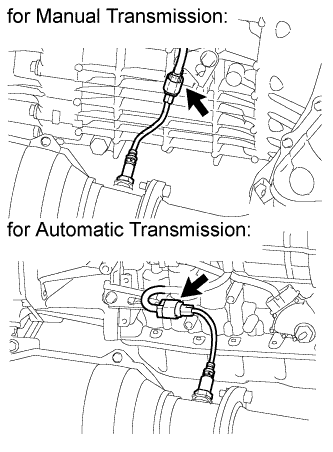
| 2. INSTALL HEATED OXYGEN SENSOR (for Bank 2 Sensor 2) |
Temporarily install the sensor to the exhaust pipe by hand.
Using SST, tighten the sensor.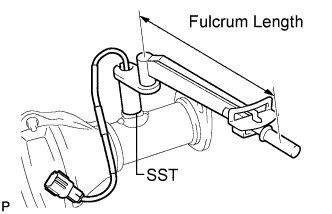
- SST
- 09224-00010
- Torque:
- without SST:
- 44 N*m{ 449 kgf*cm , 32 ft.*lbf }
- with SST:
- 40 N*m{ 408 kgf*cm , 30 ft.*lbf }
- HINT:
- Use a torque wrench with a fulcrum length of 30 cm (11.8 in.). If using a torque wrench with a length that is not 30 cm (11.8 in.), calculate the torque specification for the torque wrench and SST based on the "without SST" torque specification (Click here).
- Make sure SST and the wrench are connected in a straight line.
- Use a torque wrench with a fulcrum length of 30 cm (11.8 in.). If using a torque wrench with a length that is not 30 cm (11.8 in.), calculate the torque specification for the torque wrench and SST based on the "without SST" torque specification (Click here).
| 3. INSTALL FRONT NO. 2 EXHAUST PIPE ASSEMBLY |
Install 2 new gaskets to the front No. 2 exhaust pipe.
Connect the front No. 2 exhaust pipe to the exhaust manifold LH with 2 new nuts.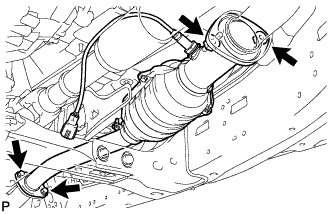
- Torque:
- 54 N*m{ 554 kgf*cm , 40 ft.*lbf }
Connect the front No. 2 exhaust pipe to the center exhaust pipe with the 2 bolts.
- Torque:
- 48 N*m{ 489 kgf*cm , 35 ft.*lbf }
Connect the heated oxygen sensor connector.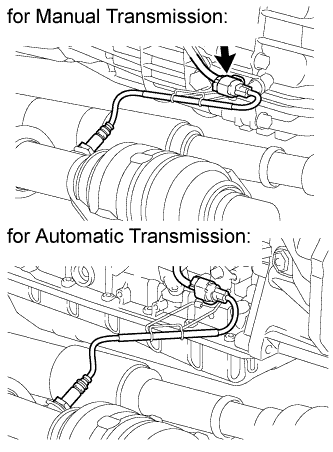
- HINT:
- Hook the wire harness to the bracket.
| 4. INSPECT FOR EXHAUST GAS LEAK |