REMOVAL
Removal / installation · Vehicles built Sep 2011 – Dec 2011
Versions by build date: Sep 2011 – Dec 2011 from Jan 2012
| 1.
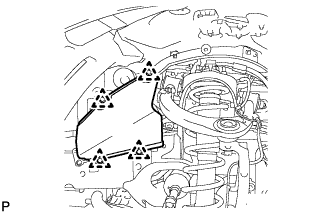
REMOVE FRONT FENDER APRON SEAL LH
|
 |
- Using a clip remover, remove the 4 clips and fender apron seal.
| 2.
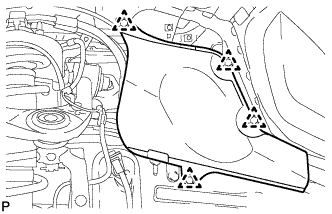
REMOVE FRONT FENDER APRON SEAL REAR LH
|
|
- Using a clip remover, remove the 4 clips and fender apron seal.
| 3.
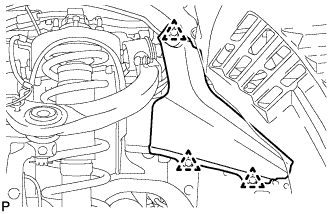
REMOVE FRONT FENDER APRON SEAL FRONT RH
|
|
- Using a clip remover, remove the 3 clips and fender apron seal.
| 4.
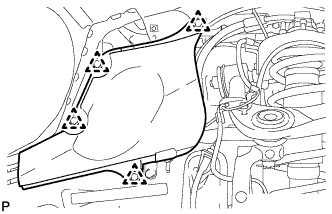
REMOVE FRONT FENDER APRON SEAL REAR RH
|
|
- Using a clip remover, remove the 4 clips and fender apron seal.
| 5.
REMOVE FRONT NO. 2 EXHAUST PIPE ASSEMBLY
|
|
Disconnect the heated oxygen sensor connector.
Remove the 2 bolts from the center exhaust pipe.
Remove the 2 bolts, 2 nuts and front No. 2 exhaust pipe.
Remove the 2 gaskets from the front No. 2 exhaust pipe.
| 6.
REMOVE FRONT EXHAUST PIPE ASSEMBLY
|
|
Disconnect the heated oxygen sensor connector.
Remove the 2 bolts with the 2 compression springs from the center exhaust pipe.
Remove the 2 nuts and front exhaust pipe.
Remove the 2 gaskets from the front exhaust pipe.
| 7.
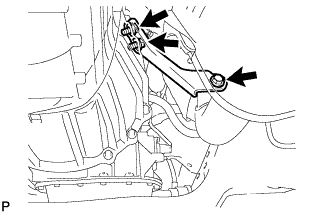
REMOVE MANIFOLD STAY
|
|
- Remove the 3 bolts and No. 1 manifold stay.
| 8.
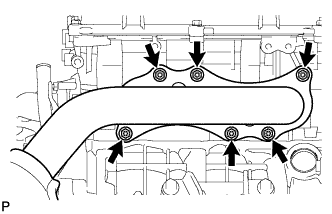
REMOVE EXHAUST MANIFOLD SUB-ASSEMBLY RH
|
|
Disconnect the air fuel ratio sensor connector.
- Remove the 6 nuts, exhaust manifold and gasket from the cylinder head RH.
| 9.
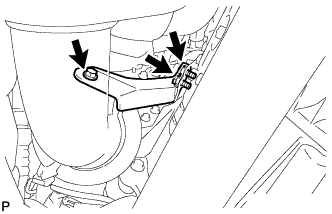
REMOVE NO. 2 MANIFOLD STAY
|
|
- Remove the 3 bolts and No. 2 manifold stay.
| 10.
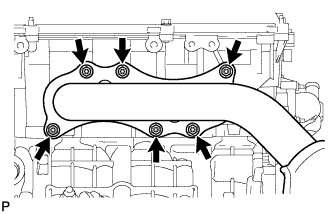
REMOVE EXHAUST MANIFOLD SUB-ASSEMBLY LH
|
|
Disconnect the air fuel ratio sensor connector.
- Remove the 6 nuts, exhaust manifold and gasket from the cylinder head LH.
| 11.
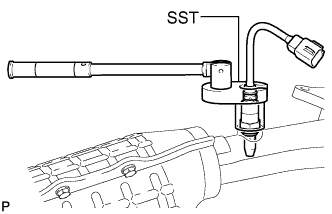
REMOVE AIR FUEL RATIO SENSOR (for Bank 1 Sensor 1) |
|
- Using SST, remove the sensor.
- SST
- 09224-00010
| 12.
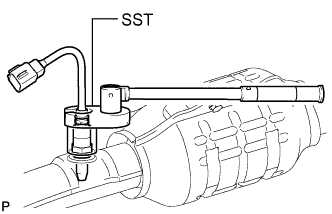
REMOVE AIR FUEL RATIO SENSOR (for Bank 2 Sensor 1) |
|
- Using SST, remove the sensor.
- SST
- 09224-00010