INSTALLATION
Removal / installation · Vehicles built from Jan 2012
Versions by build date: Sep 2011 – Dec 2011 from Jan 2012
- HINT:
- Use the same procedures for the LH side and RH side.
- The procedures listed below are for the LH side.
| 1.
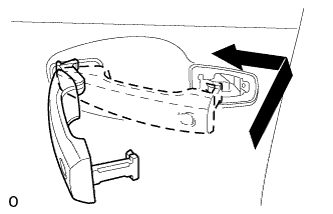
INSTALL FRONT DOOR HANDLE ASSEMBLY OUTSIDE LH |
 |
- Install the handle by pushing it in the direction of the arrow in the illustration.
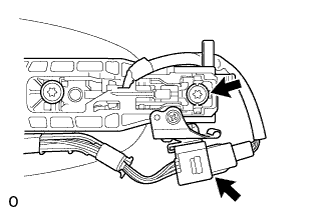
- Using a T30 ''TORX'' socket, install the screw.
Connect the connector.
| 2.
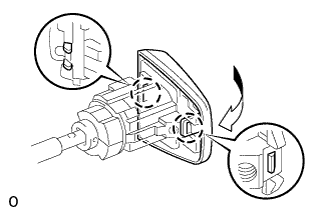
INSTALL FRONT DOOR OUTSIDE HANDLE COVER LH
|
|
- Attach the 2 claws to install the front door outside handle cover to the front door lock cylinder.
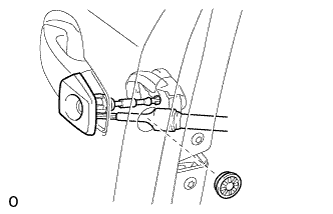
- Using a T30 ''TORX'' socket, install the cover (with the door lock cylinder) with the screw.
-
Torque:
- 4.0 N*m{
41 kgf*cm
, 35 in.*lbf
}
Install the hole plug.
| 3.
INSTALL FRONT DOOR SERVICE HOLE COVER LH
|
|
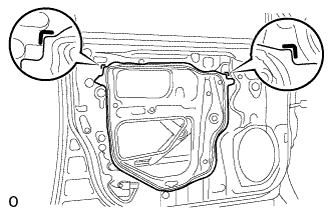
- Apply butyl tape to the door.
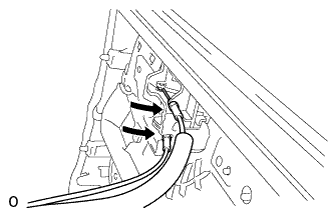
Pass the front door lock remote control cable and front door inside locking cable through a new front door service hole cover.
- NOTICE:
- When installing the service hole cover, pull the links and connectors through the service hole cover.
- There should be no wrinkles or folds after attaching the service hole cover.
- After attaching the service hole cover, check the sealing quality.
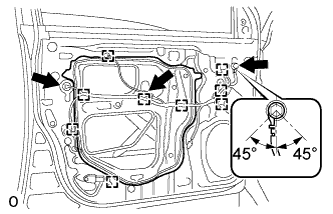
- Connect the 2 connectors.
Attach the 9 clamps.
Install the bolt as shown in the illustration.
-
Torque:
- 8.4 N*m{
86 kgf*cm
, 74 in.*lbf
}
| 4.
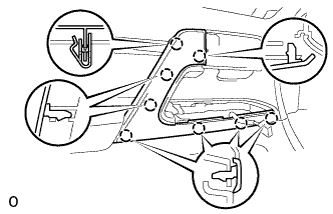
INSTALL FRONT DOOR TRIM BOARD SUB-ASSEMBLY LH
|
|
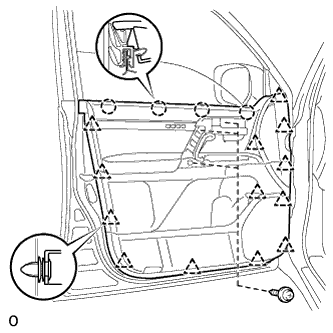
Connect the connector.
- Connect the front door lock remote control cable and front door inside locking cable to the front door inside handle sub-assembly.
- Attach the 4 claws and 13 clips to install the front door trim board sub-assembly.
Install the 3 screws.
| 5.
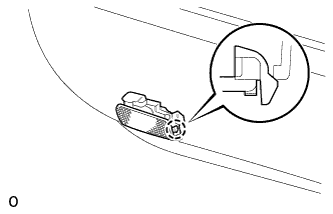
INSTALL COURTESY LIGHT ASSEMBLY (w/ Courtesy Light)
|
|
- Connect the connector.
Attach the claw of the courtesy light to the front door trim.
| 6.
INSTALL DOOR ASSIST GRIP COVER LH
|
|
- Attach the 8 claws to install the door assist grip cover to the door trim panel.
| 7.
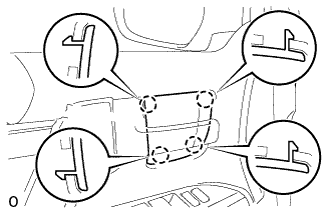
INSTALL FRONT DOOR INSIDE HANDLE BEZEL LH
|
|
- Attach the 4 claws to install the bezel.
| 8.
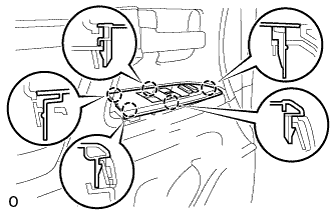
INSTALL FRONT DOOR ARMREST BASE PANEL ASSEMBLY LH
|
|
Connect the connector.
- Attach the 5 claws to install the armrest base panel.
| 9.
INSTALL FRONT LOWER DOOR FRAME BRACKET GARNISH LH
|
|
- Attach the clip and claw, and install the front door lower frame bracket garnish.
| 10.
CONNECT CABLE TO NEGATIVE BATTERY TERMINAL |
|
- NOTICE:
- When disconnecting the cable, some systems need to be initialized after the cable is reconnected (Click here).
| 11.
CHECK SRS WARNING LIGHT |
|
Check the SRS warning light (Click here).