REMOVAL
Removal / installation · Vehicles built from Jan 2012
Versions by build date: Sep 2011 – Dec 2011 from Jan 2012
| 1.
REMOVE FUEL TANK SUB-ASSEMBLY |
 |
(Click here)
| 2.
REMOVE FUEL TANK MAIN TUBE, FUEL TANK RETURN TUBE AND NO. 2 FUEL TANK MAIN TUBE SUB-ASSEMBLY
|
|
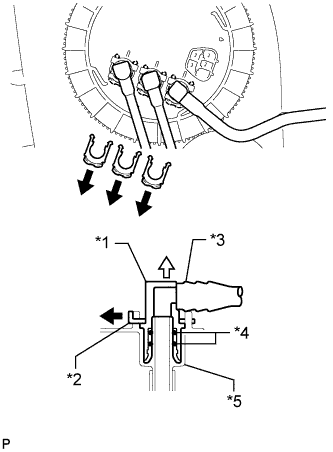
- Remove the 3 fuel tube joint clips and pull out the 3 fuel tubes.
- NOTICE:
- Remove any dirt and foreign matter on the fuel tube joint before performing this work.
- Do not allow any scratches or foreign matter on the parts when disconnecting them, as the fuel tube joint contains the O-rings that seal the plug.
- Perform this work by hand. Do not use any tools.
- Do not forcibly bend, twist or turn the nylon tube.
- Protect the disconnected part by covering it with a plastic bag and tape after disconnecting the fuel tubes.
Text in Illustration
*1
|
Tube Joint
|
*2
|
Tube Joint Clip
|
*3
|
Fuel Tank Tube
|
*4
|
O-Ring
|
*5
|
Fuel Suction Plate
|
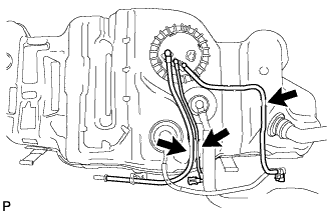
- Remove the 3 fuel tubes from the fuel tank.
| 3.
REMOVE FUEL SUCTION WITH PUMP AND GAUGE TUBE ASSEMBLY |
|
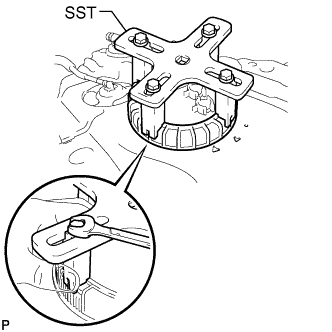
- Set SST on the retainer.
- SST
- 09808-14030
- HINT:
- Securely attach the claws of SST to the protrusion of the retainer and fix SST in place.
- Install SST while pressing the claws of SST against the retainer (towards the center of SST).
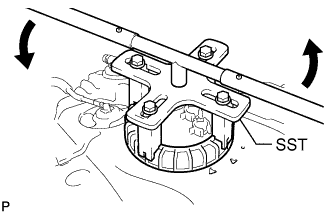
- Using SST, loosen the retainer.
- SST
- 09808-14030
Text in Illustration
 
|
Turn
|
- NOTICE:
- Do not use any tools other than those specified in this operation. Damage to the retainer or the fuel tank may result.
- While pressing down on SST so that the claws of SST do not slip off the protrusion of the retainer, turn the retainer counterclockwise to loosen it.
- HINT:
- The protrusion of the retainer fits in the ends of SST.
Remove the retainer while holding the fuel suction tube assembly by hand.
Remove the gasket from the fuel tank.