1.
REMOVE HEADLIGHT LIGHT CONTROL ECU SUB-ASSEMBLY LH
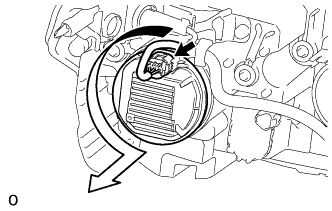
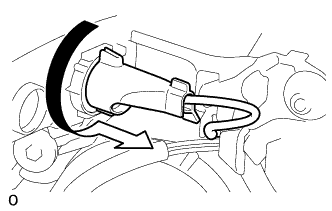
Disconnect the connector.
Turn the headlight light control ECU sub-assembly LH in the direction indicated by the arrow in the illustration and disconnect the headlight light control ECU sub-assembly LH.
NOTICE:
Do not apply excessive force using a tool.
Do not damage the headlight gasket or allow it to become contaminated with foreign matter. If the headlight gasket is damaged or contaminated, water may get into the headlight assembly, resulting in a malfunction of the headlight light control ECU sub-assembly LH.
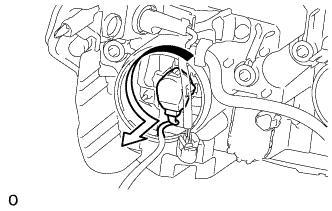
Turn the headlight light control ECU sub-assembly LH socket in the direction indicated by the arrow in the illustration and disconnect the headlight light control ECU sub-assembly LH socket to remove the headlight light control ECU sub-assembly LH.
NOTICE:
Do not pull the headlight light control ECU sub-assembly LH with the socket connected.
2.
REMOVE HEADLIGHT GASKET
Remove the headlight gasket from the headlight light control ECU sub-assembly LH.
3.
REMOVE DISCHARGE HEADLIGHT BULB
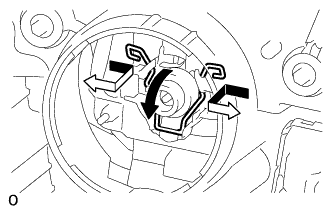
Release the set spring lock as shown in the illustration and remove the discharge headlight bulb.
NOTICE:
Do not touch the glass part of the discharge headlight bulb.
4.
REMOVE NO. 1 HEADLIGHT BULB
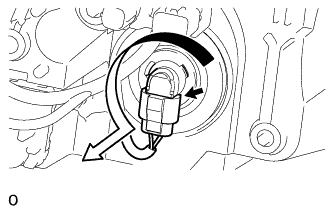
Disconnect the connector.
Turn the No. 1 headlight bulb in the direction indicated by the arrow in the illustration and remove the No. 1 headlight bulb.
NOTICE:
Do not touch the glass part of the No. 1 headlight bulb.
5.
REMOVE FRONT TURN SIGNAL LIGHT BULB
Turn the socket in the direction indicated by the arrow in the illustration and remove the socket.
Remove the front turn signal light bulb from the socket.
6.
REMOVE HEADLIGHT LEVELING MOTOR LH
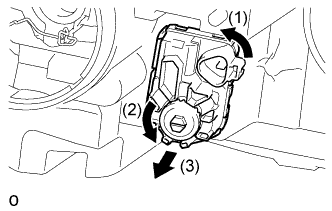
Type 1:
Disconnect the connector.
Turn the motor in the direction indicated by the arrow (1) in the illustration to disconnect it.
Turn the aiming screw in the direction indicated by the arrow (2) in the illustration to disconnect the shaft.
Pull the headlight leveling motor LH in the direction indicated by the arrow (3) in the illustration to remove it.
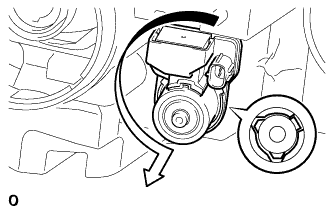
Type 2:
Align the notches of the headlight leveling motor and the housing, and pull out the headlight leveling motor slightly.
HINT:
For the headlight leveling motor RH, rotate it symmetrical to the directional arrow shown in the illustration.
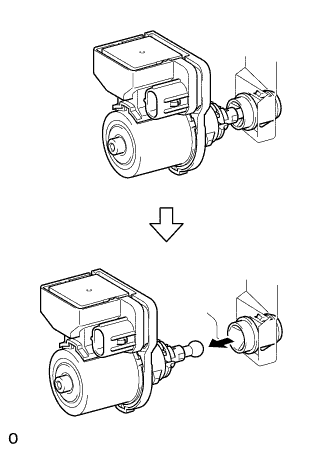
Pull the headlight leveling motor to disengage it from the reflector and remove the headlight leveling motor.