REASSEMBLY
Removal / installation · Vehicles built Sep 2011 – Dec 2011
Versions by build date: Sep 2011 – Dec 2011 from Jan 2012
| 1. INSTALL ANTENNA CORD SUB-ASSEMBLY |

w/o Sliding Roof:
Apply new double-sided tape as shown in the illustration.
- HINT:
- Attach double-sided tape to the hatched areas shown in the illustration below.
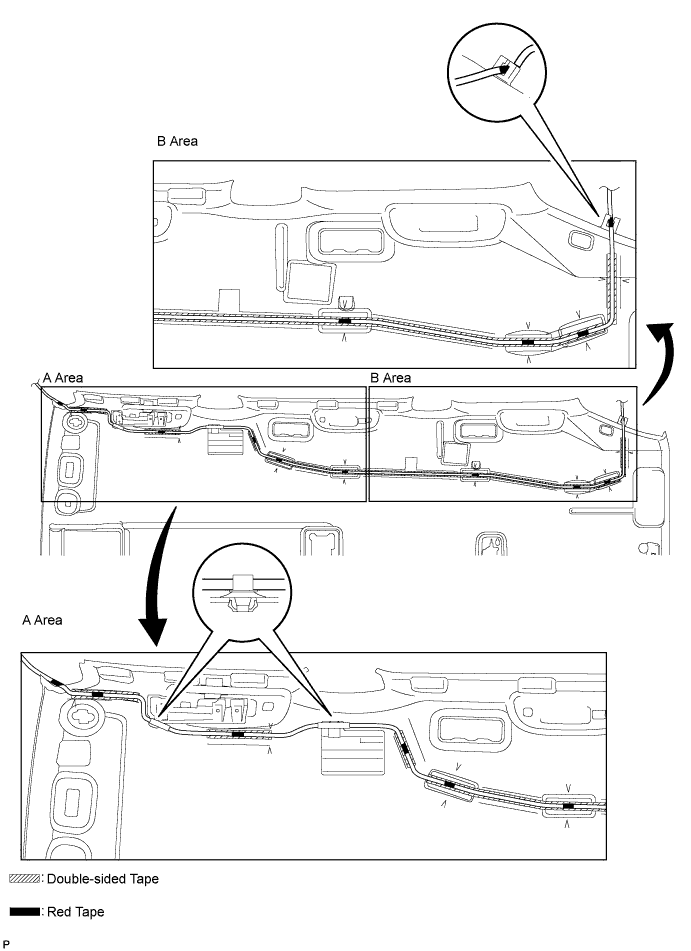

Align the red tape wound around the antenna cord with the V markings on the roof headlining and the notch at the rear of the headlining, and attach the antenna cord to the double-sided tape.
Attach the 2 clamps and fit the antenna into the notch.
w/ Sliding Roof:
Apply new double-sided tape as shown in the illustration.
- HINT:
- Attach double-sided tape to the hatched areas shown in the illustration below.
-
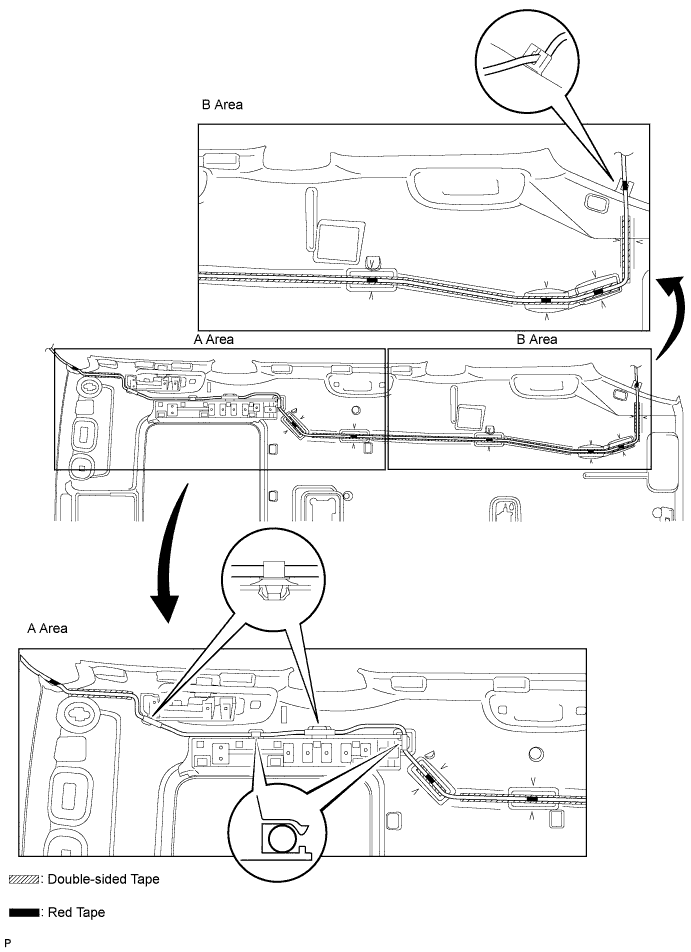
Align the red tape wound around the antenna cord with the V markings on the roof headlining and the notch at the rear of the headlining, and attach the antenna cord to the double-sided tape.
Attach the 4 clamps and fit the antenna into the notch.
| 2. INSTALL NO. 1 ROOF WIRE |
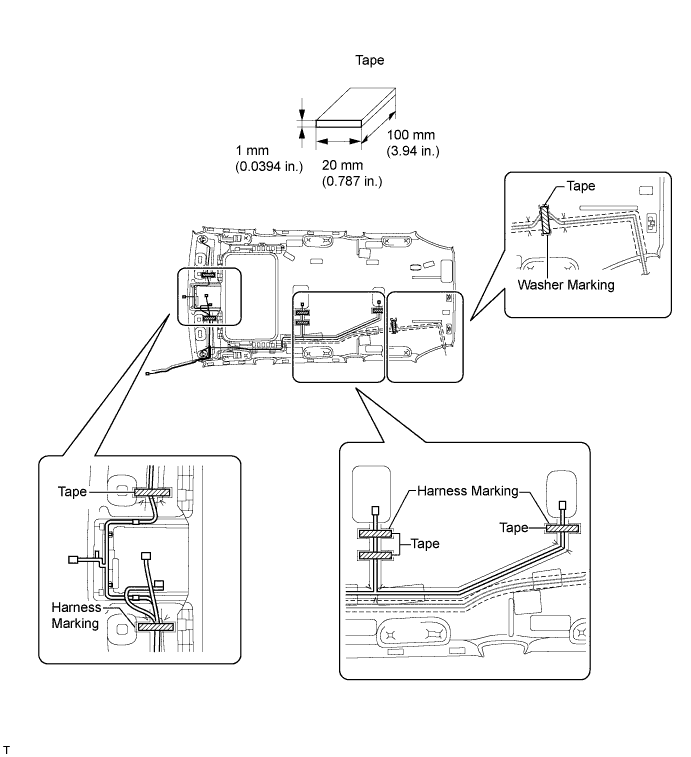
Place double-sided tape along the center of the harness marking and washer marking.
- HINT:
- Make sure that the double-sided tape is not peeling off or misaligned.
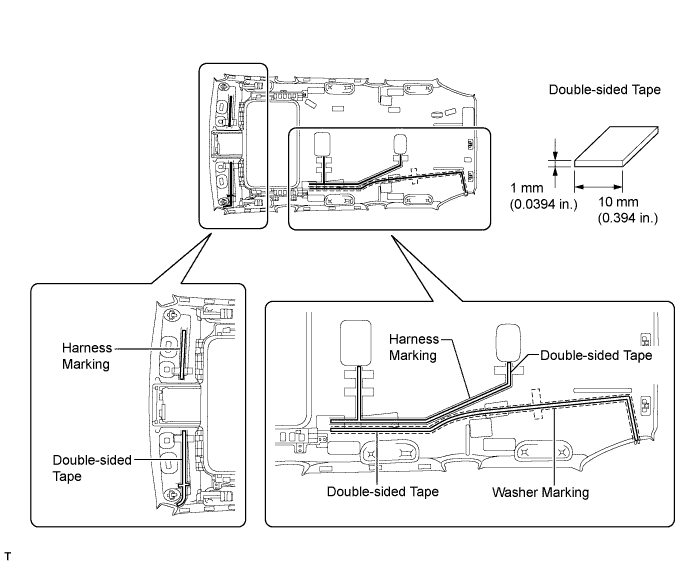
Remove the peeling paper from the double-sided tape while not touching the adhesive side.
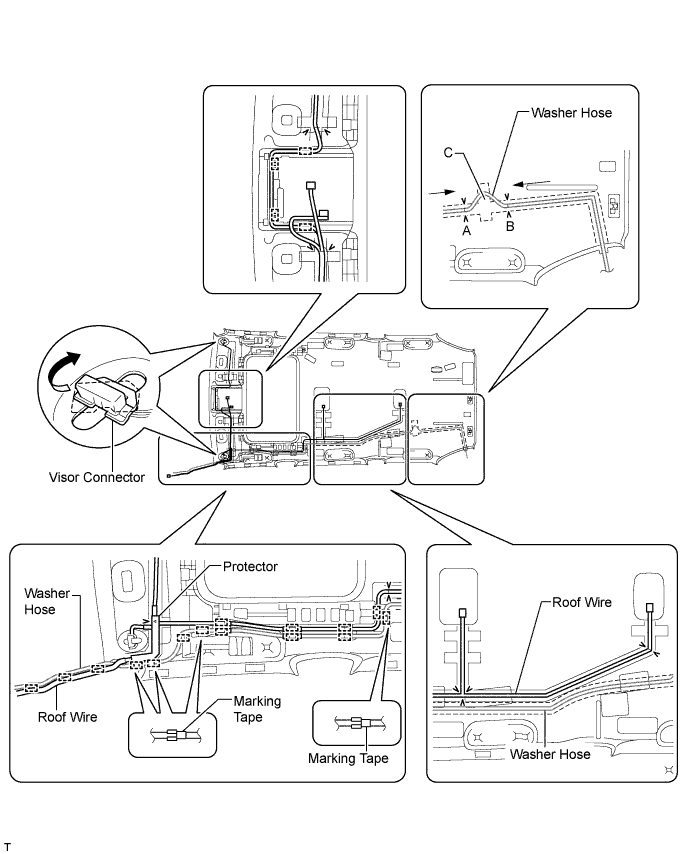
Align the triangle mark of the roof wire protector with the V mark of the headlining as shown in the illustration, and then attach the roof wire protector.
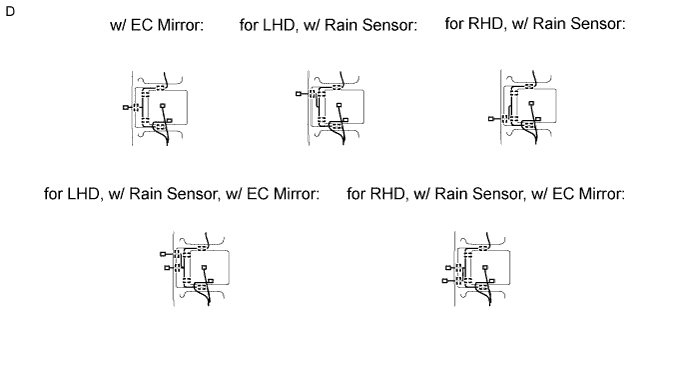
Attach each clamp as shown in the illustration.
- HINT:
- The positions of the clamps at the front of the roof headlining are shown in illustration D.
Align the roof wire and washer hose with the V marks of the headlining as shown in the illustration, and attach them to the headlining.
- HINT:
- Attach the washer hose from the front to the point labeled A, and attach the washer hose from the rear to the point labeled B as shown in the illustration.
- Attach the extra length of the washer hose to the part labeled C in the illustration.
- Attach the washer hose from the front to the point labeled A, and attach the washer hose from the rear to the point labeled B as shown in the illustration.
Turn the visor connectors approximately 90° clockwise to install them to the roof headlining.
Place tape at the wire harness marking and washer marking locations as shown in the illustration to fix the roof wire and washer hose in place.
- HINT:
- Apply sufficient pressure when placing tape.
| 3. INSTALL NO. 4 ROOF SILENCER PAD |
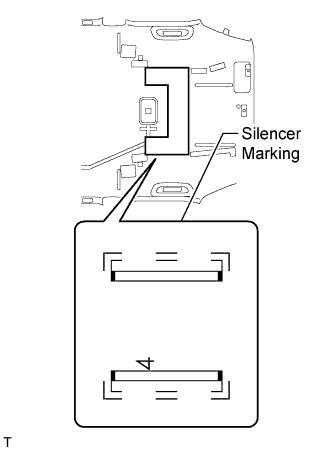 |
Align the silencer marking on the roof headlining with the roof silencer pad and install the pad using double-sided tape as shown in the illustration.
| 4. INSTALL NO. 1 ROOF SILENCER PAD |
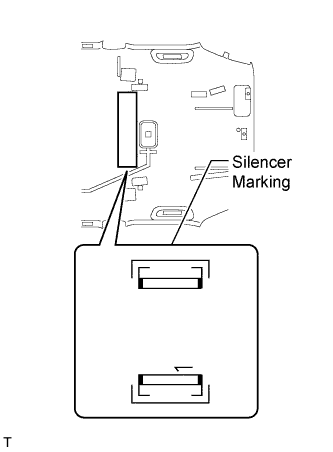 |
Align the silencer marking on the roof headlining with the roof silencer pad and install the pad using double-sided tape as shown in the illustration.
| 5. INSTALL NO. 2 AIR OUTLET GRILLE ASSEMBLY (w/ Rear Air Conditioning System) |
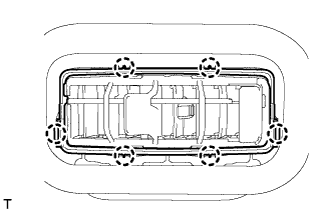 |
- HINT:
- Use the same procedures to install the air outlet grille on the other side.
Attach the 6 claws to install the air outlet grille.
| 6. INSTALL NO. 1 AIR OUTLET GRILLE ASSEMBLY (w/ Rear Air Conditioning System) |
- HINT:
- Use the same procedures described for the No. 2 air outlet grille.