REMOVAL
Removal / installation · Vehicles built Sep 2011 – Dec 2011
Versions by build date: Sep 2011 – Dec 2011 from Jan 2012
| 2.
REMOVE FRONT FENDER SPLASH SHIELD SUB-ASSEMBLY LH
|
 |
Remove the 3 bolts and screw.
Turn the clip indicated by the arrow in the illustration to remove the fender splash shield.
| 3.
REMOVE FRONT FENDER SPLASH SHIELD SUB-ASSEMBLY RH
|
|
- HINT:
- Use the same procedures described for the LH side.
| 4.
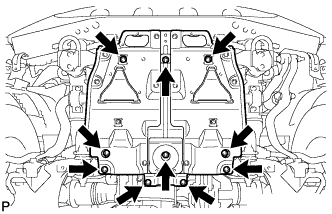
REMOVE NO. 1 ENGINE UNDER COVER SUB-ASSEMBLY
|
|
- Remove the 10 bolts and No. 1 engine under cover.
| 5.
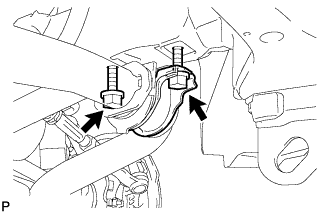
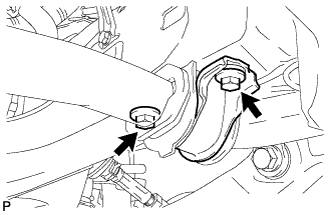
LOOSEN NO. 1 FRONT STABILIZER BRACKET LH |
|
- Loosen the 2 bolts of the front stabilizer brackets.
| 6.
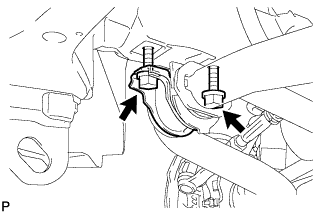
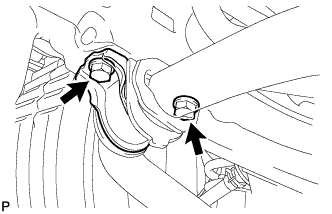
LOOSEN NO. 1 FRONT STABILIZER BRACKET RH |
|
- Loosen the 2 bolts of the front stabilizer brackets.
| 7.
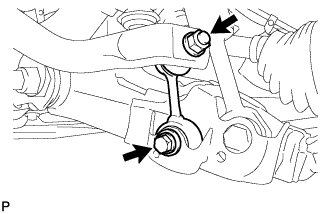
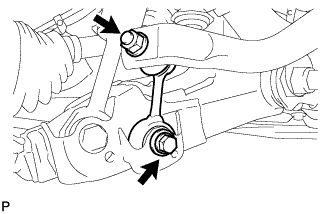
REMOVE FRONT STABILIZER LINK ASSEMBLY LH |
|
- Remove the bolt, nut and stabilizer link.
- HINT:
- If the ball joint turns together with the nut, use a 6 mm hexagon wrench to hold the stud.
| 8.
REMOVE FRONT STABILIZER LINK ASSEMBLY RH |
|
- Remove the bolt, nut and stabilizer link.
- HINT:
- If the ball joint turns together with the nut, use a 6 mm hexagon wrench to hold the stud.
| 9.
REMOVE NO. 1 FRONT STABILIZER BRACKET LH |
|
- Remove the 2 bolts and stabilizer bracket from the front frame assembly.
| 10.
REMOVE NO. 1 FRONT STABILIZER BRACKET RH |
|
- Remove the 2 bolts and stabilizer bracket from the front frame assembly.
| 11.
REMOVE FRONT STABILIZER BAR |
|
Remove the front stabilizer bar from the frame assembly.
| 12.
REMOVE NO. 1 FRONT STABILIZER BAR BUSH |
|
Remove the front stabilizer bar bush from the front stabilizer bar.