AUDIO / VIDEO BACK DOOR SPEAKER INSPECTION
PROCEDURE

 86160Z 1.INSPECT REAR NO. 3 SPEAKER ASSEMBLY (for LH Side)
With the speaker in the installed condition, check there are no abnormalities such looseness or rattling.
Check that there is no foreign matter inside the speaker.
Check that the speaker cone is not damaged.
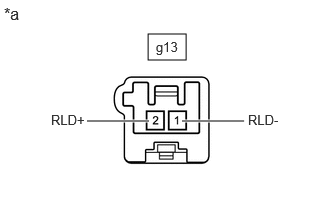
| *a | Component without harness connected (Rear No. 3 Speaker Assembly) |
Measure the resistance according to the value(s) in the table below.
- Standard Resistance:
-
Tester Connection Condition Specified Condition Click Location & Routing(g13)Location & Routingewd_type=routing;type=c;code=g13
Click Connector(g13)Body>No. 1 Rear Window Wire / No. 2 Back Door Wire>No. 3 Rear Speaker Assembly LHewd_type=component;type=c;code=g13;pinno=1,2
g13-1 (RLD-) - g13-2 (RLD+) Always 2.8 to 3.8 Ω
If the result is not as specified, replace the rear No. 3 speaker assembly.
86160Z 2.INSPECT REAR NO. 3 SPEAKER ASSEMBLY (for RH Side)
With the speaker in the installed condition, check there are no abnormalities such looseness or rattling.
Check that there is no foreign matter inside the speaker.
Check that the speaker cone is not damaged.
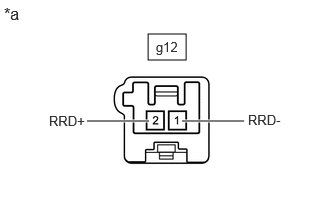
| *a | Component without harness connected (Rear No. 3 Speaker Assembly) |
Measure the resistance according to the value(s) in the table below.
- Standard Resistance:
-
Tester Connection Condition Specified Condition Click Location & Routing(g12)Location & Routingewd_type=routing;type=c;code=g12
Click Connector(g12)Body>No. 1 Rear Window Wire / No. 2 Back Door Wire>No. 3 Rear Speaker Assembly RHewd_type=component;type=c;code=g12;pinno=1,2
g12-1 (RRD-) - g12-2 (RRD+) Always 2.8 to 3.8 Ω
If the result is not as specified, replace the rear No. 3 speaker assembly.