BM25T0E _01 Vehicle Exterior _030570 BODY WELD POINT _0139896 ROOF SIDE INNER PANEL(for 2 Door Short Rug Roof Van) F
BODY WELD POINT ROOF SIDE INNER PANEL(for 2 Door Short Rug Roof Van) ASSEMBLY REPLACEMENT
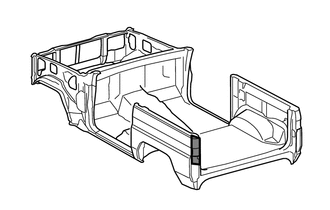
With the back door opening trough assembly removed.
REMOVAL
| Symbol Meaning | |
|---|---|

|
Remove Weld Points |

|
Remove Weld Points |

|
Cut with Disc Sander etc. |
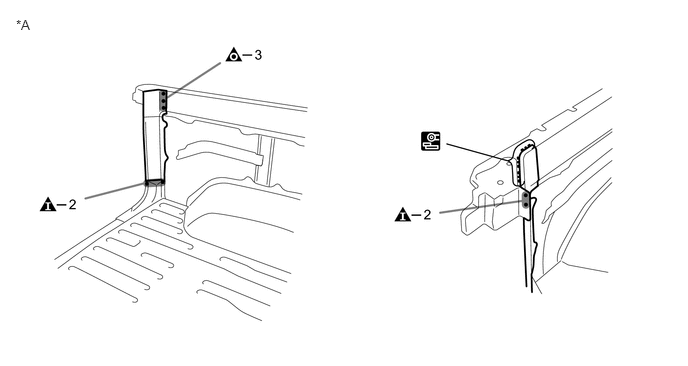
0.167,0.177 0.479,0.333 0.313,0.156 10 false *A
| *A | LH | - | - |
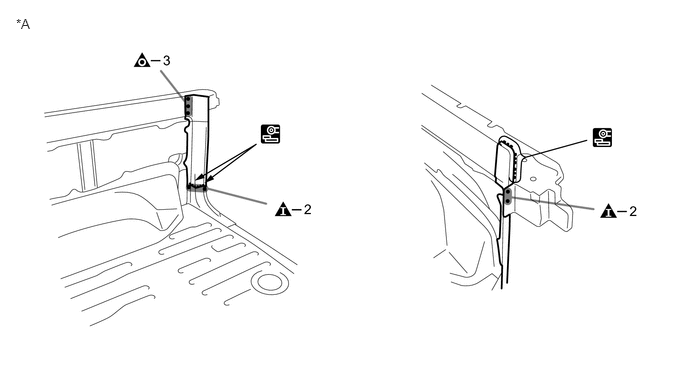
0.167,0.167 0.479,0.323 0.313,0.156 10 false *A
| *A | RH | - | - |
INSTALLATION
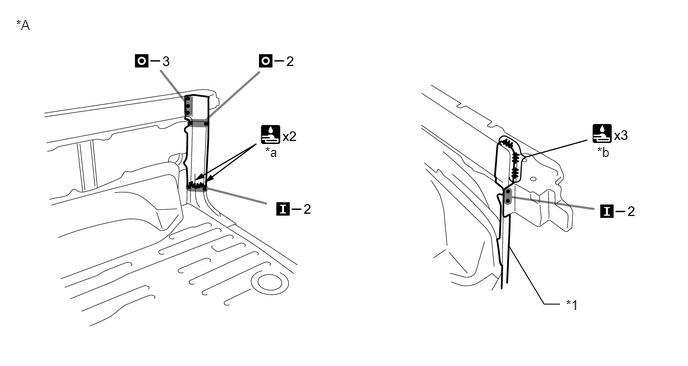
| Symbol Meaning | |
|---|---|

|
Plug Weld |

|
Plug Weld |

|
Fillet Weld |
a.
Inspect the fitting of the related parts around the new parts before welding. This affects the appearance of the finish.
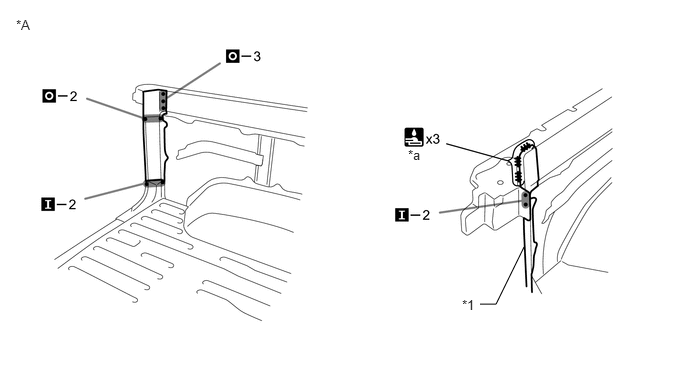
5,3.167 5.167,3.167 5.167,3.167 5.458,2.573 false 0.167,0.177 0.479,0.333 0.313,0.156 10 false *A 4.813,3.094 5.125,3.25 0.313,0.156 10 false *1 4.25,1.531 4.563,1.688 0.313,0.156 10 false *a
| *A | LH | - | - |
| *1 | ROOF SIDE PANEL SUB-ASSEMBLY INNER REAR | - | - |
| *a | 15 mm (0.59 in.) | - | - |
5.833,3.167 5.667,3.167 5.667,3.167 5.302,2.563 false 0.167,0.177 0.479,0.333 0.313,0.156 10 false *A 5.896,3.094 6.208,3.25 0.313,0.156 10 false *1 2.76,1.5 3.073,1.656 0.313,0.156 10 false *a 6.219,1.5 6.531,1.656 0.313,0.156 10 false *b
| *A | RH | - | - |
| *1 | ROOF SIDE PANEL SUB-ASSEMBLY INNER REAR | - | - |
| *a | 20 mm (0.79 in.) | *b | 15 mm (0.59 in.) |
b.
After welding, apply body sealer to the corresponding parts. (See the painting/coating)
c.
After applying the top coat, apply anti-rust agent to the internal panel portion of the closed section structural weld points.