1GR-FE BATTERY / CHARGING GENERATOR REASSEMBLY
PROCEDURE

 1.INSTALL DRIVE END FRAME BEARING
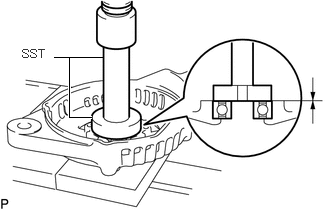
Using SST and a press, press in a new generator drive end frame bearing.
- SST
-
09950-60010 09950-70010 (09951-00470, 09951-07100)
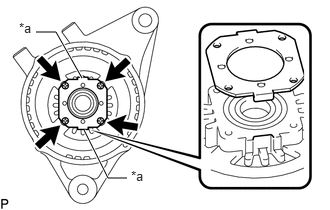
| *a | Cutout |
Fit the tabs on the retainer plate into the cutouts on the generator drive end frame assembly to install the retainer plate.
Install the retainer plate with the 4 screws.
- Torque:
- 2.3 N*m (23 kgf*cm, 20 in.*lbf)
27330 2.INSTALL GENERATOR ROTOR ASSEMBLY
Place the generator drive end frame assembly on the generator pulley.
Install the generator rotor assembly to the generator drive end frame assembly.
27444 3.INSTALL GENERATOR BEARING COVER PACKING
- NOTICE:
-
A new generator coil assembly comes with a generator bearing cover packing. Therefore, it is not necessary to install a new generator bearing cover packing when installing a new generator coil assembly.
Install a new generator bearing cover packing to the generator coil assembly.
- NOTICE:
-
Align the protrusion of the generator bearing cover packing with the groove of the generator coil assembly when installing.
4.INSTALL GENERATOR COIL ASSEMBLY
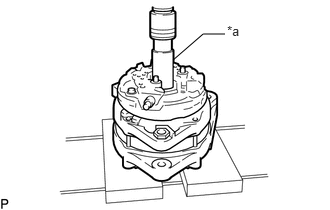
| *a | 21 mm Deep Socket Wrench |
Using a 21 mm deep socket wrench and press, slowly press in the generator coil assembly.
Install the generator coil assembly with the 4 bolts.
- Torque:
- 5.9 N*m (60 kgf*cm, 52 in.*lbf)
27370 5.INSTALL GENERATOR BRUSH HOLDER ASSEMBLY
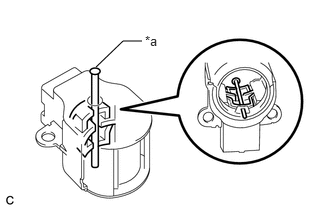
| *a | Pin |
While pushing the 2 brushes into the generator brush holder assembly, insert a pin with a diameter of 1.0 mm (0.0394 in.) into the brush holder hole.
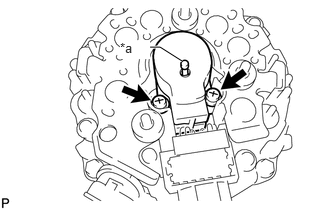
| *a | Pin |
Install the generator brush holder assembly with the 2 screws.
- Torque:
- 1.8 N*m (18 kgf*cm, 16 in.*lbf)
Pull out the pin from the generator brush holder assembly.
27387 6.INSTALL TERMINAL INSULATOR
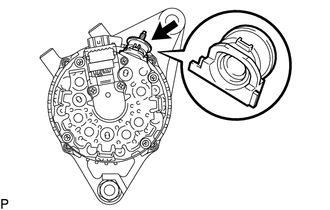
Install the terminal insulator to the generator coil assembly.
- NOTICE:
-
Make sure the terminal insulator is installed facing the proper direction.
27039 7.INSTALL GENERATOR REAR END COVER
Install the generator rear end cover to the generator coil assembly with the 3 bolts.
- Torque:
- 4.6 N*m (47 kgf*cm, 41 in.*lbf)
27411 8.INSTALL GENERATOR PULLEY
Temporarily install the generator pulley by hand.
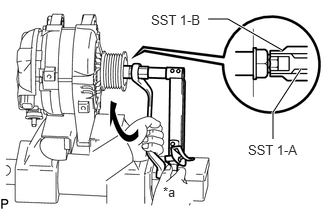
| *a | Hold |

|
Turn |
Mount the generator assembly in a vise between aluminum plates.
Install SST 1-A to the generator pulley shaft.
- SST
-
09820-63011 (09820-06010, 09820-06021)
- HINT:
-
SST 1-A and B 09820-06010 SST 2 09820-06021
Install SST 1-B to SST 1-A.
Hold SST 1-A with a torque wrench and turn SST 1-B clockwise with the specified torque.
- Torque:
- 39 N*m (400 kgf*cm, 29 ft.*lbf)
- NOTICE:
-
Make sure that SST is secured to the generator rotor shaft.
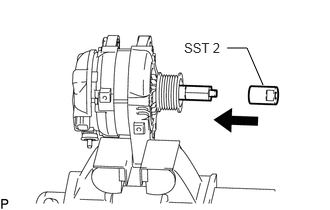
|
|
Insert |
Insert SST 2 and attach it to the generator pulley nut.
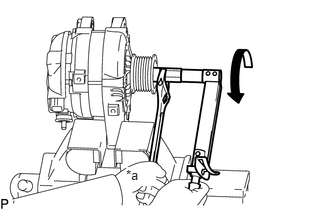
| *a | Hold |
|
|
Turn |
Tighten the generator pulley nut by turning SST 1-A in the direction shown in the illustration.
- Torque:
- 133 N*m (1351 kgf*cm, 98 ft.*lbf)
Remove SST 2 from the generator assembly.
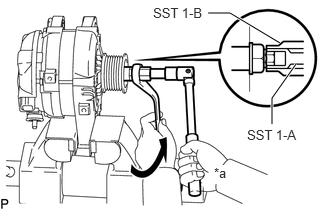
| *a | Hold |
|
|
Turn |
Turn SST 1-B in the direction shown in the illustration and remove SST 1-A and B.
Turn the generator pulley and check that the generator pulley moves smoothly.