1VD-FTV STARTING STARTER REASSEMBLY
PROCEDURE

 28011 1.INSTALL STARTER CLUTCH SUB-ASSEMBLY
Apply high-temperature grease to the parts indicated by the arrows in the illustration.
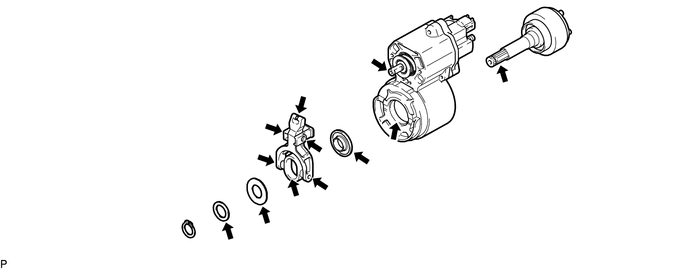
Install the starter clutch sub-assembly into the main switch assembly.
- NOTICE:
-
Make sure that the bearing does not disengage from the starter clutch sub-assembly.
Install the 3 starter washers and pinion drive lever with the snap ring.
28110 2.INSTALL STARTER DRIVE HOUSING ASSEMBLY
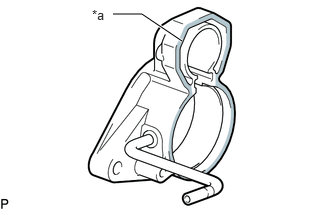
| *a | Seal Packing |
Apply a light coat of seal packing to the surface of the starter drive housing assembly that contacts the main switch assembly.
- Seal packing:
-
Toyota Genuine Seal Packing 1121C, Three Bond 1121C or equivalent
Install the starter drive housing assembly with the 2 bolts.
- Torque:
- 6.0 N*m (61 kgf*cm, 53 in.*lbf)
28256 3.INSTALL STARTER INTERNAL GEAR
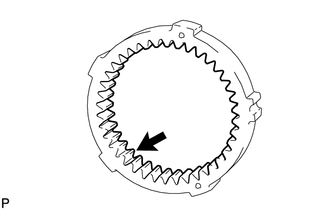
Apply high-temperature grease to the portion indicated by the arrow in the illustration.
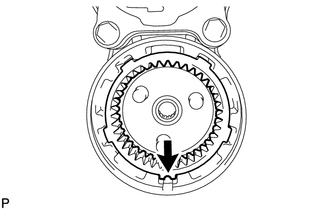
Install the starter internal gear.
- NOTICE:
-
Make sure the starter internal gear protrusion indicated by the arrow in the illustration is aligned with the groove on the bottom side of the main switch assembly.
Apply high-temperature grease to the starter planetary gears.
Install the 3 starter planetary gears.
28160 4.INSTALL STARTER ARMATURE ASSEMBLY
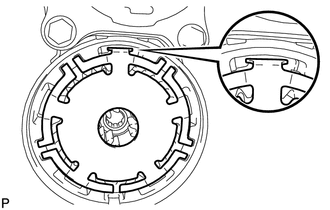
Install the starter washer.
- NOTICE:
-
Make sure that the starter washer is securely seated in the groove.
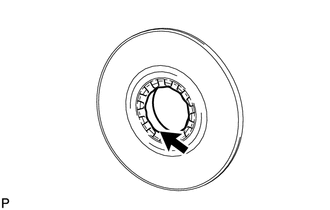
Apply high-temperature grease to the portion indicated by the arrow in the illustration.
Install the starter plate.
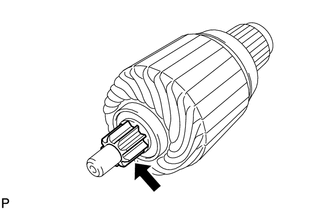
Apply high-temperature grease to the portion indicated by the arrow in the illustration.
Install the starter armature assembly to the starter plate.
28120 5.INSTALL STARTER YOKE ASSEMBLY
Install 2 new O-rings to the starter yoke assembly.
Install the starter yoke assembly to the main switch assembly.
28140 6.INSTALL STARTER BRUSH HOLDER ASSEMBLY
Place the starter brush holder assembly on the starter armature assembly.
Using a screwdriver, hold the starter brush spring back and connect the 4 starter brushes to the starter brush holder assembly.
- NOTICE:
-
Check that the positive (+) lead wires are not grounded.
Install the starter brush holder assembly into the starter armature assembly.
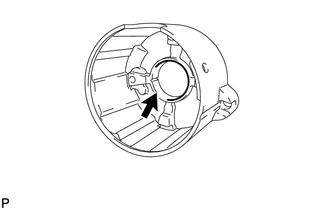
Apply high-temperature grease to the portion indicated by the arrow in the illustration.
Install the commutator end frame with the 2 screws.
- Torque:
- 3.9 N*m (40 kgf*cm, 35 in.*lbf)
Install the 2 through bolts.
- Torque:
- 17 N*m (173 kgf*cm, 12 ft.*lbf)
Install the nut to terminal C.
- Torque:
- 21 N*m (214 kgf*cm, 15 ft.*lbf)
28213 7.INSTALL STARTER CLUTCH PINION
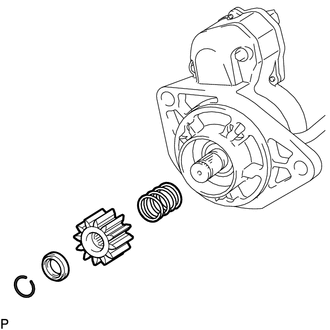
Install the starter drive spring, starter clutch pinion and pinion stop collar with the snap ring.