HEATING / AIR CONDITIONING FRONT HEATER UNIT REASSEMBLY
PROCEDURE

 87201D 1.INSTALL AIR DUCT SUB-ASSEMBLY
Install the air duct sub-assembly with the 5 screws.
55906A 2.INSTALL DEFROSTER DAMPER CONTROL CABLE SUB-ASSEMBLY
for LHD:
Align the link of the heater radiator unit sub-assembly to the DEF side, and then insert the end of the defroster control cable sub-assembly and secure it with clamp B.
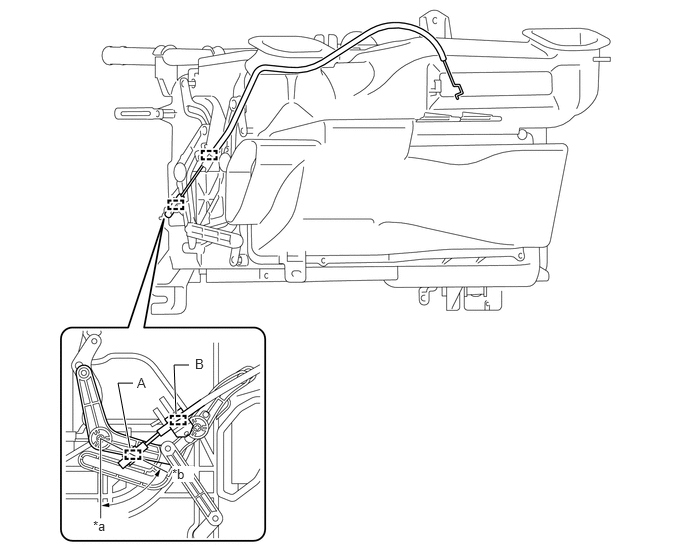
| *a | FACE Side | *b | DEF Side |
for RHD:
Align the link of the heater radiator unit sub-assembly to the DEF side, and then insert the end of the defroster control cable sub-assembly and secure it with clamp B.
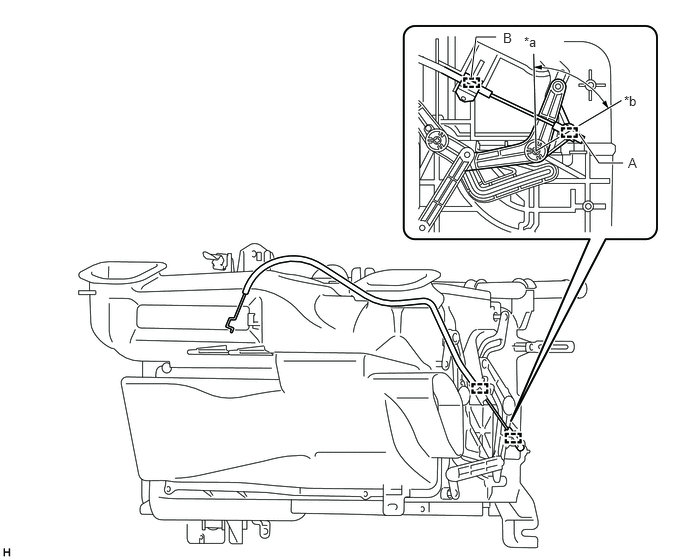
| *a | FACE Side | *b | DEF Side |
55909A 3.INSTALL AIRMIX DAMPER CONTROL CABLE SUB-ASSEMBLY (w/ Heater)
for LHD:
Align the link of the heater radiator unit sub-assembly to the COOL side, and then insert the end of the airmix control cable sub-assembly and secure it with clamp A.
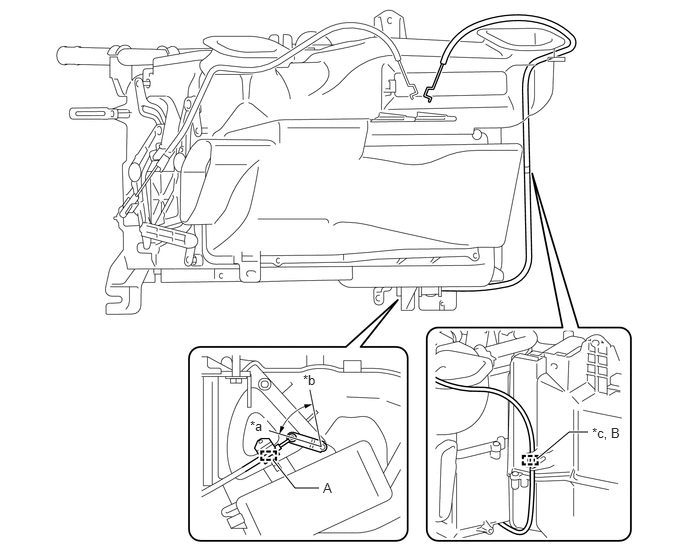
| *a | COOL Side | *b | WARM Side |
| *c | Airmix Damper Control Cable Sub-assembly Paint Mark (White) | - | - |
for LHD:
Secure the airmix damper control cable sub-assembly with clamp B at the paint mark (white).
for RHD:
Align the link of the heater radiator unit sub-assembly to the COOL side, and then insert the end of the airmix control cable sub-assembly and secure it with clamp A.
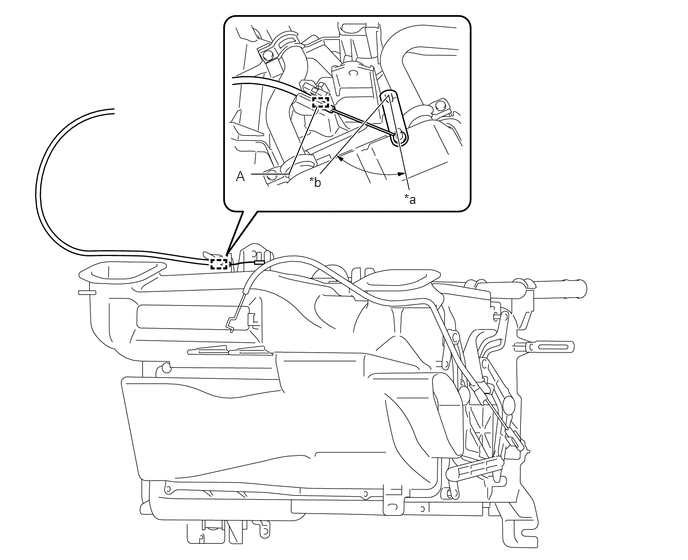
| *a | COOL Side | *b | WARM Side |
87249E 4.INSTALL HEATER UNIT HEATER WATER OUTLET PIPE (w/ Heater)
Install the heater unit heater water outlet pipe.
Install the clamp with the screw.
87248E 5.INSTALL HEATER WATER INLET PIPE E (w/ Heater)
Install the heater water inlet pipe E.
Install the clamp with the screw.
6.INSTALL HEATER RADIATOR ASSEMBLY (w/ Heater)
Install the heater radiator assembly and 2 brackets with the 2 screws.
87201B 7.INSTALL NO. 2 AIR DUCT SUB-ASSEMBLY (w/ Heater)
Attach the 2 claws to install the No. 2 air duct sub-assembly.
Install the 2 bolts.
55990B 8.INSTALL LOWER DEFROSTER NOZZLE ASSEMBLY
Install the lower defroster nozzle assembly with the 2 screws.