HEATING / AIR CONDITIONING CONDENSER(for 1HZ LHD) REMOVAL
PROCEDURE

 1.RECOVER REFRIGERANT FROM REFRIGERATION SYSTEM
53111 2.REMOVE RADIATOR GRILLE
52119A 3.REMOVE FRONT BUMPER COVER
for Standard:
Click hereVehicle Exterior>EXTERIOR PANELS / TRIM>FRONT BUMPER (for Standard)>REMOVAL
for Step Type:
Click hereVehicle Exterior>EXTERIOR PANELS / TRIM>FRONT BUMPER (for Step Type)>REMOVAL
16400 4.REMOVE RADIATOR ASSEMBLY
86510 5.REMOVE HIGH PITCHED HORN ASSEMBLY
Click hereVehicle Exterior>HORN>HORN>REMOVAL
86520 6.REMOVE LOW PITCHED HORN ASSEMBLY
Click hereVehicle Exterior>HORN>HORN>REMOVAL
53217A 7.REMOVE HOOD LOCK SUPPORT BRACE
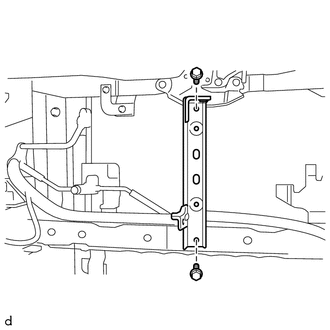
Remove the 2 bolts and hood lock support brace.
53510 8.REMOVE HOOD LOCK ASSEMBLY
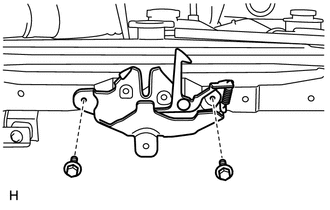
Remove the 2 bolts and hood lock assembly.
53205 9.REMOVE UPPER RADIATOR SUPPORT SUB-ASSEMBLY
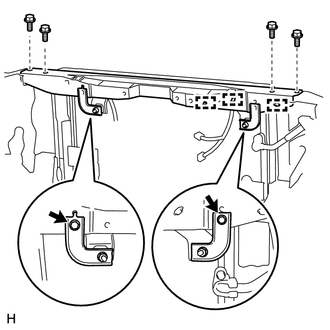
Remove the 6 bolts.
Detach the 3 clamps and remove the upper radiator support sub-assembly.
88711 10.DISCONNECT NO. 1 COOLER REFRIGERANT DISCHARGE HOSE
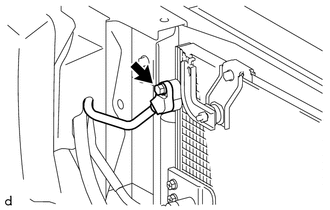
Remove the bolt and disconnect the No. 1 cooler refrigerant discharge hose from the cooler condenser assembly.
- NOTICE:
-
·
When removing the bolt, do not allow any tools to contact the pipe.
·When removing the bolt, hold a part of the pipe near the connector.
Remove the O-ring from the No. 1 cooler refrigerant discharge hose.
- NOTICE:
-
Seal the openings of the disconnected parts using vinyl tape to prevent moisture and foreign matter from entering them.
88716B 11.DISCONNECT COOLER REFRIGERANT LIQUID PIPE B
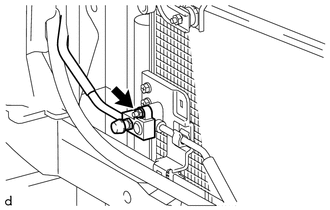
Remove the nut and cooler refrigerant liquid pipe B from the cooler condenser assembly.
- NOTICE:
-
·
When removing the nut, do not allow any tools to contact the pipe.
·When removing the nut, hold a part of the pipe near the connector.
Remove the O-ring from the cooler refrigerant liquid pipe B.
- NOTICE:
-
Seal the openings of the disconnected parts using vinyl tape to prevent moisture and foreign matter from entering them.
88460 12.REMOVE COOLER CONDENSER ASSEMBLY
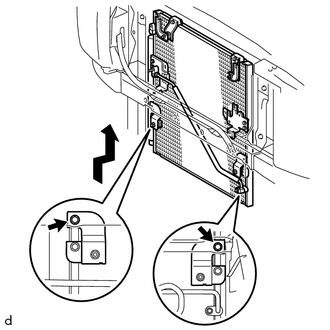
Remove the 2 bolts.
Remove the cooler condenser assembly as shown in the illustration.