AXLE AND DIFFERENTIAL FRONT DIFFERENTIAL LOCK ACTUATOR(w/ Differential Lock) INSTALLATION
PROCEDURE

 41450A 1.INSTALL NO. 2 DIFFERENTIAL LOCK SHIFT ACTUATOR
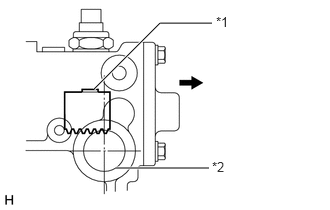
| *1 | Shift Fork |
| *2 | Actuator Installation Hole |

|
Outside |
Check that the outermost rack tooth of the shift fork is almost directly above the center line of the No. 2 differential lock shift actuator installation hole.
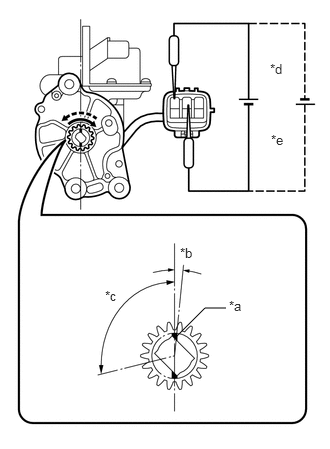
| *a | Matchmark |
| *b | 5°+/-3 |
| *c | 95.5° |
| *d | 1.5 V (for 12 V Battery) |
| *e | 3.0 V (for 24 V Battery) |
Check that the matchmarks on the pinion of the No. 2 differential lock shift actuator are in the range between 2 and 8° clockwise of the center line of the actuator.
- NOTICE:
-
·
If the matchmarks are not within the specified range, use dry cell batteries to rotate the pinion until the matchmarks are within the range.
·Do not apply positive (+) battery voltage directly between terminals.
·If the matchmarks come to the limit of the rotation range, do not apply any more voltage.
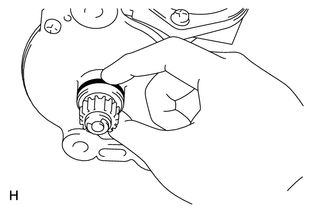
Install a new O-ring to the No. 2 differential lock shift actuator.
Apply a light coat of gear oil to the O-ring.
Apply MP grease to the gear parts.
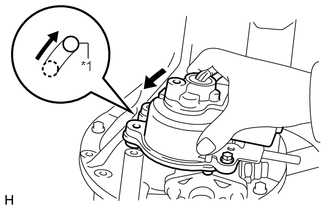
| *1 | Knock Pin |
Check that the outermost rack tooth of the shift fork aligns with the matchmarks on the pinion of the No. 2 differential lock shift actuator.
Install the No. 2 differential lock shift actuator so that the long hole in the actuator fits with the knock pin on the front differential carrier assembly.
- HINT:
-
Do not damage the O-ring of the No. 2 differential lock shift actuator.
Rotate the actuator counterclockwise so that the knock pin slides to the end of the hole as shown in the illustration.
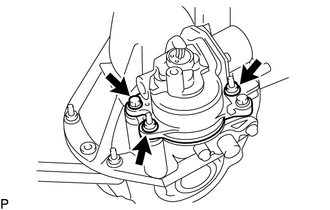
Install the bolt and 2 nuts.
- Torque:
- for Bolt : 26.5 N*m (270 kgf*cm, 20 ft.*lbf)
- for Nut : 25 N*m (255 kgf*cm, 18 ft.*lbf)
2.CONNECT WIRE HARNESS
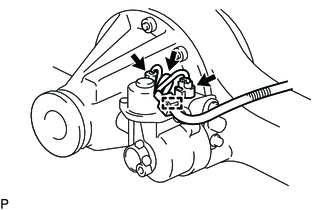
Connect the breather hose and wire harness.
Connect the clamp and 2 connectors.