SLIDING ROOF / CONVERTIBLE SOFT TOP(for Model Code #J71 Series) REMOVAL
PROCEDURE

 65910A 1.REMOVE TARPAULIN ASSEMBLY
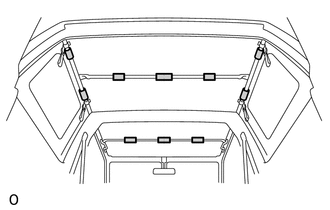

|
Fastening Tape |
Detach the 10 pieces of fastening tape.
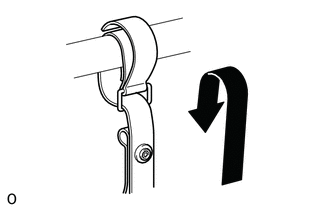
Detach the 4 belts.
- HINT:
-
Use the same procedure for all belts.
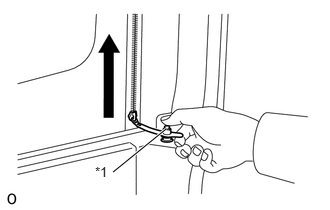
| *1 | Burglary Prevention Cock |
Release the 4 burglary prevention cocks.
- HINT:
-
Use the same procedure for all burglary prevention cocks.
Open the 4 fasteners.
- HINT:
-
Use the same procedure for all fasteners.
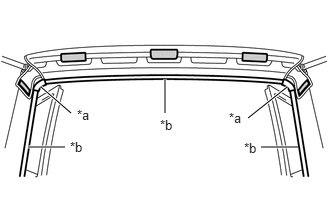
| *a | Corner Joint |
| *b | Opening Trim |
|
|
Fastening Tape |
Remove the 2 corner joints.
Remove the 3 opening trims.
Detach the 5 pieces of fastening tape.
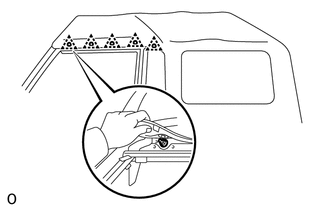
Detach the 10 clips.
- HINT:
-
The illustration shows the LH side. The vertical orientation of the RH side is opposite that of the image shown in the illustration.
|
|
Fastening Tape |
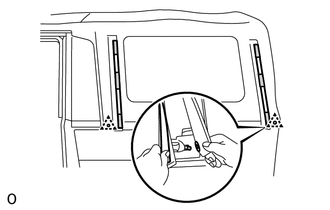
Detach the 12 pieces of fastening tape and 4 clips.
- HINT:
-
The illustration shows the LH side. The vertical orientation of the RH side is opposite that of the image shown in the illustration.
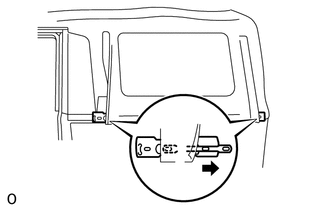
Remove the tarpaulin side bar.
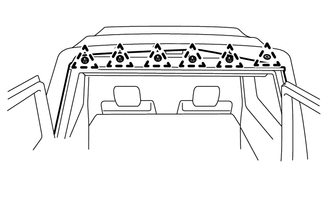
Detach the 6 clips.
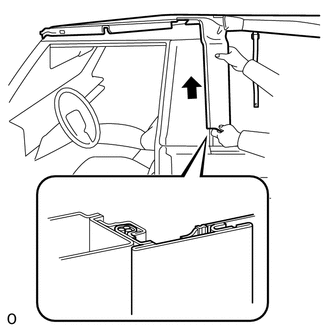
Slide and disconnect the tarpaulin assembly from the roll over panel sub-assembly.
- HINT:
-
The illustration shows the LH side. The vertical orientation of the RH side is opposite that of the image shown in the illustration.
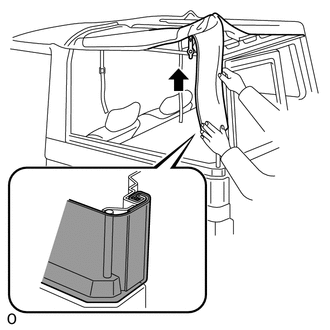
Slide and disconnect the tarpaulin assembly from the rear top cover tarpaulin bow sub-assembly.
- HINT:
-
The illustration shows the LH side. The vertical orientation of the RH side is opposite that of the image shown in the illustration.
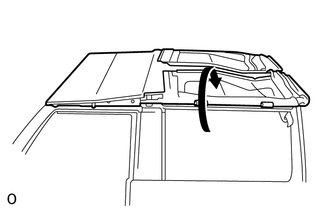
Flip the sidewalls up onto the roof above the cargo compartment.
- HINT:
-
The illustration shows the LH side. The vertical orientation of the RH side is opposite that of the image shown in the illustration.
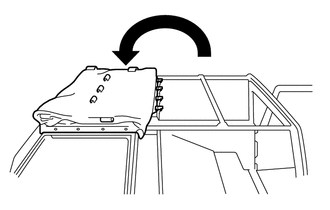
Flip the folded back half of the tarpaulin assembly forward onto the roof above the driver's compartment.
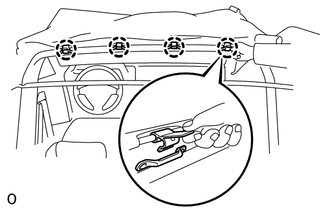
Detach the 4 claws.
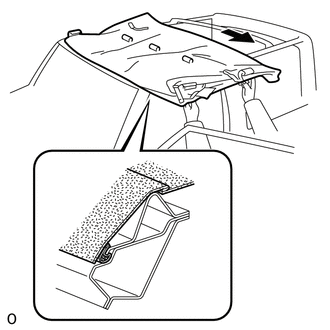
Slide and remove the tarpaulin assembly.
- HINT:
-
The tarpaulin assembly can be removed from LH or RH side.
65821 2.REMOVE FRONT TOP COVER TARPAULIN BOW
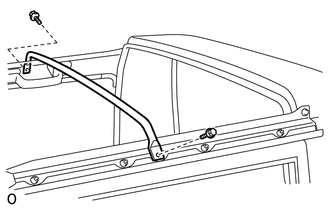
Remove the 2 bolts and front top cover tarpaulin bow.
65831 3.REMOVE CENTER TOP COVER TARPAULIN BOW
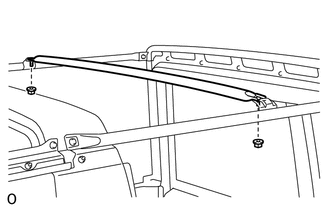
Remove the 2 nuts and center top cover tarpaulin bow.
65806A 4.REMOVE CENTER TOP COVER TARPAULIN BOW SUB-ASSEMBLY LH
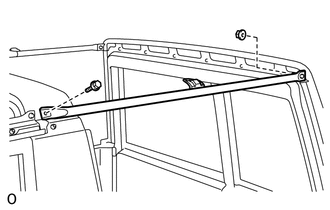
Remove the bolt and nut and center top cover tarpaulin bow sub-assembly LH.
65805A 5.REMOVE CENTER TOP COVER TARPAULIN BOW SUB-ASSEMBLY RH
- HINT:
-
Use the same procedure described for the LH side.
65809A 6.REMOVE REAR TOP COVER TARPAULIN BOW SUB-ASSEMBLY
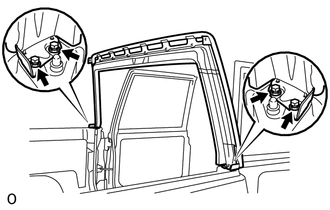
Remove the 4 bolts and rear top cover tarpaulin bow sub-assembly.
61232 7.REMOVE ROOF SIDE RAIL SUB-ASSEMBLY LH
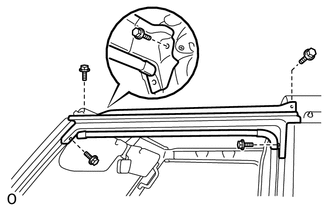
Remove the 5 bolts and roof side rail sub-assembly LH.
61203 8.REMOVE ROOF SIDE RAIL SUB-ASSEMBLY RH
- HINT:
-
Use the same procedure described for the LH side.
81240 9.REMOVE NO. 1 ROOM LIGHT ASSEMBLY
66503 10.REMOVE ROLL OVER PANEL SUB-ASSEMBLY
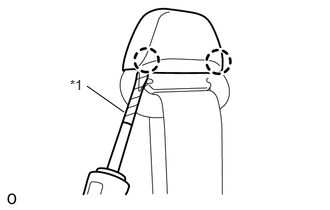
| *1 | Protective Tape |
Using a screwdriver, detach the 2 claws and open the shoulder anchor cover.
- HINT:
-
Tape the screwdriver tip before use.
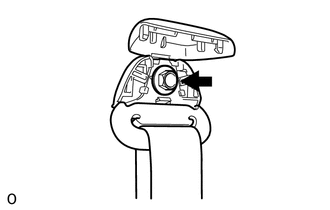
Loosen the bolt and disconnect the shoulder anchor of the front seat outer belt assembly LH from the roll over panel sub-assembly.
Remove the 12 bolts and roll over panel sub-assembly.
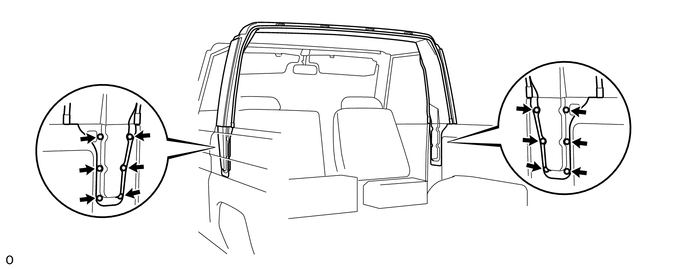
62033C 11.REMOVE NO. 3 FRONT DOOR OPENING TRIM SUB-ASSEMBLY
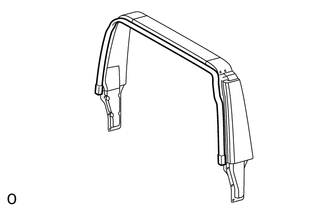
Remove the No. 3 front door opening trim sub-assembly from the roll over panel sub-assembly.
62403 12.REMOVE ROLL OVER PANEL TRIM SUB-ASSEMBLY
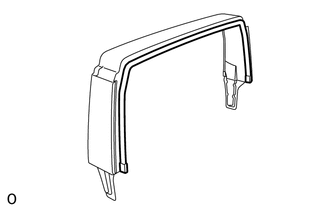
Remove the roll over panel trim sub-assembly from the roll over panel sub-assembly.