R151F MANUAL TRANSMISSION / TRANSAXLE MANUAL TRANSMISSION UNIT DISASSEMBLY
PROCEDURE

 33019 1.REMOVE TRANSMISSION BREATHER SUB-ASSEMBLY
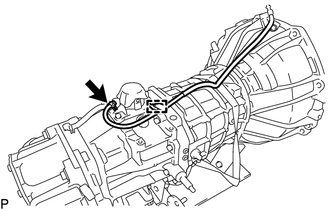
Disconnect the clamp.
Slide the clip and disconnect the transmission breather sub-assembly from the manual transmission.
33101A 2.REMOVE MANUAL TRANSMISSION FILLER PLUG
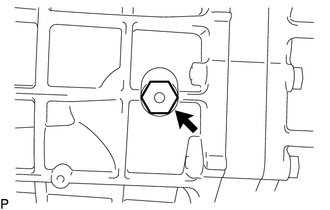
Remove the manual transmission filler plug and gasket from the manual transmission case.
33104 3.REMOVE DRAIN PLUG SUB-ASSEMBLY
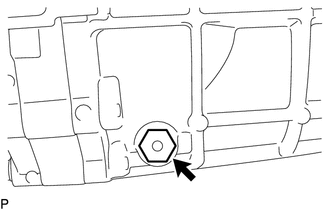
Remove the drain plug sub-assembly and gasket from the manual transmission case.
31111 4.REMOVE CLUTCH HOUSING
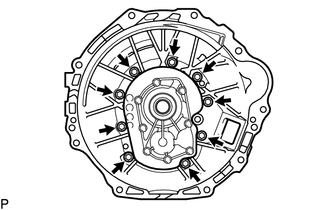
Remove the 9 bolts.
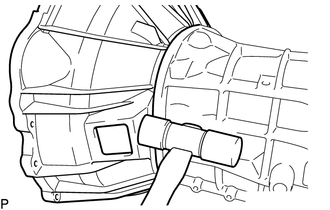
Using a plastic-faced hammer, tap off the clutch housing from the manual transmission case.
84210 5.REMOVE BACK-UP LIGHT SWITCH ASSEMBLY
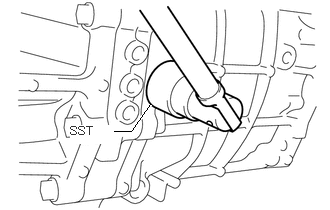
Using SST, remove the back-up light switch assembly and gasket from the manual transmission case.
- SST
-
09817-16011
33280 6.REMOVE RESTRICT PIN
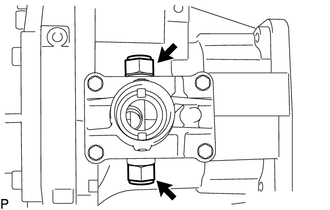
Remove the 2 restrict pins from the transfer adapter.
33506F 7.REMOVE FLOOR SHIFT CONTROL SHIFT LEVER RETAINER SUB-ASSEMBLY
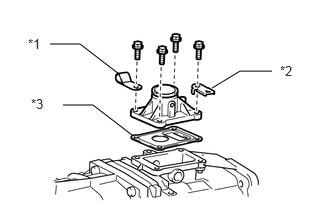
| *1 | Clamp |
| *2 | Wire Harness Clamp Bracket |
| *3 | Oil Deflector |
Remove the 4 bolts, clamp and wire harness clamp bracket.
Remove the floor shift control shift lever retainer sub-assembly.
Remove the oil deflector.
33261C 8.REMOVE SHIFT AND SELECT LEVER SHAFT
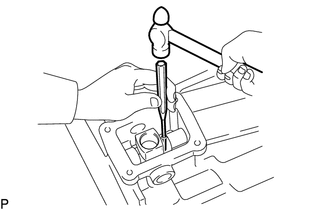
Using a 5 mm pin punch and a hammer, tap out the slotted spring pin from the shift lever housing.
Remove the shift and select lever shaft and shift lever housing from the transfer adapter.
36117 9.REMOVE TRANSFER ADAPTER
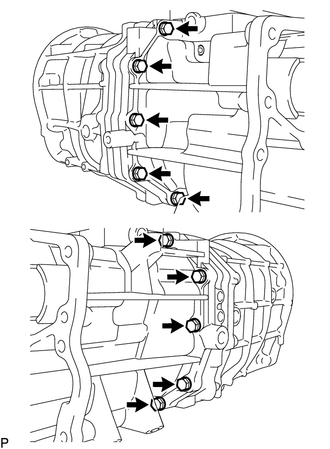
Remove the 10 bolts.
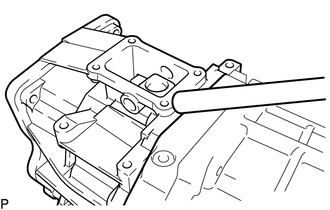
Using a brass bar and a hammer, tap the transfer adapter from the manual transmission case.
36111Q 10.REMOVE OIL RECEIVER PIPE
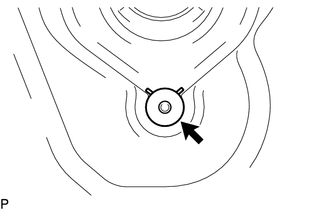
Remove the oil receiver pipe from the transfer adapter.
33280F 11.REMOVE REVERSE RESTRICT PIN ASSEMBLY
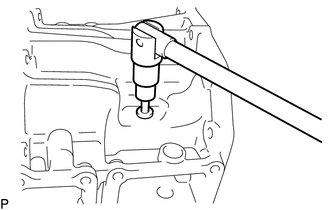
Using a T40 ''TORX'' socket wrench, remove the reverse restrict pin plug.
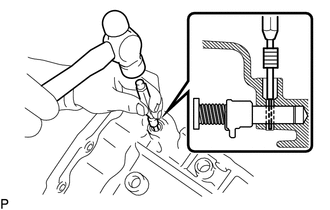
Using a 5 mm pin punch and a hammer, tap out the reverse restrict slotted pin.
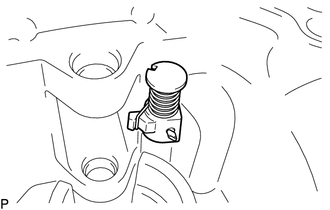
Remove the reverse restrict pin assembly.
33131 12.REMOVE FRONT BEARING RETAINER
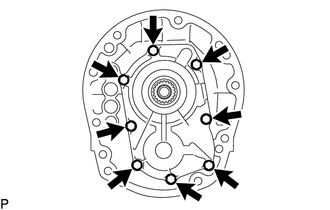
Remove the 8 bolts.
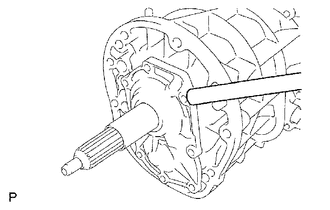
Using a brass bar and hammer, tap off the front bearing retainer from the manual transmission case.
33131A 13.REMOVE FRONT TRANSMISSION BEARING RETAINER OIL SEAL
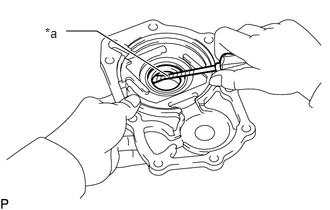
| *a | Protective Tape |
Using a screwdriver, pry out the front transmission bearing retainer oil seal.
- NOTICE:
-
Be careful not to damage the lip of the front transmission bearing retainer oil seal and front bearing contact surfaces.
- HINT:
-
Tape the screwdriver tip before use.
33311G 14.REMOVE FRONT BEARING SHAFT SNAP RING
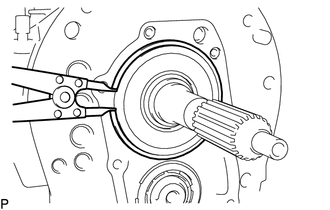
Using a snap ring expander, remove the front bearing shaft snap ring from the front input shaft bearing.
33411D 15.REMOVE FRONT NO. 1 COUNTER GEAR BEARING SNAP RING
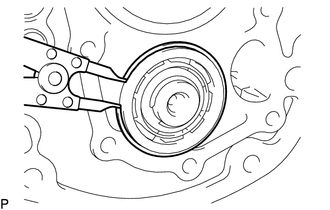
Using a snap ring expander, remove the front No. 1 counter gear bearing snap ring from the front counter gear bearing.
33111 16.REMOVE MANUAL TRANSMISSION CASE
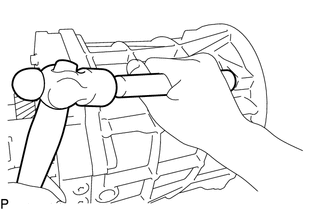
Using a brass bar and hammer, remove the manual transmission case by tapping the intermediate plate.
33176 17.REMOVE NO. 1 MANUAL TRANSMISSION OIL SEPARATOR
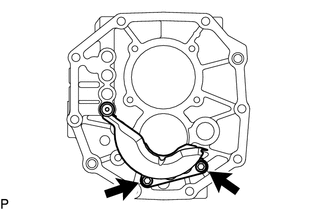
Remove the 2 bolts and No. 1 manual transmission oil separator.
33126A 18.REMOVE OIL RECEIVER SEAL
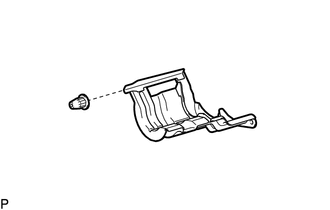
Remove the oil seal receiver seal from the No. 1 manual transmission oil separator.
33449B 19.REMOVE TRANSMISSION MAGNET
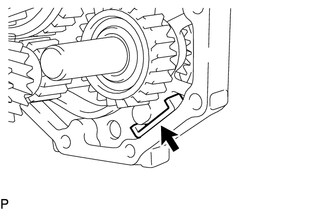
Remove the transmission magnet from the intermediate plate.
20.SECURE INTERMEDIATE PLATE
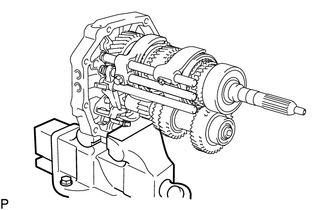
Secure the intermediate plate in a vise between aluminum plates.
33275F 21.REMOVE SHIFT DETENT BALL PLUG
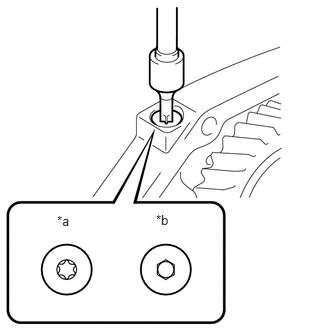
| *a | for Type A |
| *b | for Type B |
Remove the shift detent ball plug from the intermediate plate.
for Type A:
Using a T40 ''TORX'' socket wrench, remove the shift detent ball plug from the intermediate plate.
for Type B:
Using a 6 mm hexagon socket wrench, remove the shift detent ball plug from the intermediate plate.
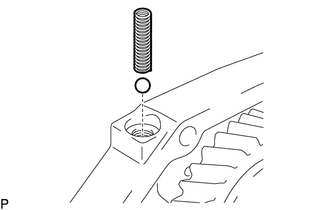
Using a magnet hand, remove the shift detent ball low side compression spring and shift detent ball from the intermediate plate.
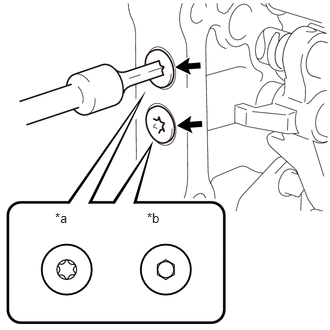
| *a | for Type A |
| *b | for Type B |
Remove the shift detent ball plug from the intermediate plate.
for Type A:
Using a T40 ''TORX'' socket wrench, remove the 2 shift detent ball plugs from the intermediate plate.
for Type B:
Using a 6 mm hexagon socket wrench, remove the 2 shift detent ball plugs from the intermediate plate.
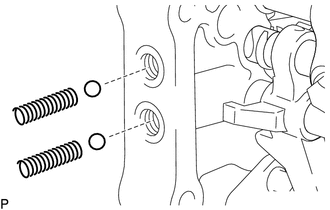
Using a magnet hand, remove the 2 shift detent ball low side compression springs and 2 shift detent balls from the intermediate plate.
33243A 22.REMOVE NO. 2 GEAR SHIFT FORK SHAFT
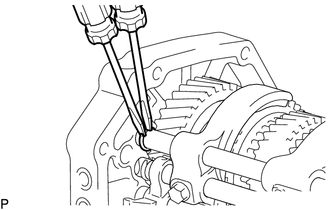
Using 2 screwdrivers and a hammer, tap off the shift fork shaft snap ring from the No. 2 gear shift fork shaft.
- NOTICE:
-
Use a cloth to prevent the snap ring from flying off.
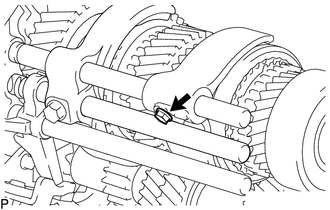
Remove the bolt from the No. 2 gear shift fork.
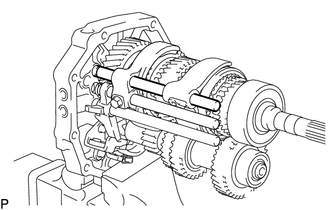
Remove the No. 2 gear shift fork shaft from the intermediate plate.
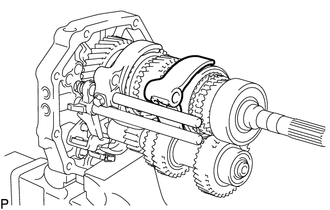
Remove the No. 2 gear shift fork from the No. 2 transmission hub sleeve.
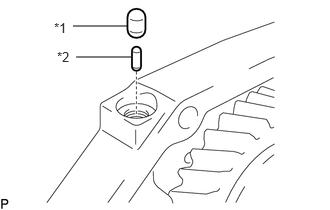
| *1 | No. 1 Shift Inter Lock Roller |
| *2 | Shift Interlock Pin |
Using a magnet hand, remove the No. 1 shift interlock roller and shift interlock pin from the intermediate plate.
33242 23.REMOVE NO. 1 GEAR SHIFT FORK SHAFT
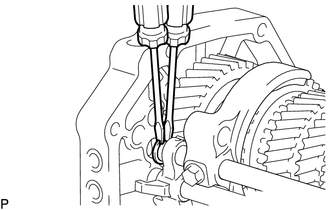
Using 2 screwdrivers and a hammer, tap off the shift fork shaft snap ring from the No. 1 gear shift fork shaft.
- NOTICE:
-
Use a cloth to prevent the snap ring from flying off.
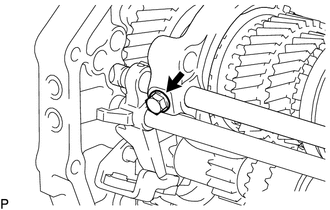
Remove the bolt from the No. 1 gear shift fork.
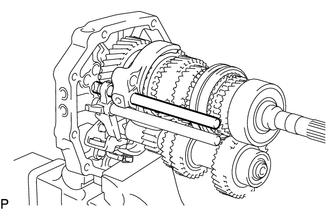
Remove the No. 1 gear shift fork shaft from the intermediate plate.
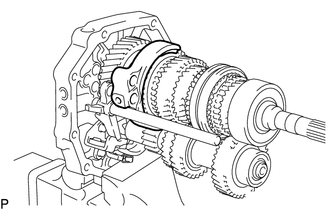
Remove the No. 1 gear shift fork from the reverse gear.
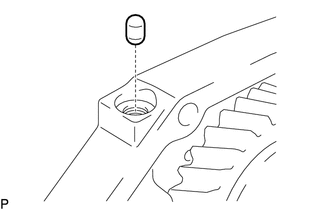
Using a magnet hand, remove the No. 1 shift interlock roller from the intermediate plate.
33241 24.REMOVE REVERSE SHIFT FORK SHAFT
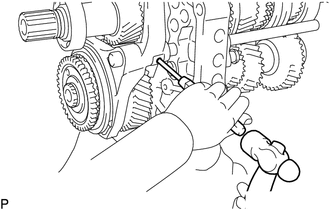
Using a 5 mm pin punch and hammer, tap out the shift fork set slotted spring pin from the No. 3 gear shift fork.
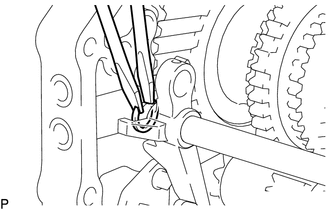
Using 2 screwdrivers and a hammer, tap off the shift fork shaft snap ring from the No. 3 gear shift fork shaft.
- NOTICE:
-
Use a cloth to prevent the snap ring from flying off.
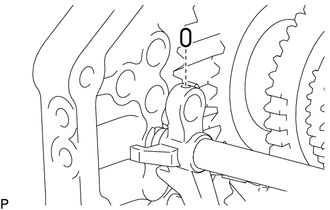
Using a magnet hand, remove the straight pin from the reverse shift fork.
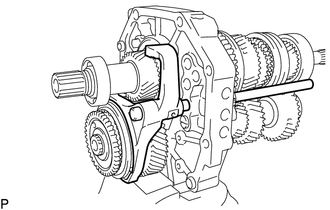
Remove the No. 3 gear shift fork and reverse shift fork shaft from the intermediate plate.
33211 25.REMOVE REVERSE SHIFT FORK
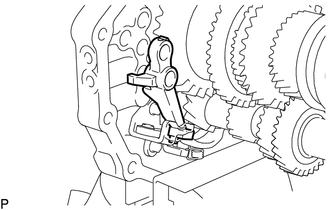
Remove the reverse shift fork from the reverse shift arm.
33228 26.REMOVE REVERSE SHIFT ARM BRACKET
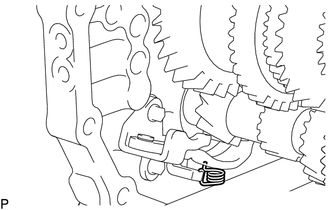
Remove the torsion spring from the reverse shift arm bracket.
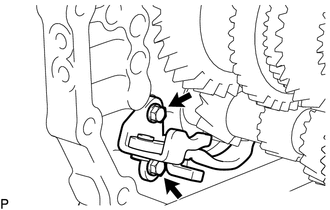
Remove the 2 bolts and reverse shift arm bracket from the intermediate plate.
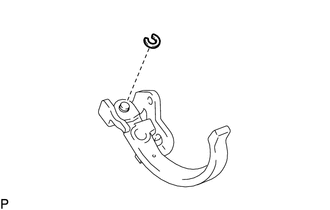
Using a screwdriver, pry out the snap ring from the reverse shift arm bracket.
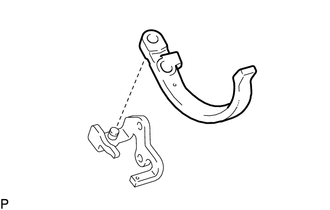
Remove the reverse shift arm from the reverse shift arm bracket.
33321A 27.REMOVE REAR OUTPUT SHAFT BEARING
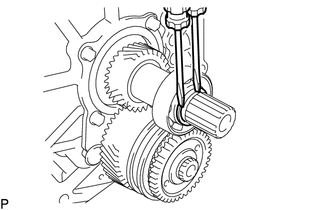
Using 2 screwdrivers and a hammer, tap out the rear output shaft bearing shaft snap ring from the output shaft.
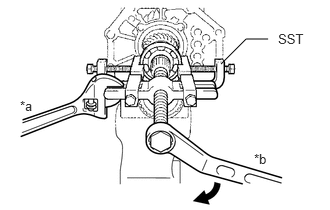
| *a | Hold |
| *b | Turn |
Using SST, remove the rear output shaft bearing and output shaft spacer from the output shaft.
- SST
-
09950-40011 (09951-04010, 09952-04010, 09953-04020, 09954-04010, 09955-04051, 09957-04010, 09958-04011)
28.INSPECT COUNTER 5TH GEAR THRUST CLEARANCE
29.INSPECT COUNTER 5TH GEAR RADIAL CLEARANCE
33421R 30.REMOVE REAR COUNTER GEAR SHAFT SNAP RING
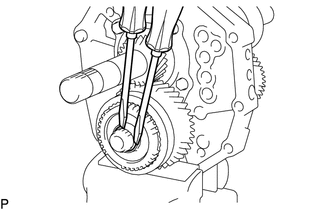
Using 2 screwdrivers and a hammer, tap off the rear counter gear shaft snap ring from the counter gear.
33395 31.REMOVE NO. 3 TRANSMISSION HUB SLEEVE
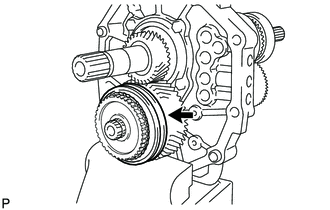
Remove the No. 3 transmission hub sleeve from the countershaft 5th gear.
33428 32.REMOVE COUNTERSHAFT 5TH GEAR
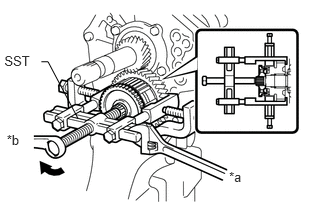
| *a | Hold |
| *b | Turn |
Using SST, remove the countershaft 5th gear together with the 2 No. 3 synchromesh shifting keys, No. 3 synchromesh shifting key spring, No. 3 counter synchronizer ring and No. 5 gear spline piece from the counter gear.
- SST
-
09950-40011 (09951-04020, 09952-04010, 09953-04020, 09954-04010, 09955-04021, 09957-04010, 09958-04011)
33318 33.REMOVE NO. 5 GEAR SPLINE PIECE
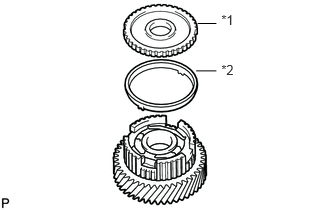
| *1 | No. 5 Gear Spline Piece |
| *2 | No. 3 counter synchronizer Ring |
Remove the No. 5 gear spline piece and No. 3 counter synchronizer ring from the countershaft 5th gear.
33428B 34.REMOVE COUNTER 5TH GEAR BEARING
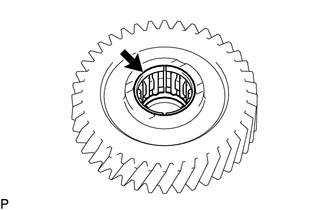
Remove the 2 pieces of the counter 5th gear bearings from the countershaft 5th gear.
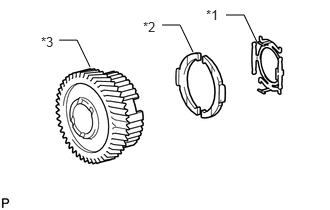
33394B 35.REMOVE NO. 3 SYNCHROMESH SHIFTING KEY
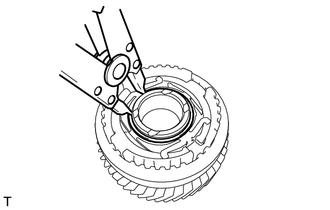
Using a snap ring expander, remove the shaft snap ring.
| *1 | No. 3 synchromesh shifting key spring |
| *2 | No. 3 synchromesh shifting key |
| *3 | Countershaft 5th Gear |
Remove the No. 3 synchromesh shifting key spring and 2 No. 3 synchromesh shifting keys from the countershaft 5th gear.
33349 36.REMOVE 5TH GEAR THRUST WASHER
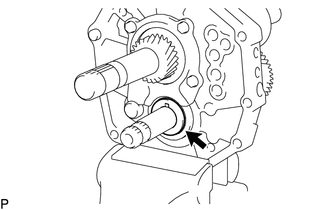
Remove the 5th gear thrust washer from the counter gear.
33349C 37.REMOVE 5TH GEAR THRUST WASHER PIN
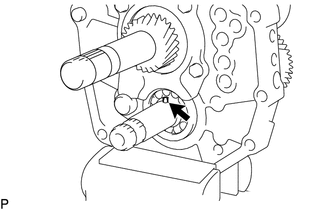
Remove the 5th gear thrust washer pin from the counter gear.
33151 38.REMOVE REAR OUTPUT SHAFT BEARING RETAINER
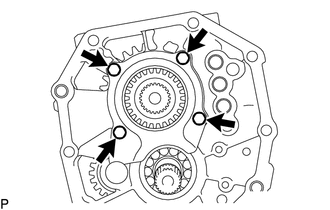
Remove the 4 bolts and rear output shaft bearing retainer from the intermediate plate.
33402 39.REMOVE REVERSE IDLER GEAR SUB-ASSEMBLY
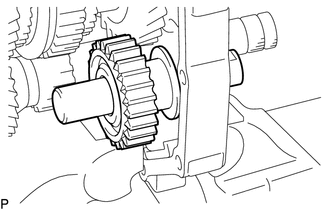
Pull out the reverse idler gear shaft from the rear side and remove the reverse idler gear sub-assembly from the intermediate plate.
33411P 40.REMOVE CENTER COUNTER SHAFT BEARING
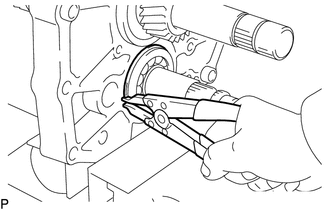
Using a snap ring expander, remove the snap ring.
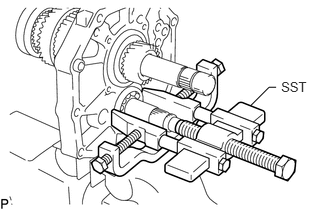
Using SST, remove the center counter shaft bearing from the intermediate plate.
- SST
-
09950-40011 (09951-04010, 09952-04010, 09953-04020, 09954-04010, 09955-04011, 09957-04010, 09958-04011)
- HINT:
-
Remove the bearing while tapping the tip of the counter gear so that the counter gear does not hit the side wall of the output shaft gear by being pushed forward.
33421 41.REMOVE COUNTER GEAR
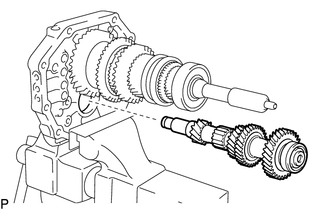
Remove the counter gear from the intermediate plate.
33311 42.REMOVE INPUT SHAFT
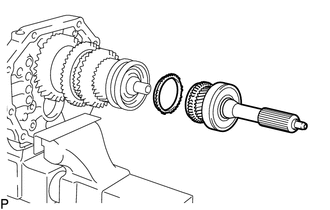
Remove the input shaft and No. 2 synchronizer ring from the output shaft.
- NOTICE:
-
Do not drop the input shaft bearing or No. 2 synchronizer ring.
33321C 43.REMOVE OUTPUT SHAFT BEARING SHAFT SNAP RING
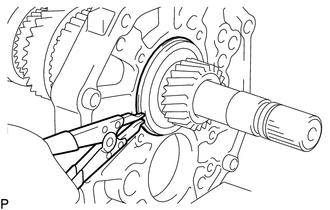
Using a snap ring expander, remove the output shaft bearing snap ring from the output shaft center bearing.
33321 44.REMOVE OUTPUT SHAFT
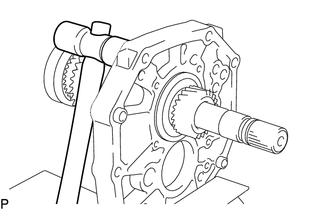
Using a plastic-faced hammer, remove the output shaft by tapping the intermediate plate.
45.INSPECT NO. 3 SYNCHRONIZER RING
33395 46.INSPECT NO. 3 TRANSMISSION HUB SLEEVE
47.INSPECT COUNTER 5TH GEAR
48.INSPECT REVERSE IDLER GEAR SUB-ASSEMBLY
49.INSPECT REVERSE IDLER GEAR RADIAL CLEARANCE