ГЕНЕРАТОР > ПОВТОРНАЯ СБОРКА |
| 1. INSTALL GENERATOR ROTOR ASSEMBLY |
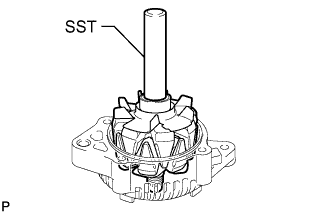 |
Using SST and a press, press in the generator rotor.
Place the washer on the generator rotor.
| 2. INSTALL GENERATOR RECTIFIER END FRAME |
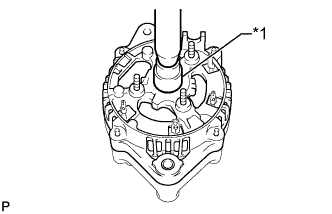 |
Using a 17 mm socket wrench and press, slowly press on the rectifier end frame.
| *1 | 17 mm Socket Wrench |
Install the cord clip and 4 nuts.
| 3. INSTALL GENERATOR HOLDER WITH RECTIFIER |
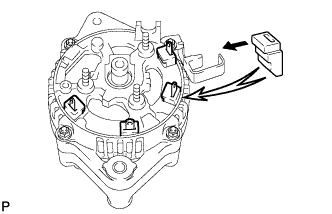 |
Install the 4 rubber insulators to the lead wires.
 | Inside |
 |
While pushing down on the rectifier holder, install it with the 4 screws.
| Push |
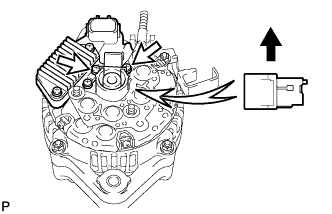
| 4. INSTALL GENERATOR REGULATOR ASSEMBLY |
Install the regulator with the 3 screws.
| 5. INSTALL GENERATOR BRUSH HOLDER ASSEMBLY |
Install the plate seal.
 |
Install the brush holder with the 2 screws.
| Upper |
Install the brush holder cover.
| 6. INSTALL GENERATOR REAR END COVER |
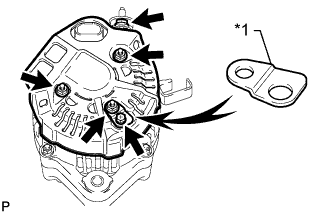 |
Install the rear end cover and rectifier plate with the bolt and 3 nuts.
| *1 | Rectifier Plate |
Install the terminal insulator with the nut.
| 7. INSTALL VACUUM PUMP ASSEMBLY |
Align the matchmarks and install the vacuum pump with the 4 bolts.
