BODY PANEL CENTER BODY PILLAR CUT AND JOIN REPLACEMENT SECTIONS
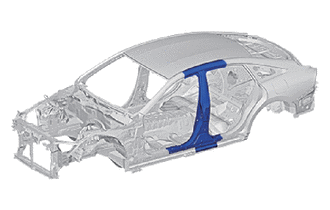
REMOVAL
| Symbol Meaning | |
|---|---|

|
Remove Weld Points |

|
Cut and Join Location |

|
Cut Location for Supply Parts |
Roughly cut open the panel so that the adhesive can be reached. Cut through the adhesive with a cut chisel to remove the panel.
- HINT:
-
In cases where the adhesive cannot be removed with a cut chisel, heat the adhesive with an industrial heater gun or gas burner taking care not to cause panel deformation by overheating.
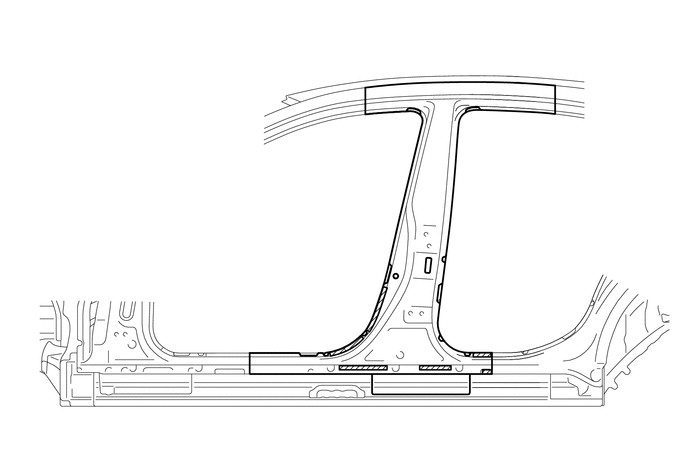

|
Adhesive | - | - |
Be careful when cutting as foamed sealing material is located near the cutting position.
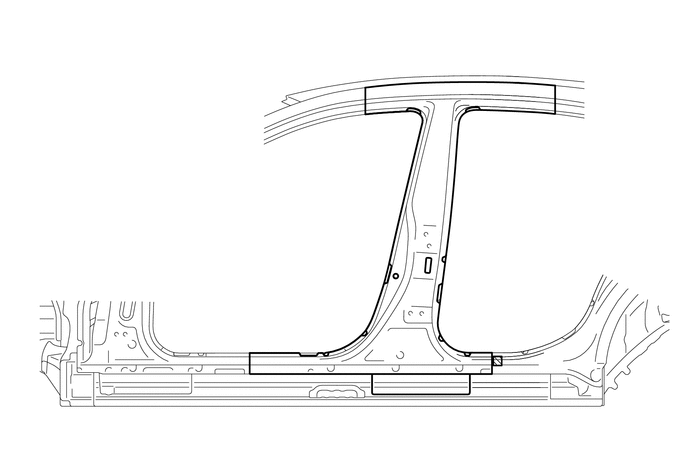

|
Foamed Sealing Material | - | - |
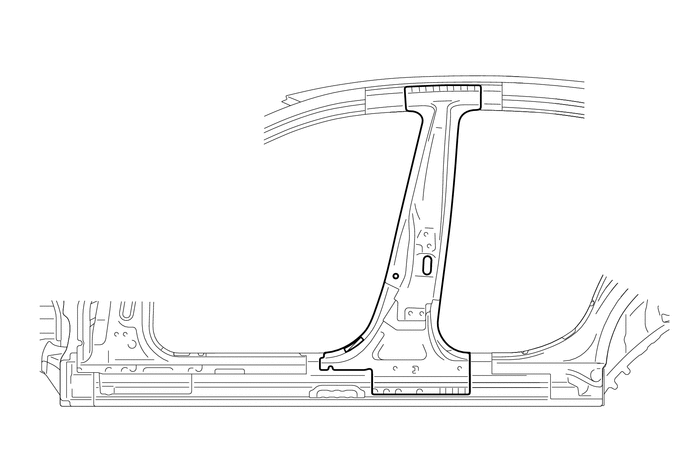
Remove the center body pillar outer.
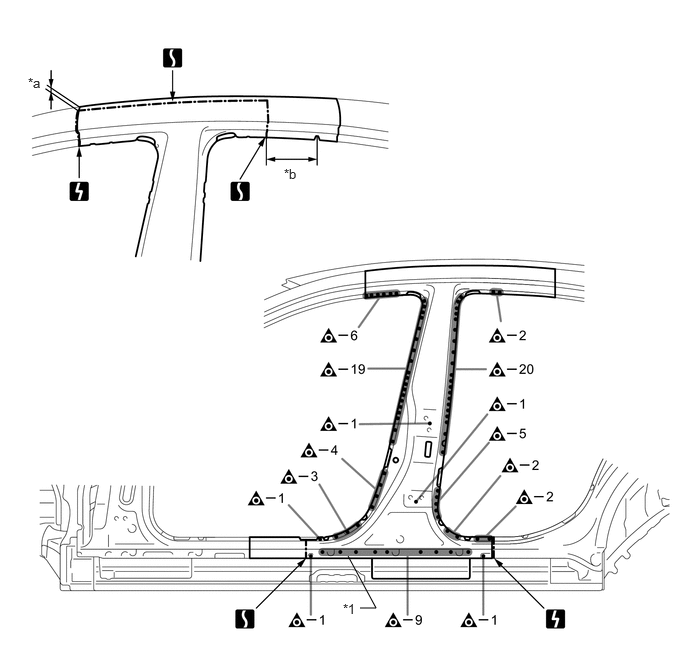
| *1 | CENTER BODY PILLAR OUTER | - | - |
| *a | 20 mm (0.79 in.) | *b | 145 mm (5.71 in.) |
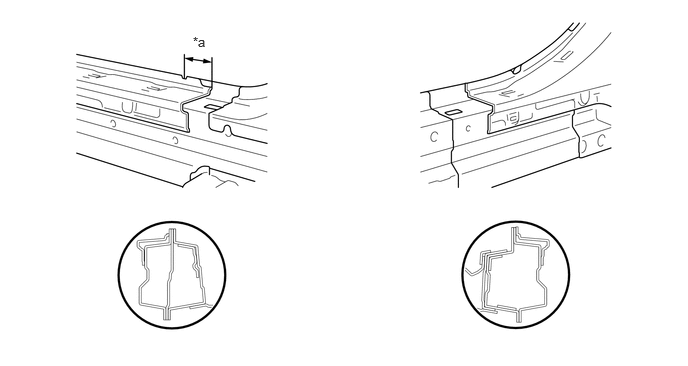
| *a | 65 mm (2.56 in.) | - | - |
Roughly cut open the panel so that the adhesive can be reached. Cut through the adhesive with a cut chisel to remove the panel.
- HINT:
-
In cases where the adhesive cannot be removed with a cut chisel, heat the adhesive with an industrial heater gun or gas burner taking care not to cause panel deformation by overheating.
|
|
Adhesive | - | - |
Remove the center body pillar reinforcement sub-assembly.
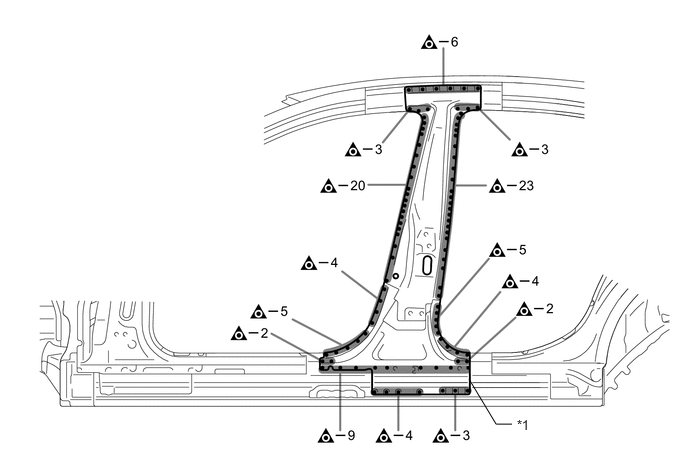
| *1 | CENTER BODY PILLAR REINFORCEMENT SUB-ASSEMBLY | - | - |
INSTALLATION
| Symbol Meaning | |
|---|---|

|
Plug weld |

|
Butt Weld |
Inspect the fitting of the related parts around the new parts before welding. This affects the appearance of the finish.
Temporarily install the new parts and measure each part of the new parts in accordance with the body dimension diagram. (See the body dimensions)
Apply adhesive (3MTM AutomixTM Panel Bonding Adhesive #8115).
- HINT:
- ·
Do not apply adhesive around the plug welding points.
·Minimize squeeze out in plug welding areas.
|
|
Adhesive | - | - |
Weld the center body pillar reinforcement sub-assembly to the vehicle side.
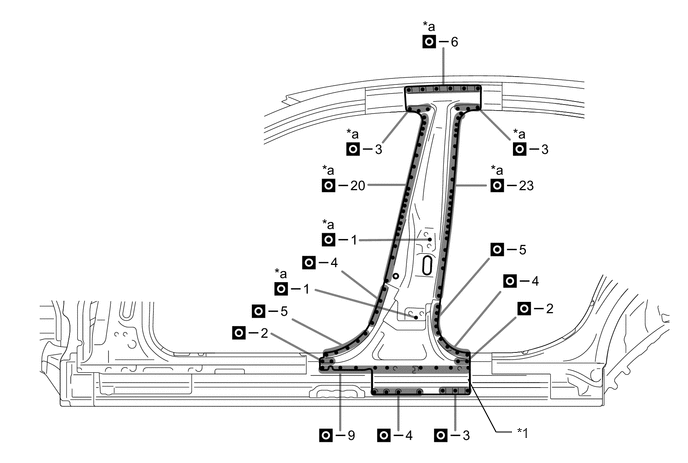
| *1 | CENTER BODY PILLAR REINFORCEMENT SUB-ASSEMBLY | - | - |
| *a | Ultra High Strength Steel Welding Point | - | - |
When welding 2 panels together including 1500 MPa ultra high strength steel.
| *a: Plug weld | Plug diameter | 10 mm (0.39 in.) |
| Wire type | AWS A5.18 ER70S-6/ER70S-3 | |
| Shield gas | Metal active gas |
- NOTICE:
-
Be sure to use Metal active gas (Ar + CO2 20 to 30% or Ar + O2 2%) as the shield gas when plug welding. Sufficient weld strength cannot be assured when using 100% CO2 shield gas.
Apply adhesive (3MTM AutomixTM Panel Bonding Adhesive #8115).
- HINT:
- ·
Do not apply adhesive around the plug welding points.
·Minimize squeeze out in plug welding areas.
|
|
Adhesive | - | - |
Be careful when welding as foamed sealing material is located near the area that is cut and joined together.
|
|
Foamed Sealing Material | - | - |
Weld the center body pillar outer to the vehicle side.
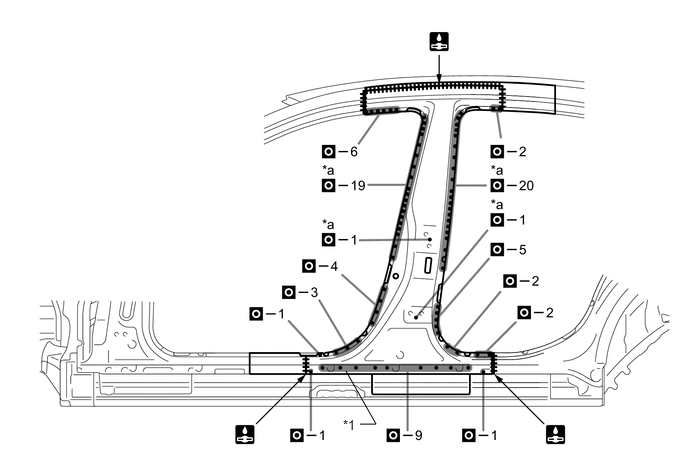
| *1 | CENTER BODY PILLAR OUTER | - | - |
| *a | Ultra High Strength Steel Welding Point | - | - |
When welding 3 panels or more together including 1500 MPa or ultra high strength steel. (When plug welding a third panel to 2 panels which are welded under the conditions described above.)
| *a: Plug weld | Plug diameter | Same as the standard method (See the introduction) |
| Wire type | AWS A5.18 ER70S-6/ER70S-3 | |
| Shield gas | Metal active gas |
- NOTICE:
-
Be sure to use Metal active gas (Ar + CO2 20 to 30% or Ar + O2 2%) as the shield gas when plug welding. Sufficient weld strength cannot be assured when using 100% CO2 shield gas.
After welding, apply the foamed sealing material to the corresponding parts. (See the painting /coating)
After welding, apply body sealer to the corresponding parts. (See the painting /coating)
After applying the top coat, apply anti-rust agent to the internal panel portion of the closed section structural weld points.