FRONT SUSPENSION FRONT UPPER SUSPENSION ARM INSPECTION
CAUTION / NOTICE / HINT
- HINT:
- ·
Use the same procedure for the RH and LH side.
·The following procedure is for the LH side.
PROCEDURE

 48630D
1.INSPECT FRONT UPPER NO. 1 SUSPENSION ARM ASSEMBLY LH
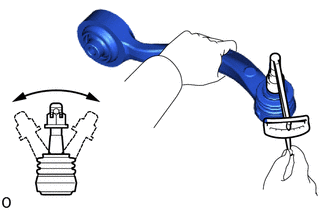
Inspect the turning torque of the ball joint.
Install the nut to the front upper No. 1 suspension arm assembly LH stud.
Using a torque wrench, turn the stud continuously at a rate of 2 to 4 seconds per turn and take the torque reading on the 5th turn.
- Turning torque:
Specified Condition 0.98 to 3.43 N*m
10 to 34 kgf*cm
9 to 30 in.*lbf
If the turning torque is not within the specified range, replace the front upper No. 1 suspension arm assembly LH with a new one.
Inspect the dust cover.
Check that the dust cover is not cracked and that there is no grease on it.
If the dust cover is cracked or there is grease on it, replace the front upper No. 1 suspension arm assembly LH with a new one.
48630E
2.INSPECT FRONT UPPER NO. 2 SUSPENSION ARM ASSEMBLY LH
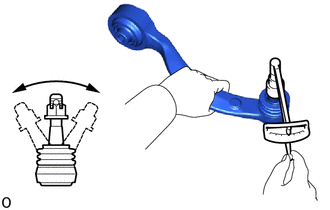
Inspect the turning torque of the ball joint.
Install the nut to the front upper No. 2 suspension arm assembly LH stud.
Using a torque wrench, turn the stud continuously at a rate of 2 to 4 seconds per turn and take the torque reading on the 5th turn.
- Turning torque:
Specified Condition 0.98 to 3.43 N*m
10 to 34 kgf*cm
9 to 30 in.*lbf
If the turning torque is not within the specified range, replace the front upper No. 2 suspension arm assembly LH with a new one.
Inspect the dust cover.
Check that the dust cover is not cracked and that there is no grease on it.
If the dust cover is cracked or there is grease on it, replace the front upper No. 2 suspension arm assembly LH with a new one.