 |
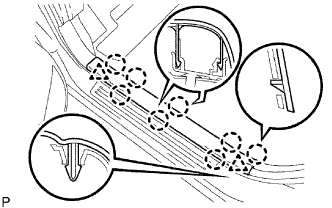
Using a screwdriver, detach the 8 claws and 2 clips, and remove the scuff plate.
- HINT:
- Tape the screwdriver tip before use.
FRONT SIDE FIX WINDOW GLASS > REMOVAL |
| 1. REMOVE FRONT DOOR SCUFF PLATE LH |
|
Using a screwdriver, detach the 8 claws and 2 clips, and remove the scuff plate.
| 2. REMOVE COWL SIDE TRIM BOARD LH |
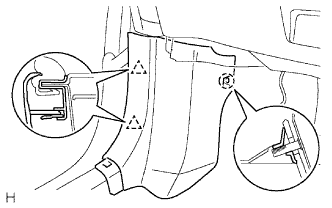 |
Using a screwdriver, detach the claw and 2 clips, and remove the trim board.
| 3. REMOVE FRONT DOOR OPENING TRIM LH |
Partially remove the front door opening trim weatherstrip LH so that the front pillar garnish LH can be removed .
| 4. REMOVE FRONT PILLAR GARNISH CORNER PIECE LH |
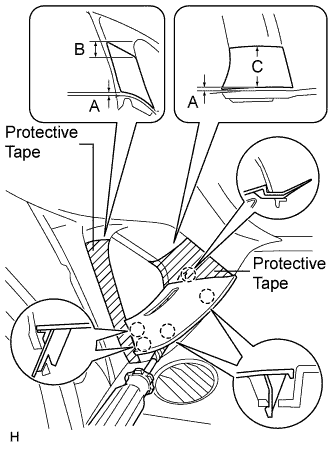 |
Put protective tape as shown in the illustration.
| Area | Specified Condition |
| A | 2.0 mm (0.079 in.) |
| B | 10.0 mm (0.394 in.) |
| C | 50.0 mm (1.969 in.) |
Using a screwdriver, detach the 5 claws and remove the corner piece.
| 5. REMOVE FRONT PILLAR GARNISH LH |
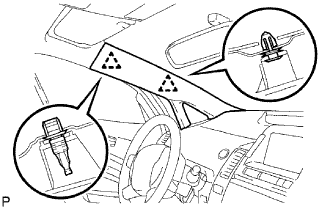 |
w/o Curtain Shield Airbag:
Using a screwdriver, detach the 2 clips and remove the pillar garnish.
w/ Curtain Shield Airbag:
Remove the pillar garnish.
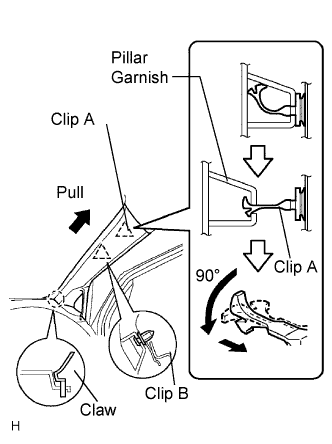 |
Pull the pillar garnish so that clip B detaches, the base of clip A detaches, and the tip of clip A locks in the pillar garnish's hole.
Using needle-nose pliers, rotate clip A 90°. Then pull the pillar garnish to release the tip of clip A from the pillar garnish.
Pull the pillar garnish in the direction indicated by the arrow in the illustration to detach the claw.
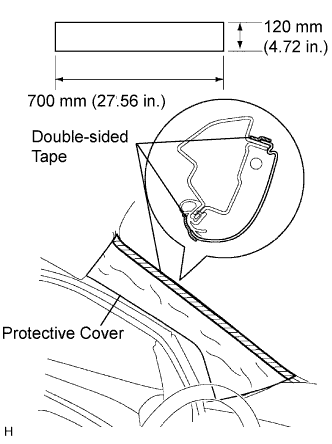 |
w/ Curtain Shield Airbag:
Protect the curtain shield airbag LH.
Thoroughly cover the airbag with cloth or nylon that is approximately 700 mm (27.56 in.) x 120 mm (4.72 in.) and fix the ends of the cover with double-sided tape, as shown in the illustration.
| 6. REMOVE FRONT SIDE FIX WINDOW ASSEMBLY LH |
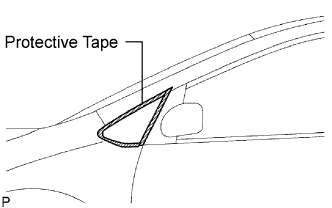 |
Apply protective tape to the outer surface of the vehicle body to prevent scratches.
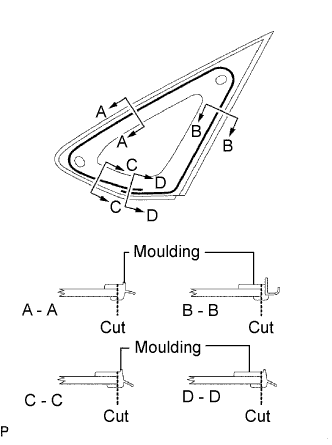 |
Using a knife, cut off the moulding as shown in the illustration.
Remove the remaining moulding.
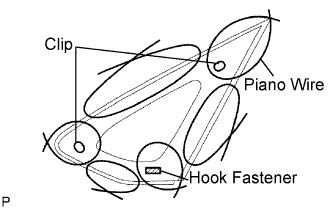 |
From the interior, insert a piano wire between the vehicle body and glass as shown in the illustration.
Tie objects that can serve as handles (for example, wooden blocks) to both wire ends.
Cut through the adhesive by pulling the piano wire around the glass.
Disengage the stoppers.
Using suction cup, remove the glass.
| 7. CLEAN VEHICLE BODY |
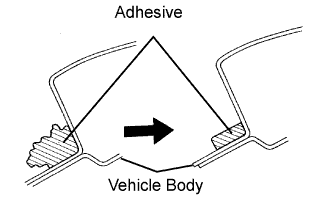 |
Clean and shape the contact surface of the vehicle body.
On the contact surface of the vehicle body, use a knife to cut away excess adhesive as shown in the illustration.
Clean the contact surface of the vehicle body with cleaner.