 |
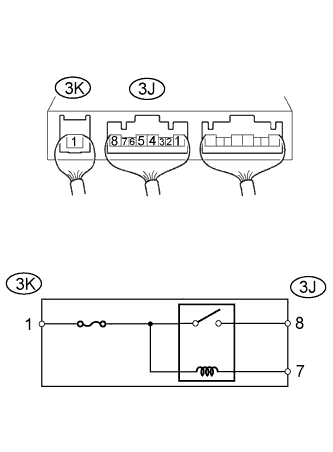
Measure the resistance of the HORN relay.
- Standard voltage:
Tester Connection Specified Condition 3J-8 - 3K-1 10 kΩ or higher 3J-8 - 3K-1 Below 1 Ω (when battery voltage is applied to terminals 3J-7 and 3K-1)
INTEGRATION RELAY > ON-VEHICLE INSPECTION |
| 1. DISCONNECT CABLE FROM NEGATIVE BATTERY TERMINAL |
| 2. INSPECT FUSE (HORN) |
Measure the resistance of the fuse.
| 3. INSPECT INTEGRATION RELAY (HORN RELAY) |
Using a screwdriver, detach the 2 claws and disconnect the integration relay from the engine room No. 1 junction block.
Disconnect the 3 connectors from the integration relay.
|
Measure the resistance of the HORN relay.
| Tester Connection | Specified Condition |
| 3J-8 - 3K-1 | 10 kΩ or higher |
| 3J-8 - 3K-1 | Below 1 Ω (when battery voltage is applied to terminals 3J-7 and 3K-1) |
Connect the 3 connectors to the integration relay.
Install the integration relay to the engine room No. 1 junction block.
| 4. CONNECT CABLE TO NEGATIVE BATTERY TERMINAL |
| 5. PERFORM INITIALIZATION |
Perform initialization ( Click here).