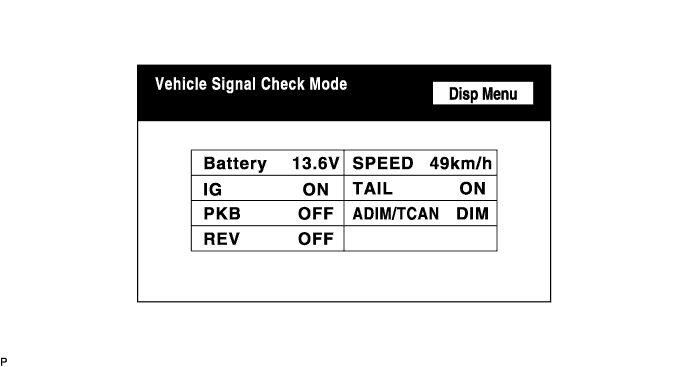
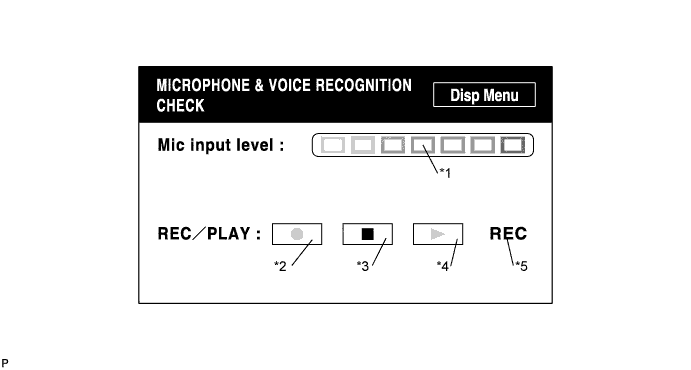
System Check Mode Screen
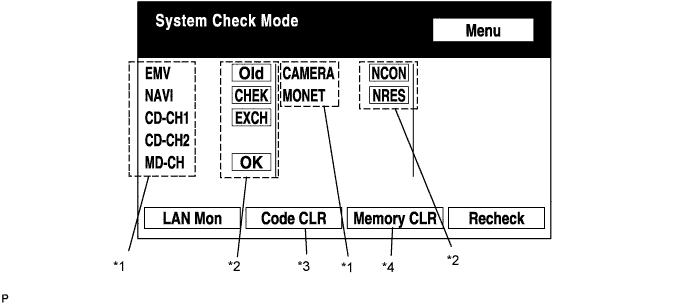
Device Names and Hardware Address/*1
- HINT:
- Registered device names are displayed.
- If a device name is unknown to the system, its physical address is shown instead.
Address No. Name Address No. Name 110 EMV 120 AVX 128 1DIN TV 140 AVN 144 G-BOOK 178 NAVI 17C MONET 190 AUDIO H/U 1AC CAMERA-C 1B0 Rr-TV 1C0 Rr-CONT 19D BT-HF 1C4 PANEL 1C6 G/W 1C8 FM-M-LCD 1D8 CONT-SW 1EC Body 118 EMVN 1F1 XM 1F2 SIRIUS 230 TV-TUNER 240 CD-CH2 250 DVD-CH 280 CAMERA 360 CD-CH1 3A0 MD-CH 17D TEL 440 DSP-AMP 530 ETC 1F6 RSE 1A0 DVD-P 1D6 CLOCK 238 DTV 480 AMP Check Result/*2
- HINT:
- Result codes for all devices are displayed.
Result Meaning Action OK Device did not respond with DTC (excluding communication DTCs from AVC-LAN). - EXCH Device responds with "replace" type DTC. Look up DTC in "Unit Check Mode" and replace device. CHEK Device responds with "check" type DTC. Look up DTC in "Unit Check Mode". NCON Device was previously present, but does not respond in diagnostic mode. - Check power supply wire harness of device.
- Check AVC-LAN of device.
Old Device responds with "old" type DTC. Look up DTC in "Unit Check Mode". NRES Device responds in diagnostic mode, but gives no DTC information. - Check power supply wire harness of device.
- Check AVC-LAN of device.
Code Clear/*3
- Present DTCs are cleared.
- Press the "Code CLR" switch for 3 seconds.
- Present DTCs are cleared.
Memory Clear/*4
- Present and past DTCs and registered connected device names are cleared.
- Press the "Memory CLR" switch for 3 seconds.
- Present and past DTCs and registered connected device names are cleared.
Diagnosis MENU Screen
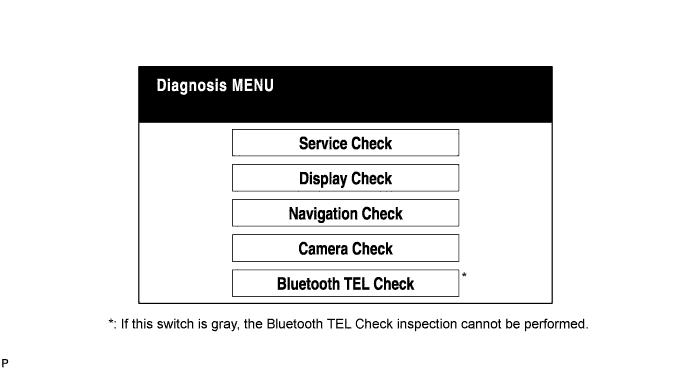
- HINT:
- Each item is grayed out or not displayed based on the device settings.
Unit Check Mode Screen
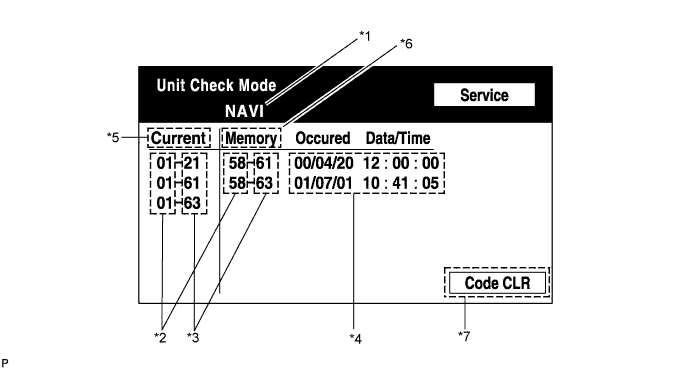
| Display | Contents |
| Device name/*1 | Target device |
| Segment/*2 | Target device logical address |
| DTC/*3 | DTC (Diagnostic Trouble Code) |
| Timestamp/*4 | Time and date of past DTCs are displayed (Year is displayed in 2-digit format). |
| Present Code/*5 | DTCs output at service check are displayed. |
| Past Code/*6 | Diagnostic memory results and recorded DTCs are displayed. |
| Diagnosis Clear Switch/*7 | Pushing this switch for 3 seconds clears diagnostic memory data of target device (both response to diagnostic system check result and displayed data are cleared). |
LAN Monitor (Original) Screen
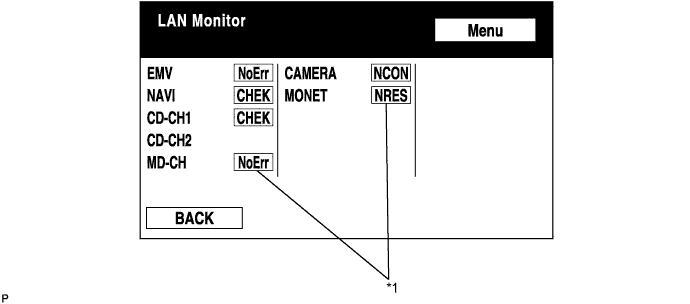
Check Result/*1
- HINT:
- The check results of all the devices are displayed.
Result Meaning Action No Err (OK) There are no communication DTCs. - CHEK Device responds with "check" type DTC. Look up DTC in "Unit Check Mode". NCON Device was previously present, but does not respond in diagnostic mode. - Check power supply wire harness of device.
- Check AVC-LAN of device.
Old Device responds with "old" type DTC. Look up DTC in "Unit Check Mode". NRES Device responds in diagnostic mode, but gives no DTC information. - Check power supply wire harness of device.
- Check AVC-LAN of device.
LAN Monitor (Individual) Screen
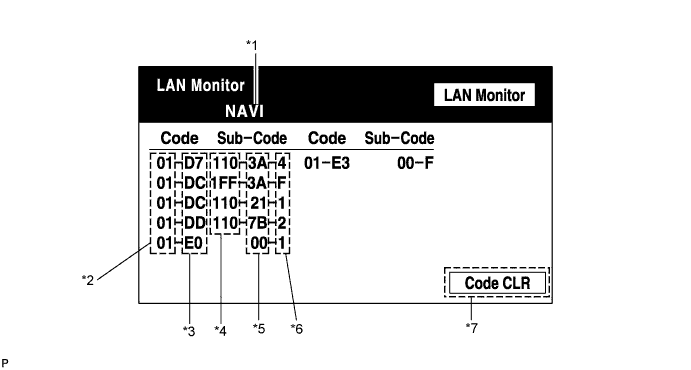
| Display | Contents |
| Device name/*1 | Target device |
| Segment/*2 | Target logical address |
| DTC/*3 | DTC (Diagnostic Trouble Code) |
| Sub-code (device address)/*4 | Physical address stored with DTC (If there is no address, nothing is displayed). |
| Connection check No./*5 | Connection check number stored with DTC |
| DTC occurrence/*6 | Number of times same DTC has been recorded |
| Diagnosis Clear Switch/*7 | Pushing this switch for 3 seconds clears diagnostic memory data of target device (both response to diagnostic system check result and displayed data are cleared). |