 |
Unlock the 2 washer tank cover knobs, and then remove the rear floor board.
TIMING CHAIN > REMOVAL |
| 1. REMOVE REAR NO. 2 FLOOR BOARD |
|
Unlock the 2 washer tank cover knobs, and then remove the rear floor board.
| 2. REMOVE REAR DECK FLOOR BOX |
 |
Remove the rear deck floor box from the vehicle.
| 3. REMOVE REAR NO. 3 FLOOR BOARD |
 |
Detach the 4 claws, and then remove the floor board.
| 4. DISCONNECT CABLE FROM NEGATIVE BATTERY TERMINAL |
| 5. REMOVE RADIATOR SUPPORT OPENING COVER |
| 6. REMOVE FRONT WHEELS |
| 7. REMOVE NO. 3 ENGINE UNDER COVER |
| 8. REMOVE NO. 4 CENTER ENGINE UNDER COVER |
| 9. DRAIN ENGINE COOLANT |
Disconnect the coolant heat storage water pump connector.
Connect a vinyl hose to the drain cock of the radiator.
Connect a vinyl hose to the drain cock of the engine.
Connect a vinyl hose to the drain cock of the coolant heat storage tank.
Loosen the drain cock plugs of the radiator, engine and coolant heat storage tank, then drain the coolant.
Remove the radiator cap.
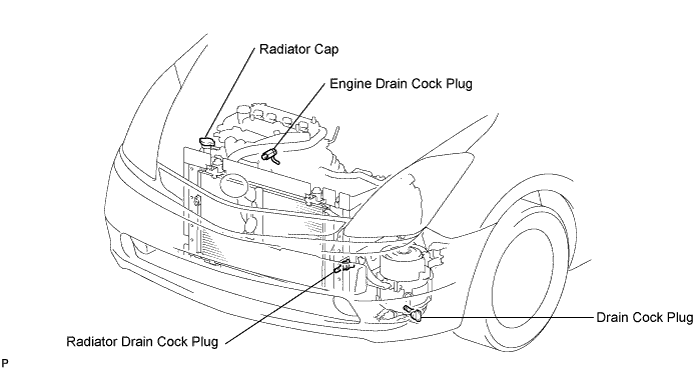
Drain the coolant in the radiator reservoir.
| 10. DRAIN ENGINE OIL |
Remove the oil filler cap.
Remove the oil drain plug, then drain the oil into a container.
Clean the oil drain plug and install it with a new gasket.
| 11. REMOVE WIPER ARM HEAD CAP |
| 12. REMOVE FRONT WIPER ARM LH |
Remove the 2 nuts and FR wiper arm LH.
| 13. REMOVE FRONT WIPER ARM RH |
Remove the nut and FR wiper arm RH.
| 14. REMOVE HOOD TO COWL TOP SEAL |
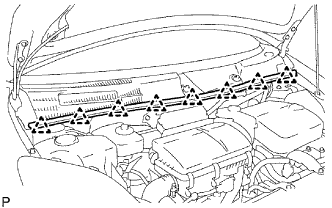 |
Detach the 8 clips and remove the hood to cowl top seal.
| 15. REMOVE COWL TOP VENTILATOR LOUVER LH |
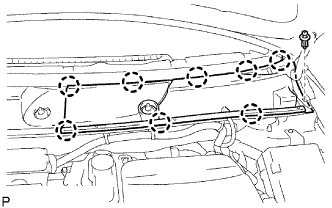 |
Detach the 8 claws and clip, and remove the cowl top ventilator louver LH.
| 16. REMOVE COWL TOP VENTILATOR LOUVER RH |
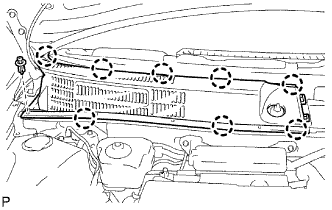 |
Detach the 8 claws and clip, and remove the cowl top ventilator louver RH.
| 17. REMOVE WINDSHIELD MOTOR WITH WIPER LINK ASSEMBLY |
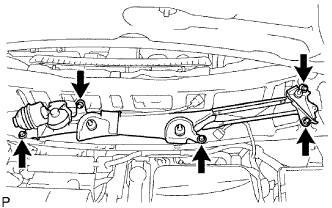 |
Disconnect the connector.
Remove the 5 bolts and wiper motor & link.
| 18. REMOVE FRONT COWL TOP PANEL OUTER |
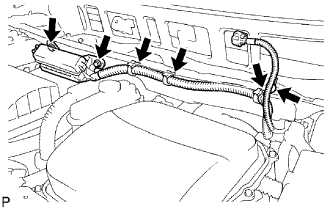 |
Remove the 2 bolts and disconnect the No. 2 engine room relay block.
Remove the 4 wire harness clamps.
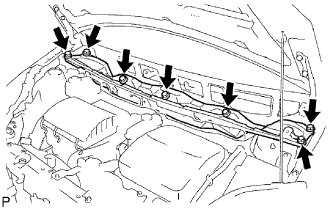 |
Remove the 7 bolts and panel.
| 19. REMOVE AIR CLEANER ASSEMBLY |
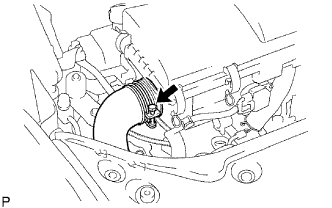 |
Loosen the clamp, then disconnect the No. 1 air cleaner inlet from the air cleaner case.
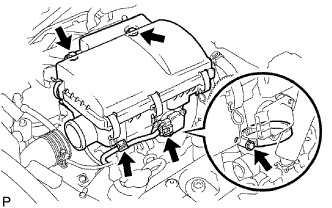 |
Disconnect the intake air flow meter connector, then remove the wire harness clamp.
Loosen the clamp, then remove the 2 bolts and air cleaner assembly.
| 20. REMOVE NO. 2 AIR CLEANER INLET |
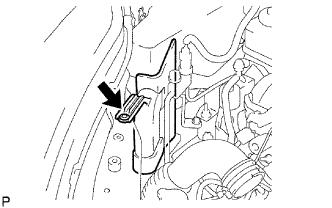 |
Remove the clip and No. 2 air cleaner inlet.
| 21. DISCONNECT BRAKE MASTER CYLINDER RESERVOIR |
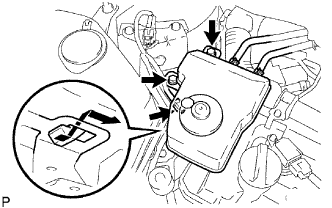 |
Disconnect the connector.
Remove the 2 bolts.
Separate the claw fitting, then suspend the brake master cylinder reservoir with rope.
| 22. REMOVE RESERVOIR BRACKET |
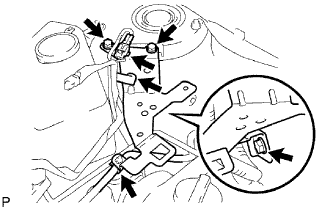 |
Disconnect the hose from the brake master cylinder reservoir bracket.
Remove the 3 bolts and wire harness clamp, then remove the brake master cylinder reservoir bracket.
| 23. REMOVE WINDSHIELD WASHER JAR ASSEMBLY |
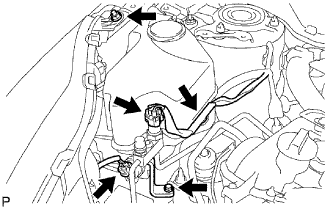 |
Loosen the bolt which holds the headlight RH.
Disconnect the connector and remove the wire harness clamp.
Remove the bolt and bracket.
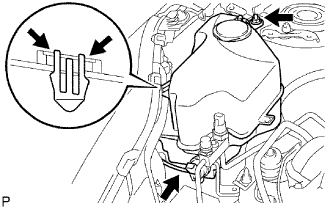 |
Remove the nut.
Slightly lift the headlight RH and separate the claw fitting, then remove the washer jar assembly.
Disconnect the hose from the washer jar assembly.
| 24. REMOVE CYLINDER HEAD COVER |
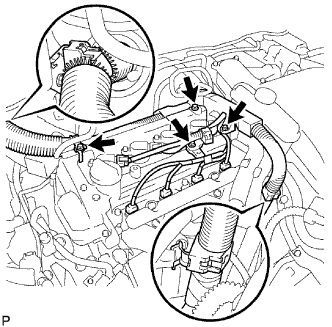 |
Disconnect the fuel injector connector and ignition coil connector.
Remove the 3 bolts and wire harness clamp, then disconnect the wire harness.
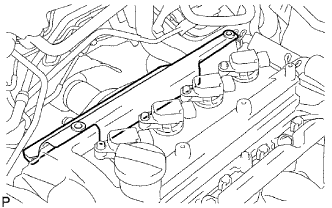 |
Remove the brake master cylinder reservoir cover.
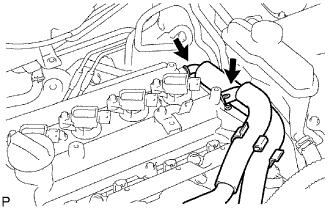 |
Disconnect the ventilation hose and ventilation hose No. 2.
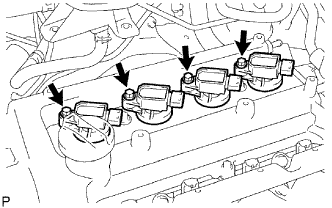 |
Remove the bolt and ignition coil.
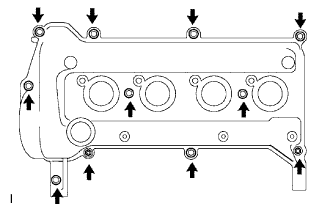 |
Remove the 9 bolts and 2 nuts, then remove the cylinder head cover.
| 25. REMOVE PURGE VSV |
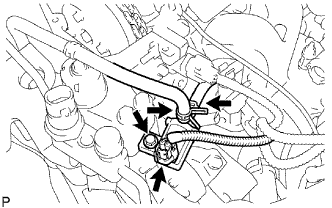 |
Disconnect the connector and hose.
Remove the bolt and purge VSV.
| 26. REMOVE DRIVE BELT |
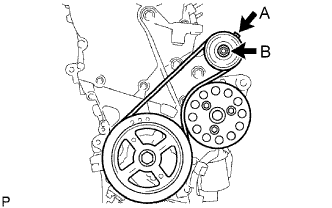 |
Loosen nut A.
Turn adjust bolt B, and then release the belt tension.
Remove the belt.
| 27. REMOVE WATER PUMP |
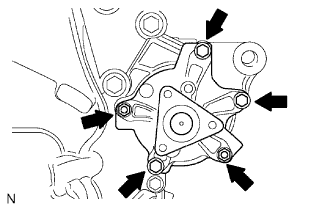 |
Remove the 3 bolts and 2 nuts.
Remove the water pump and gasket.
| 28. REMOVE CRANKSHAFT PULLEY |
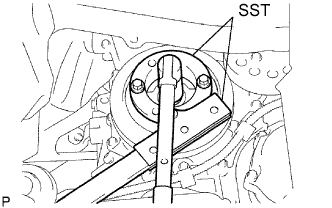 |
Using SST, hold the crankshaft pulley and loosen the crankshaft bolt.
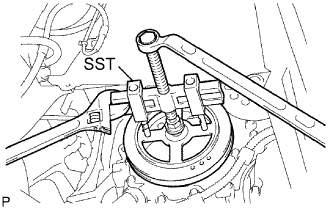 |
Loosen the crankshaft bolt until 2 to 3 threads of the bolt are tightened to the crankshaft.
Using SST, remove the crankshaft damper.
Remove the crankshaft bolt.
| 29. REMOVE ENGINE MOUNTING INSULATOR RH |
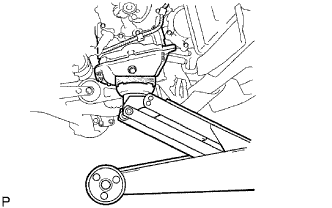 |
Put a wooden block on a jack. Support the oil pan with the jack.
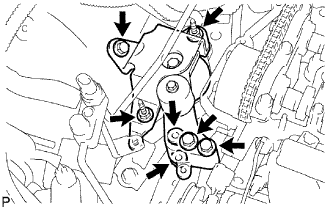 |
Remove the 3 bolts and 4 nuts, then remove the engine mounting insulator RH.
| 30. REMOVE ENGINE MOUNTING SPACER |
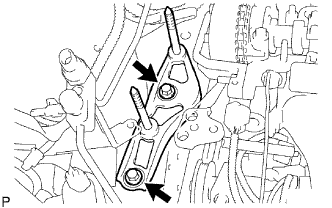 |
Remove the 2 bolts and engine mounting spacer.
| 31. REMOVE ENGINE MOUNTING BRACKET |
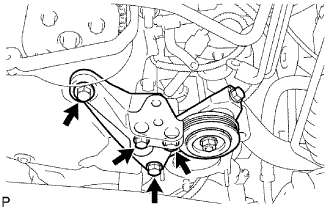 |
Remove the 4 bolts and engine mounting bracket.
| 32. REMOVE CAMSHAFT TIMING OIL CONTROL VALVE ASSEMBLY |
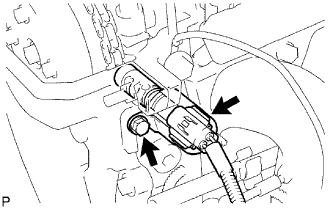 |
Disconnect the connector.
Remove the bolt and camshaft timing oil control valve assembly.
| 33. REMOVE CRANKSHAFT POSITION SENSOR |
Disconnect the sensor connector.
Remove the bolt and sensor.
| 34. REMOVE TIMING CHAIN COVER |
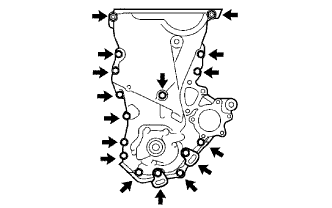 |
Remove the 15 bolts and nut.
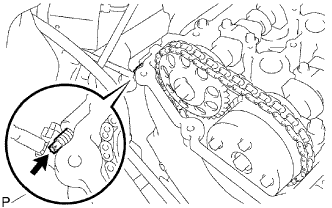 |
Using an E8 "torx" socket wrench, remove the stud bolt.
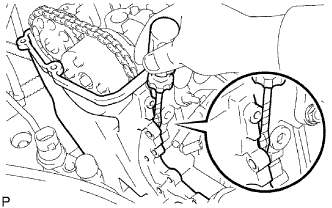 |
Using a screwdriver with its tip wrapped in tape, remove the oil pump by prying out between the cylinder head and cylinder block.
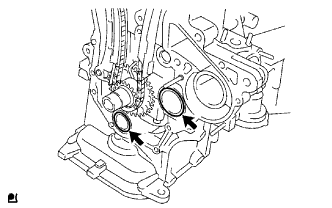 |
Remove the 2 O-rings.
| 35. REMOVE OIL PUMP SEAL |
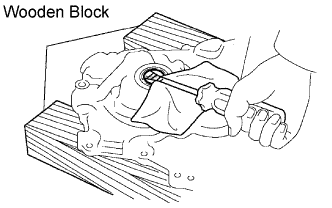 |
If the timing chain cover is removed:
Using a screwdriver, remove the oil seal.
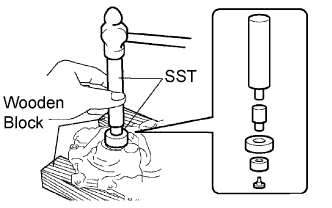 |
Using SST and a hammer, tap in a new oil seal until its surface is flush with the timing chain cover edge.
Apply multi-purpose grease to the lip of the oil seal.
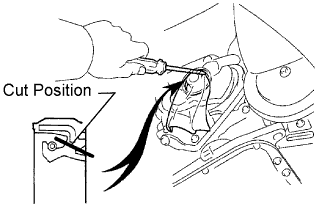 |
If the timing chain cover is installed:
Using a knife, cut off the lip of the oil seal.
Using a screwdriver with the tip wrapped in tape, pry out the oil seal.
Apply multi-purpose grease to the lip of a new oil seal.
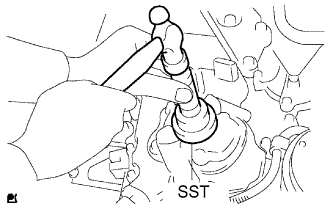 |
Using SST and a hammer, tap in the oil seal until its surface is flush with the timing chain cover edge.
| 36. SET NO. 1 CYLINDER TO TDC / COMPRESSION |
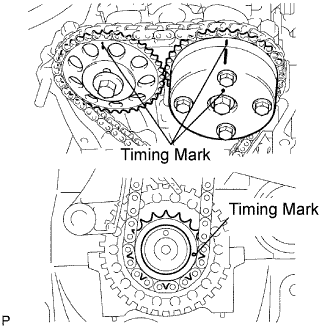 |
Install the washer to the crankshaft bolt, then install the bolt to the crankshaft.
Turn the crankshaft clockwise so it is positioned as illustrated.
| 37. REMOVE NO. 1 CHAIN TENSIONER |
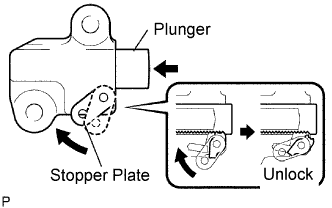 |
Lift up the stopper plate, then unlock the plunger.
Push in the plunger to the end with the plunger unlocked.
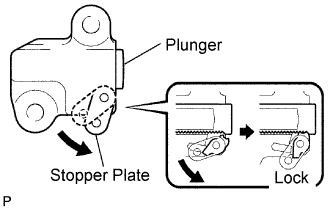 |
Lower the stopper plate with the plunger pushed to the end, then lock the plunger.
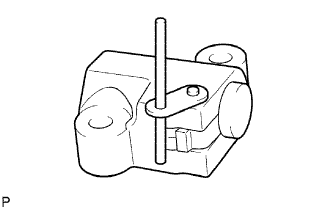 |
Insert a 3.0 mm (0.118 in.) diameter bar into the hole of the stopper plate with the plunger locked.
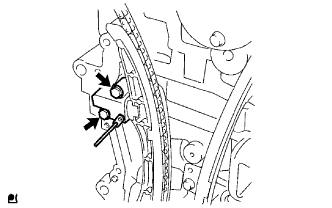 |
Remove the 2 bolts and chain tensioner.
| 38. REMOVE CHAIN TENSIONER SLIPPER |
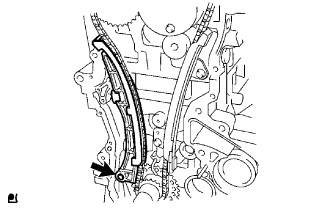 |
Remove the bolt and tensioner slipper.
| 39. REMOVE NO. 1 CHAIN VIBRATION DAMPER |
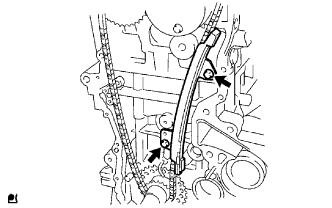 |
Remove the 2 bolts and chain vibration damper.
| 40. REMOVE CHAIN |
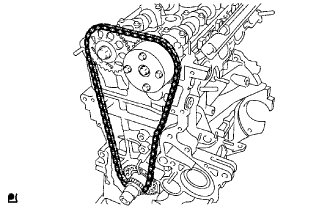 |
Remove the chain from the engine.