 |
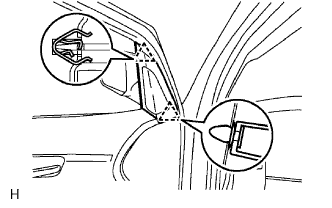
Using a screwdriver, detach the 2 clips and remove the garnish.
- HINT:
- Tape the screwdriver tip before use.
FRONT DOOR BELT MOULDING > REMOVAL |
| 1. DISCONNECT CABLE FROM NEGATIVE BATTERY TERMINAL |
| 2. REMOVE FRONT DOOR LOWER FRAME BRACKET GARNISH LH |
|
Using a screwdriver, detach the 2 clips and remove the garnish.
| 3. REMOVE FRONT DOOR INSIDE HANDLE BEZEL LH |
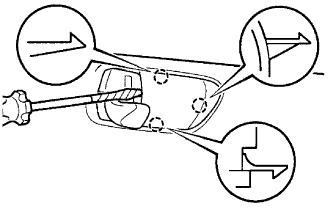 |
Using a screwdriver, detach the 3 claws and remove the bezel.
| 4. REMOVE DOOR PULL HANDLE |
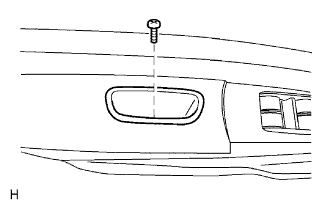 |
Remove the screw and pull handle.
| 5. REMOVE FRONT ARMREST UPPER BASE PANEL LH |
 |
Driver's side:
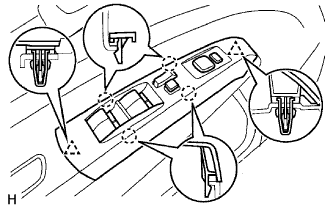
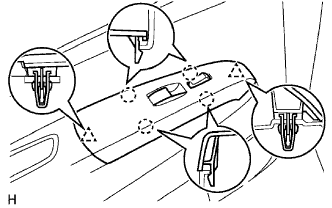
Using a screwdriver, detach the 2 clips and 4 claws, and remove the armrest base panel together with the window regulator master switch.
Disconnect the switch connector.
Remove the 3 screws and the window regulator master switch from the armrest base panel.
 |
Passenger's side:
Using a screwdriver, detach the 2 clips and 4 claws, and remove the armrest base panel together with the 2 switches.
Disconnect the switch connector.
Using a screwdriver, detach the 2 claws and remove the door control switch.
Using a screwdriver, detach the 2 claws and remove the power window regulator switch.
| 6. REMOVE FRONT DOOR TRIM BOARD SUB-ASSEMBLY LH |
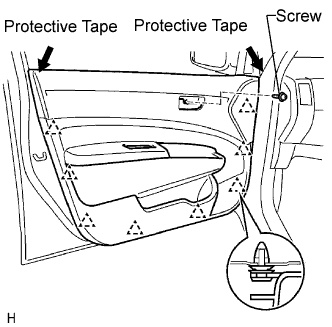 |
Remove the screw.
Using a screwdriver, detach the 7 clips and remove the trim board.
| 7. REMOVE OUTER REAR VIEW MIRROR ASSEMBLY LH |
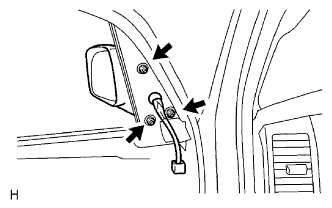 |
Disconnect the mirror connector.
Remove the 3 nuts and mirror.
| 8. REMOVE FRONT DOOR BELT MOULDING ASSEMBLY LH |
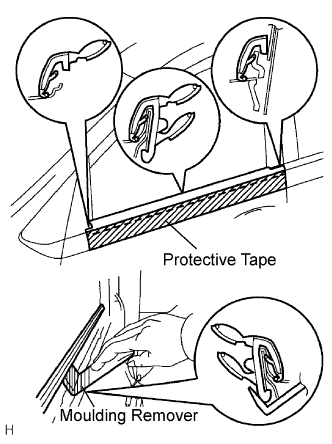 |
Put protective tape under the moulding.
Using a moulding remover, detach the claws to remove the moulding as shown in the illustration.