|
Unlock the 2 washer tank cover knobs, and then remove the rear floor board.
FRAME WIRE > REMOVAL |
| 1. PRECAUTION |
| 2. REMOVE FRONT WHEEL |
| 3. REMOVE REAR NO. 2 FLOOR BOARD |
|
Unlock the 2 washer tank cover knobs, and then remove the rear floor board.
| 4. REMOVE REAR DECK FLOOR BOX |
 |
Remove the rear deck floor box from the vehicle.
| 5. REMOVE REAR NO. 3 FLOOR BOARD |
 |
Detach the 4 claws, and then remove the floor board.
| 6. DISCONNECT CABLE FROM NEGATIVE BATTERY TERMINAL |
| 7. REMOVE SERVICE PLUG GRIP |
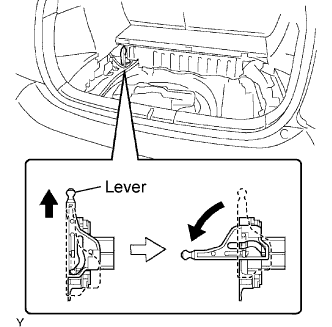 |
Slide up the lever of the service plug grip. Remove the service plug grip while turning the lever to the left.
Insulate the service plug with insulating tape.
| 8. REMOVE REAR DECK TRIM COVER |
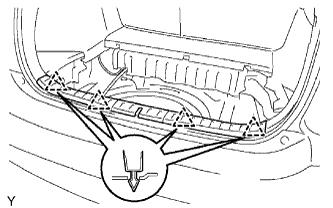 |
Detach the 4 clips shown in the illustration, then remove the deck trim cover.
| 9. REMOVE TONNEAU COVER |
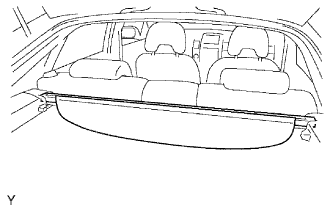 |
Remove the tonneau cover from the vehicle.
| 10. REMOVE REAR SEAT CUSHION ASSEMBLY |
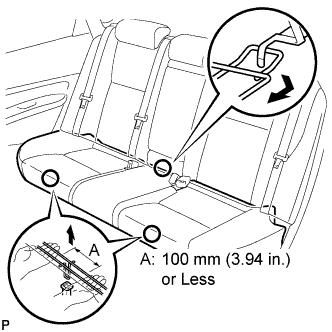 |
Detach the seat cushion's 2 front hooks from the vehicle body.
Choose a hook to detach first. Place your hands near the hook as shown in the illustration. Then lift the seat cushion to detach the hook.
Repeat for the other hook.
Detach the seat cushion's rear hook.
Remove the seat cushion.
| 11. REMOVE REAR NO. 1 FLOOR BOARD |
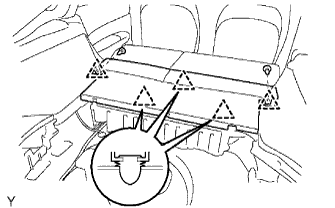 |
Remove the 2 bolts and luggage hold belt strikers.
Remove the 5 clips shown in the illustration and the rear floor board.
| 12. REMOVE REAR SIDE SEATBACK FRAME LH |
|
Remove the 2 bolts and luggage hold belt strikers.
Remove the 5 clips shown in the illustration and the rear floor board.
| 13. REMOVE REAR NO. 4 FLOOR BOARD |
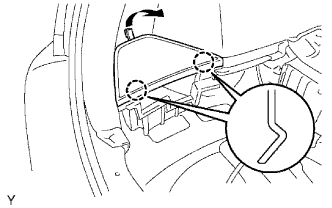 |
While lifting up the rear floor board as shown in the illustration, undo the 2 joints and remove the rear floor board.
| 14. REMOVE DECK FLOOR BOX LH |
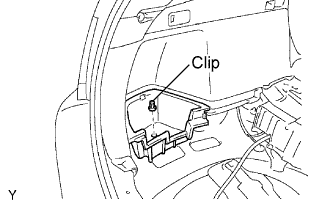 |
Remove the clip and deck floor box LH.
| 15. REMOVE DECK TRIM SIDE PANEL LH |
Remove the bolt and luggage hold belt striker.
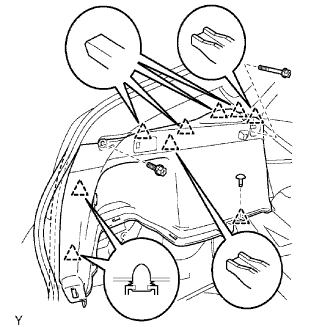 |
Remove the 2 bolts from the deck trim side panel LH.
Remove the clip from the deck trim side panel LH.
Undo the 8 clips, then pull out a part of the weather strip and remove the deck trim side panel LH.
Disconnect the lighting connector.
| 16. REMOVE BATTERY CARRIER BRACKET |
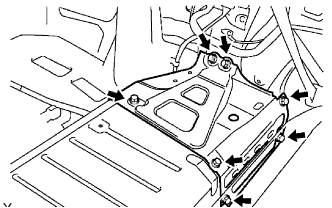 |
Remove the 7 bolts and battery carrier bracket.
| 17. REMOVE REAR DOOR SCUFF PLATE LH |
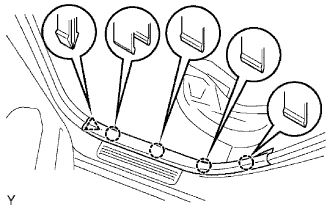 |
Remove the clip and 4 joints shown in the illustration, and then remove the rear door scuff plate.
| 18. REMOVE FLOOR SIDE PANEL LH |
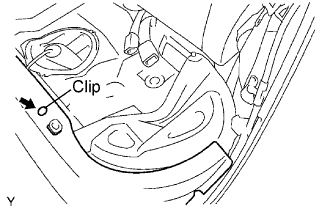 |
Remove the clip, then roll back the carpet.
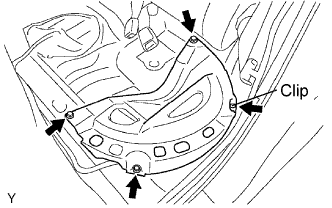 |
Remove the clip from the floor side panel.
Remove the 3 bolts and floor side panel.
| 19. REMOVE NO. 6 BATTERY CARRIER PANEL |
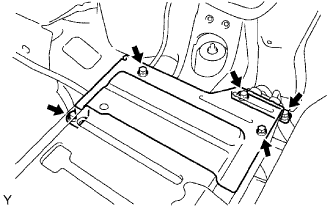 |
Remove the 3 bolts, 2 nuts and battery carrier panel.
| 20. REMOVE JUNCTION TERMINAL |
| 21. REMOVE FRAME WIRE |
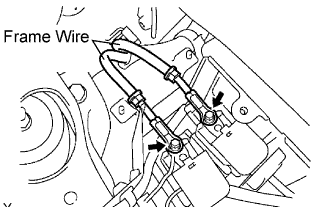 |
Remove the 2 nuts, then remove the frame wire from the No. 2 and No. 3 system main relay.
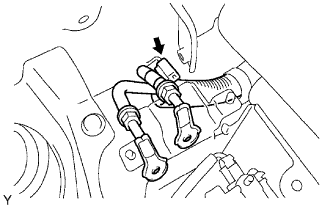 |
Remove the clamps, then remove the frame wire from the rear floor.
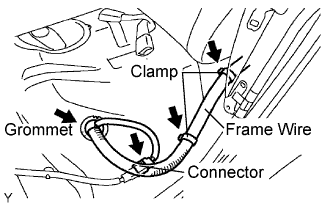 |
Remove the 2 clamps, then disconnect the frame wire from the center floor panel.
Disconnect the connector.
Disconnect the grommet.
| 22. REMOVE WINDSHIELD WIPER ARM COVER |
| 23. REMOVE FRONT WIPER ARM LH |
Remove the 2 nuts and FR wiper arm LH.
| 24. REMOVE FRONT WIPER ARM RH |
Remove the nut and FR wiper arm RH.
| 25. REMOVE HOOD TO COWL TOP SEAL |
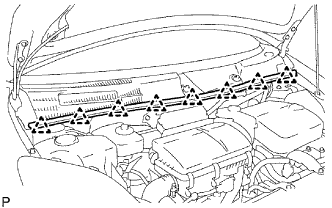 |
Detach the 8 clips and remove the hood to cowl top seal.
| 26. REMOVE COWL TOP VENTILATOR LOUVER LH |
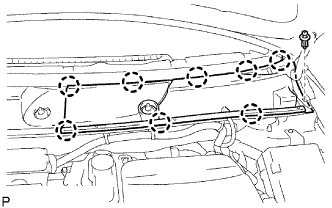 |
Detach the 8 claws and clip, and remove the cowl top ventilator louver LH.
| 27. REMOVE COWL TOP VENTILATOR LOUVER RH |
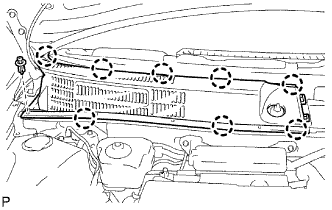 |
Detach the 8 claws and clip, and remove the cowl top ventilator louver RH.
| 28. REMOVE FRONT WIPER LINK AND WIPER MOTOR ASSEMBLY |
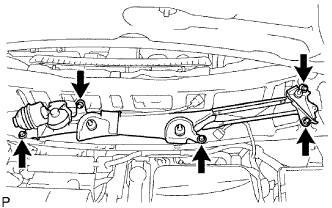 |
Disconnect the connector.
Remove the 5 bolts and wiper motor & link.
| 29. REMOVE FRONT COWL TOP PANEL OUTER |
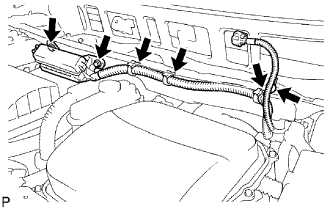 |
Remove the 2 bolts and disconnect the No. 2 engine room relay block.
Remove the 4 wire harness clamps.
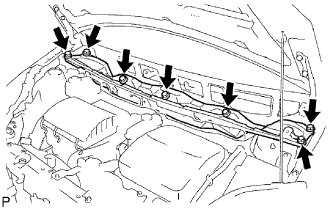 |
Remove the 7 bolts and panel.
| 30. SEPARATE FRAME WIRE |
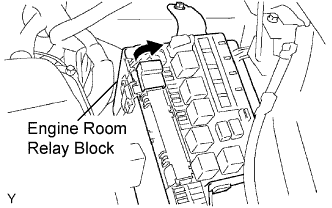 |
Flip open the cover of the jump start terminal on the engine room relay block.
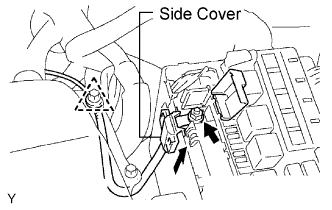 |
Remove the side cover by sliding it upward.
Remove the nut, then disconnect the frame wire from the engine room relay block.
Disconnect the clamp, then disconnect the frame wire from the side member.
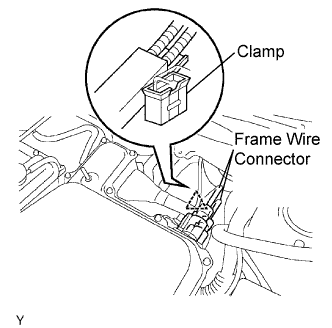 |
Remove the 2 frame wire connectors shown in the illustration from the inverter with converter assembly.
Disconnect the clamp, then disconnect the frame wire from the dash panel bracket.
| 31. REMOVE COLUMN HOLE COVER SILENCER SHEET |
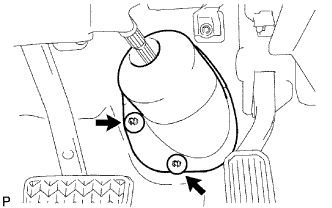 |
Fold back the floor carpet and remove the 2 clips and column hole cover silencer sheet.
| 32. SEPARATE STEERING INTERMEDIATE SHAFT |
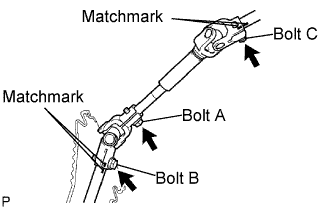 |
Loosen the bolt labeled A on the steering sliding yoke.
Put matchmarks on the steering intermediate shaft and steering intermediate shaft.
Remove the bolt labeled B and separate the steering intermediate shaft from the steering intermediate shaft.
Put matchmarks on the steering intermediate shaft and steering column.
Remove the bolt labeled C and separate the steering intermediate shaft from the steering column.
| 33. REMOVE NO. 3 ENGINE UNDER COVER |
| 34. REMOVE NO. 4 ENGINE UNDER COVER CENTER |
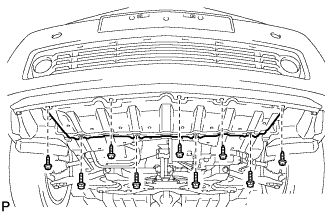 |
Remove the 5 screws, 4 bolts and under cover.
| 35. REMOVE FRONT FLOOR COVER LH |
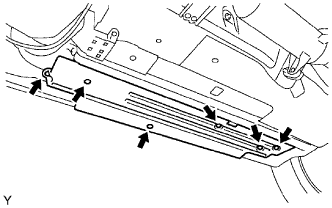 |
Remove the 6 clips and front floor cover LH.
| 36. REMOVE FRONT FLOOR COVER CENTER LH |
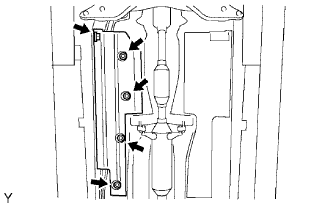 |
Remove the 5 clips and front floor cover center LH.
| 37. REMOVE NO. 1 WIRE HARNESS PROTECTOR |
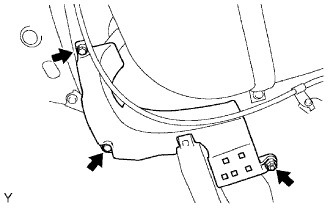 |
Remove the 2 nuts, bolt and wire harness protector.
| 38. SEPARATE FRONT SUSPENSION CROSSMEMBER |
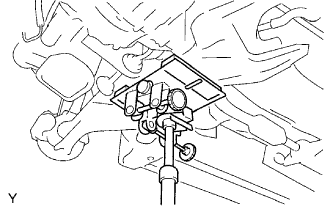 |
Support the front suspension crossmember using a jack.
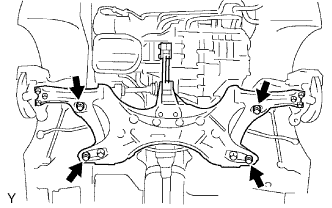 |
Remove the 4 bolts shown in the illustration from the front suspension crossmember.
| 39. REMOVE FRAME WIRE |
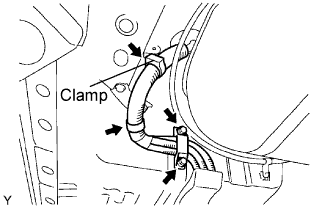 |
Remove the 2 bolts shown in the illustration.
Disconnect the 2 clamps.
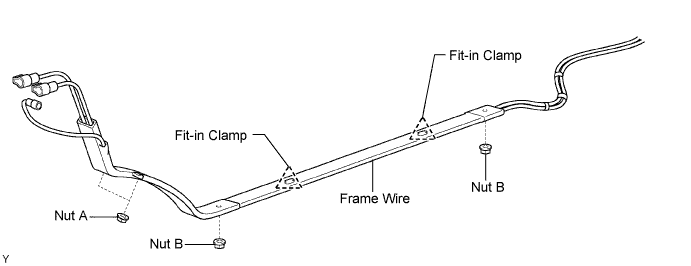
Lower the jack a little and remove both nuts labeled A.
Remove both nuts labeled B.
Disconnect the fit-in clamps, then remove the frame wire.