Connect the system main relay connector.
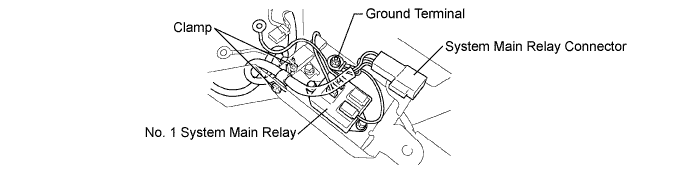
SYSTEM MAIN RELAY > INSTALLATION |
| 1. INSTALL NO. 1 SYSTEM MAIN RELAY |
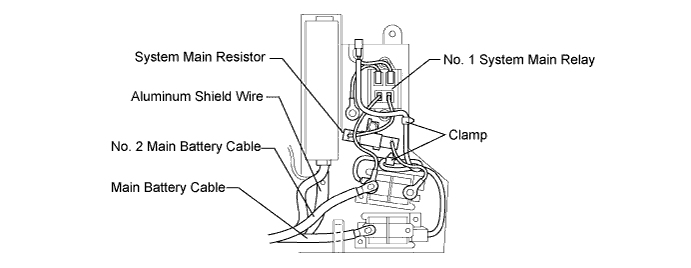
Install the No. 1 system main relay with the 2 bolts.
Connect the system main relay connector.
Connect the 2 clamps, then install the system main relay sub wiring harness to the upper battery carrier.
Install the ground terminal with the nut.
Install the connector.
| 2. INSTALL NO. 3 SYSTEM MAIN RELAY |
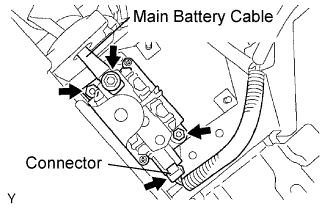 |
Connect the connector, then temporarily install the No. 3 system main relay.
Install the No. 3 system main relay with 2 new nuts.
Install the main battery cable with the nut.
| 3. INSTALL NO. 2 SYSTEM MAIN RELAY |
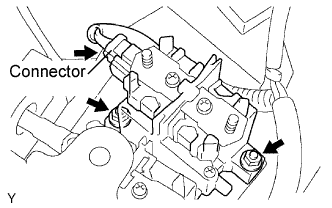 |
Install the No. 2 system main relay with the 2 nuts.
Connect the connector.
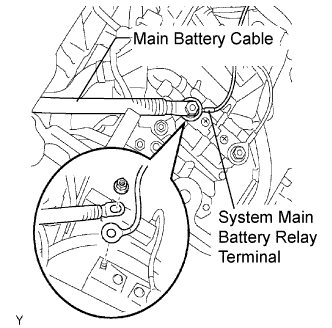 |
Temporarily install the system main relay terminal and No. 2 main battery cable terminal, in that order, and tighten a new nut.
Install the 2 terminal covers.
| 4. INSPECT CONTACT CONDITION |
Check that all the wire harnesses are correctly and securely connected on the upper battery carrier.
| 5. INSTALL FRAME WIRE |
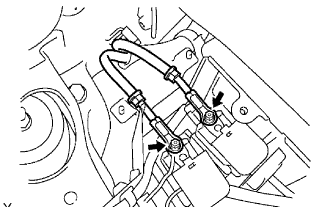 |
Install the frame wire on the No. 2 and No. 3 system main relay with 2 new nuts.
Connect the 2 clamps, then install the frame wire to the upper battery carrier.
| 6. INSTALL JUNCTION TERMINAL |
 |
| 7. INSTALL NO. 6 BATTERY CARRIER PANEL |
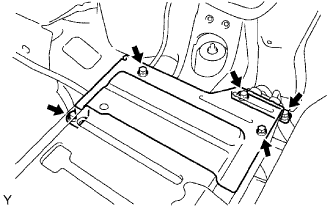 |
Install the battery carrier panel with the bolt and 2 nuts.
| 8. INSTALL BATTERY CARRIER BRACKET |
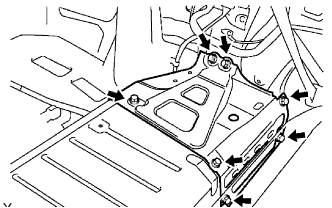 |
Install the battery carrier bracket with the 7 bolts.
| 9. INSTALL DECK TRIM SIDE PANEL LH |
Connect the lighting connector.
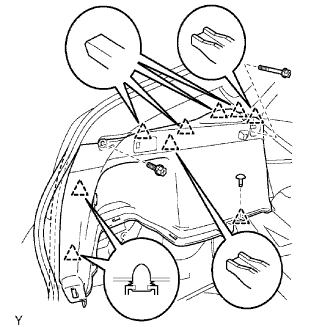 |
Install the deck trim side panel with the 8 clips and 2 bolts, and then install the part of the weather strip.
Install the luggage hold belt striker with the bolt.
| 10. INSTALL DECK FLOOR BOX LH |
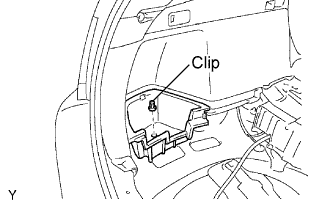 |
Install the deck floor box with the clip.
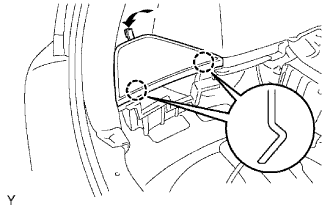
| 11. INSTALL REAR NO. 4 FLOOR BOARD |
 |
| 12. INSTALL REAR SIDE SEAT BACK FRAME LH |
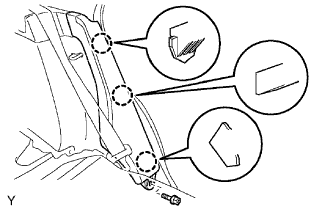 |
Install the seat back frame with the bolt.
| 13. INSTALL REAR NO. 1 FLOOR BOARD |
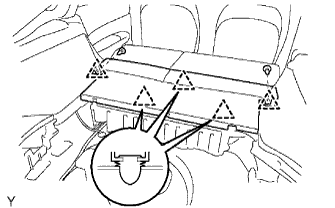 |
Install the floor board.
Install the 2 luggage strikers with the 2 bolts.
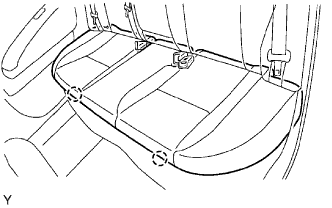
| 14. INSTALL REAR SEAT CUSHION ASSEMBLY |
 |
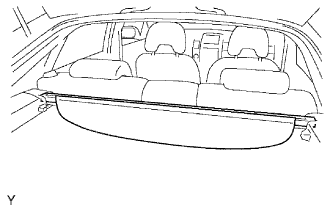
| 15. INSTALL TONNEAU COVER |
 |
| 16. INSTALL REAR DECK TRIM COVER |
|
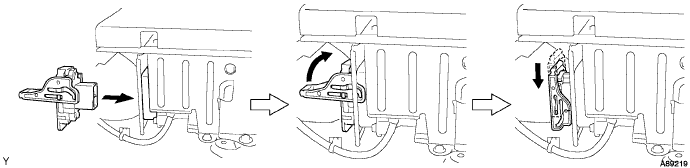
| 17. INSTALL SERVICE PLUG GRIP |
Joint the service plug grip with the HV battery.
While pushing the service plug grip to the right, rotate the lever to the right.
Slide the lever down to lock the service plug grip in place.
| 18. CONNECT CABLE TO NEGATIVE BATTERY TERMINAL |
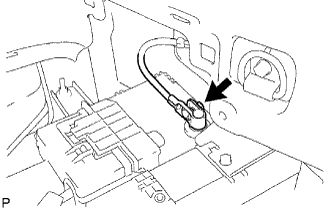 |
Connect the battery negative cable, and then tighten the nut.
| 19. INSTALL REAR NO. 3 FLOOR BOARD |
 |
Install the floor board, and then attach the 4 claws.
| 20. INSTALL REAR DECK FLOOR BOX |
 |
Install the rear deck floor box to the vehicle.
| 21. INSTALL REAR NO. 2 FLOOR BOARD |
 |
Install the floor board, and then lock the 2 cover knobs.
| 22. PERFORM INITIALIZATION |
Perform initialization (Click here).